Pictures of TLAH Build - Making some progress...

Post your reviews and pictures here.
Message
Author
Pixelmaster
Posts: 117
Joined: Fri Mar 21, 2008 11:09 pm
Location: Atlanta
Contact:

Pictures of TLAH Build - Making some progress...

#1 Post by Pixelmaster »

I thought I would post a few images of my progress so far.

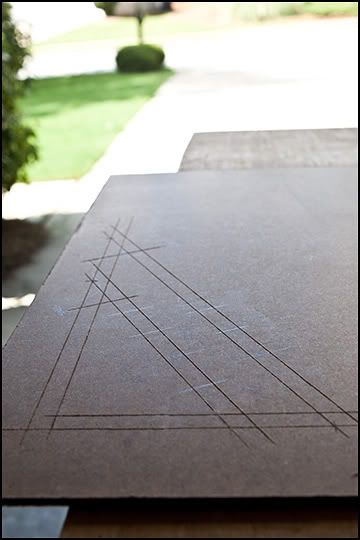
I've modified Bill's plans slightly in that I'm using 1/2 inch Baltic Birch for the baffle rather than 3/4 inch plywood. Because I modified things slightly I decided to create a layout board on a scrap piece of masonite so that I could check driver clearances inside the cabinet (as the drivers sit further back into the cabinet since I'm using 1/2 inch rather than 3/4 inch for the baffle and the mid-basses mount to the front surface of the baffle).

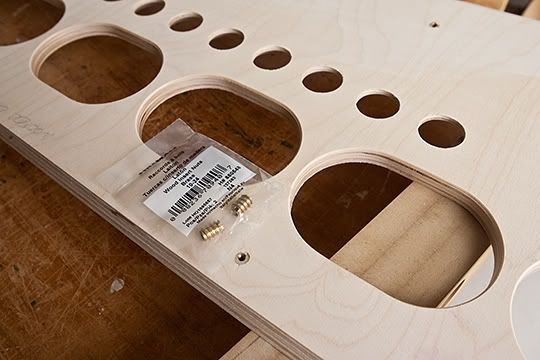
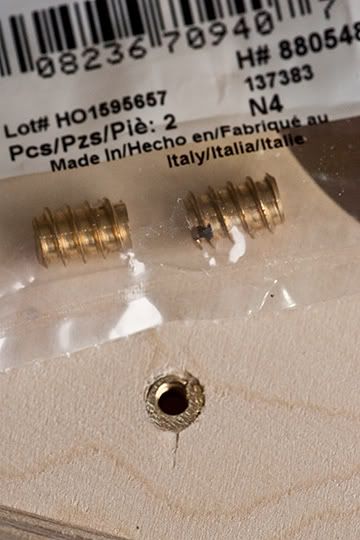
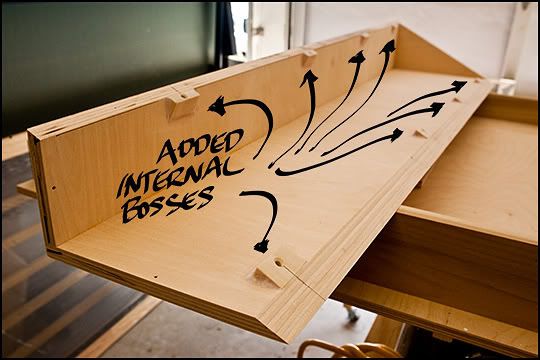
I've also added some small bosses to the interior of the cabinet and drilled and countersunk eight mounting holes for the front baffle. These are countersunk from the back on a drillpress and oriented 90 degrees to the front surface of the baffle. I'm using 10-24 flat head machine screws and I picked up some brass threaded inserts that screw into the mounting holes in the front baffle that take the 10-24 machine screws. This way the machine screws can draw the baffle down tightly and it can be removed if necessary.

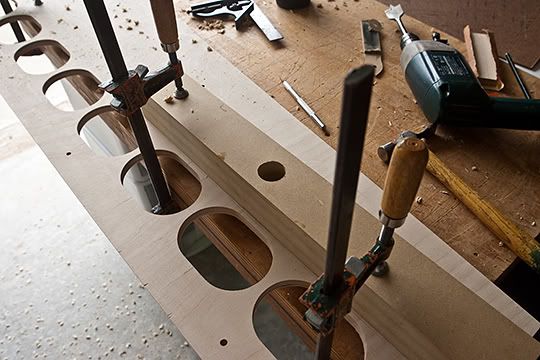
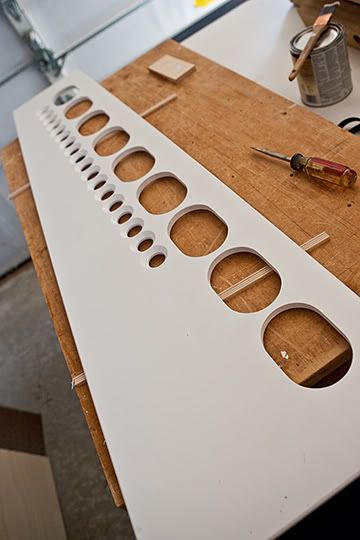
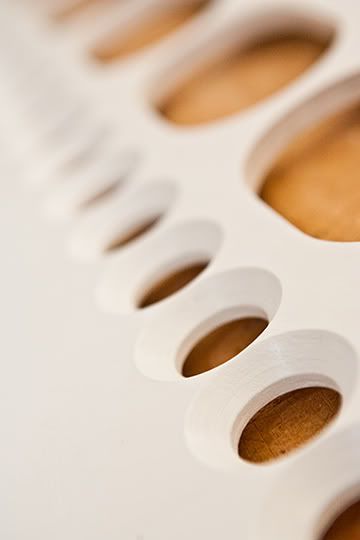
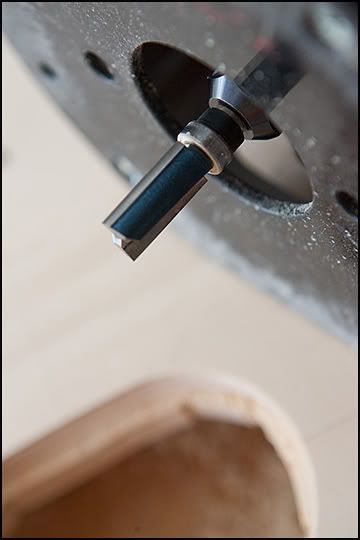
I created a jig with the exact size of the cutout necessary for the 3X5 mid-basses and then used it with a 1/2 inch carbide router bit with a ball bearing pilot. This approach worked great to create the exact sized openings in very short order.

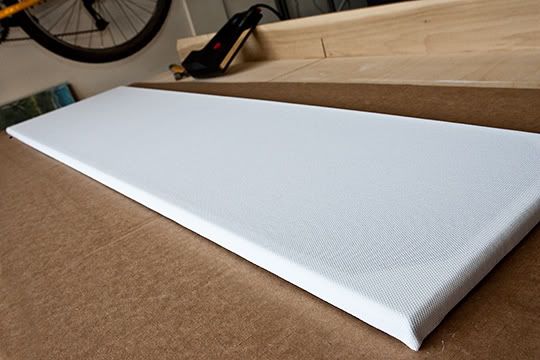
You may also notice that the grain of the wood does not run the length of the cabinet as it normally should if it were to be given a clear finish. I'm using some left over baltic birch and had to run the grain the short way versus the long way but this doesn't matter as the cabinet will be painted black and I will probably float a white grille over the front when it is all said and done.
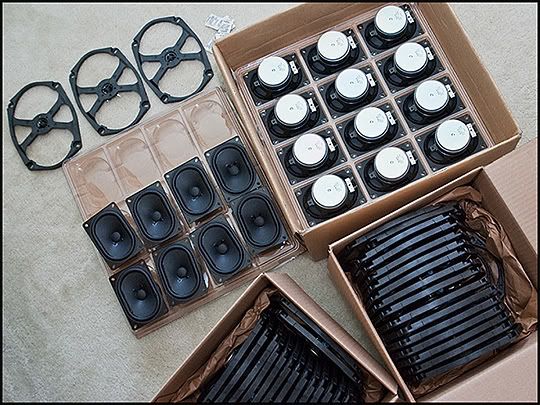
Inventory arrives!
Image


I like to work with a layout board to check clearances, etc.
Image


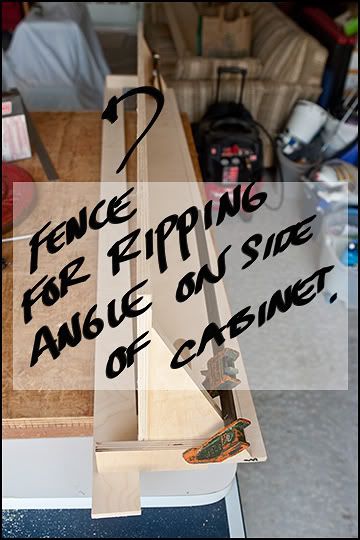
I attached a fence for ripping the angle on the side of the cabinet temporarily using clamps. Worked well!
Image


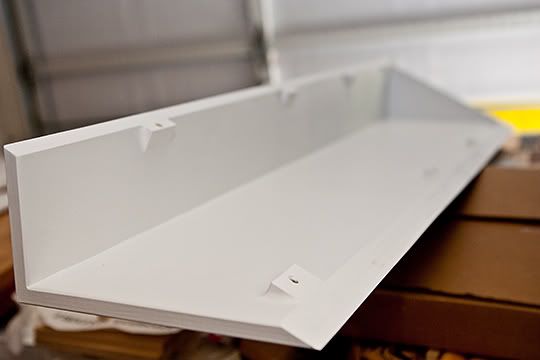
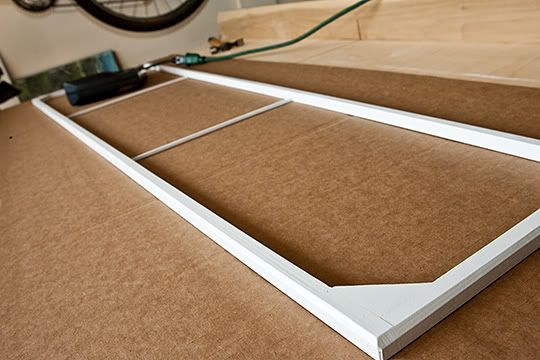
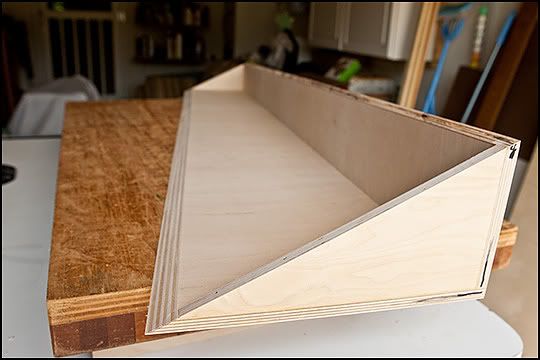
Cabinet back and sides completed...
Image


Here are the extra bosses I added so that my machine screws had a little more meat behind them....
Image


Another shot for reference...
Image


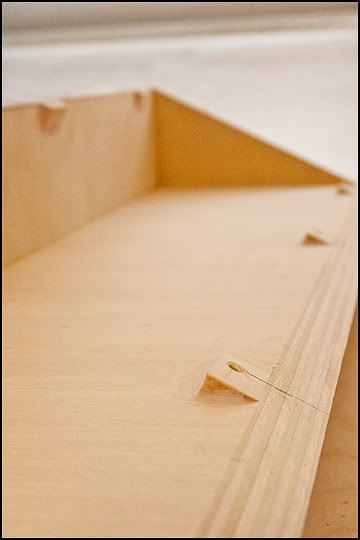
Screws countersunk from the back/side of the cabinet...
Image


1/2 inch carbide router bit with pilot for use with jig for cutting mid-bass openings.
Image


Template in place for routing next opening. You can see the opening in the foreground is complete. The finishing nails are pre-drilled once I have the template in place (I align center lines on the baffle face with centerlines on the template) then I tap the finishing nails into place and the jig is held securely as I route the opening. Once complete I simply pull the template, reposition, redrill for the finishing nails and away I go. Using the finishing nails allowed me to position and secure the template without the need for clamping it in place (clamps would have interfered with the base of the router unless I went to a much larger template).
Image
Last edited by Pixelmaster on Sun Aug 16, 2009 7:57 pm, edited 1 time in total.

User avatar
Scott Brochu
Posts: 2473
Joined: Sat Mar 10, 2007 11:53 pm
Location: Maine
Contact:

Re: Pictures of TLAH Build - Making some progress...

#2 Post by Scott Brochu »

No images
Drumming is a way of life.
ME LIKE TO HIT THINGS!
http://billfitzmaurice.info/forum/viewt ... 26&t=11232

dbaldock
Posts: 261
Joined: Sat Jun 17, 2006 2:21 am
Location: Houston, TX

Re: Pictures of TLAH Build - Making some progress...

#3 Post by dbaldock »

If you copy-&-paste the URL's of the images in his post, the pictures are there on the server in the link.

So, maybe he didn't use the correct syntax with the [ img ] tag.


Take Care,
David Baldock

User avatar
djohnson573
Posts: 324
Joined: Tue Oct 28, 2008 7:41 am
Location: Florida

Re: Pictures of TLAH Build - Making some progress...

#4 Post by djohnson573 »

Scott Brochu wrote:No images
Ditto. Really want to see this.
Dennis

Built/Own:
- 4 x Titan 39 (14"W) BP102 loaded
- 2 x TLAH
- 4 x OT12 Deltalite 2512 loaded
On Deck:
- 3 Auto Tubas

Pixelmaster
Posts: 117
Joined: Fri Mar 21, 2008 11:09 pm
Location: Atlanta
Contact:

Re: Pictures of TLAH Build - Making some progress...

#5 Post by Pixelmaster »

Sorry guys...the images all displayed when I previewed my post.

I used the Img HTML tags. I think using my SmugMug account is not working well with the forum. I will repost the images in PhotoBucket and then relink. Hope that will help!

Lee

Pixelmaster
Posts: 117
Joined: Fri Mar 21, 2008 11:09 pm
Location: Atlanta
Contact:

Re: Pictures of TLAH Build - Making some progress...

#6 Post by Pixelmaster »

Rehosted images with PhotoBucket.

I believe they should display at this point in the original post above....

Lee

User avatar
Scott Brochu
Posts: 2473
Joined: Sat Mar 10, 2007 11:53 pm
Location: Maine
Contact:

Re: Pictures of TLAH Build - Making some progress...

#7 Post by Scott Brochu »

Thank you.


Nice build. :clap: Nice pictures :clap: Clean cuts :clap:
Drumming is a way of life.
ME LIKE TO HIT THINGS!
http://billfitzmaurice.info/forum/viewt ... 26&t=11232

User avatar
Gauss
Posts: 633
Joined: Wed Jul 09, 2008 8:35 pm
Location: Michigan

Re: Pictures of TLAH Build - Making some progress...

#8 Post by Gauss »

Beautiful. You must have a tablet PC to make those diagrams. I love the shape of the drivers - very star wars futuristic. That's 1978's star wars, not the new ones.
AudioFlyer DJ: DR200 & Titan39/Titan48
BASS: Combo Amp & Titan39

User avatar
djohnson573
Posts: 324
Joined: Tue Oct 28, 2008 7:41 am
Location: Florida

Re: Pictures of TLAH Build - Making some progress...

#9 Post by djohnson573 »

Very nice! :clap: Great attention to detail. Please keep those pictures coming. :D
Dennis

Built/Own:
- 4 x Titan 39 (14"W) BP102 loaded
- 2 x TLAH
- 4 x OT12 Deltalite 2512 loaded
On Deck:
- 3 Auto Tubas

Pixelmaster
Posts: 117
Joined: Fri Mar 21, 2008 11:09 pm
Location: Atlanta
Contact:

Re: Pictures of TLAH Build - Making some progress...

#10 Post by Pixelmaster »

I will post more images as I make progress.

I really appreciate seeing the images that others post and all of the ideas everyone has! This is a great forum for sharing ideas and knowledge!

Lee

pwfirst
Posts: 147
Joined: Tue Jan 27, 2009 8:11 pm

Re: Pictures of TLAH Build - Making some progress...

#11 Post by pwfirst »

Thanks for the pictures. I am starting the exact same build shortly for my church, your design is excellent. Keep the updates coming, wonderfull job. Phil
DR 250's #2
T39's 14 in with 102 #2

bgavin
Posts: 5738
Joined: Thu May 04, 2006 10:58 am
Location: Sacramento, Moderator/Licensed BF Builder
Contact:

Re: Pictures of TLAH Build - Making some progress...

#12 Post by bgavin »

I sure admire those router templates...
I have to learn how to do that so my standard-sized hand holes look better.
Doing these with a jig saw and guide just isn't as nice.
Bravo, well done!
My biggest worry is that when I'm dead and gone, my wife will sell my toys for what I said I paid for them.

Pixelmaster
Posts: 117
Joined: Fri Mar 21, 2008 11:09 pm
Location: Atlanta
Contact:

Re: Pictures of TLAH Build - Making some progress...more pics

#13 Post by Pixelmaster »

More pictures...

I don't have a drill press with more than a 5 inch reach from the supporting post to the center of the chuck so I created this simple guide to use with a spade bit in a hand held drill.

Image


Here are several shots of the threaded brass inserts I placed in the front baffle. I will cut my machine screws so that they thread halfway into the baffle itself (the front surface of the baffle is filled with bondo so the holes don't show).

Image


Image


I decided to go all white with the finish inside and out.

Image

Image


Chamfered the tweeter cutouts (I've decided to retain the tweeter frames - they are cut way down - and will use small screws to mount them to the inside surface of the baffle). The chamfer opens up the hole and creates a nice little horn.

Image


Built a speaker grille frame and purchased white speaker grille fabric from Parts Express. I am going to hold the grille in place using small magnets from PE as well. This way the speakers look good and blend in with the family room and the grilles are easily removed for anyone that wants to take a peek behind to see what's up with the great sound.

Image

I'm going to "float" the grille about 1 inch in front of the baffle on stand-offs that contain my magnets. Floating the grille will create a natural "drop shadow" all the way around it once they are up in the corners of the room.

Image

That's all for now. More later as I get the drivers installed and wired up.

User avatar
Scott Brochu
Posts: 2473
Joined: Sat Mar 10, 2007 11:53 pm
Location: Maine
Contact:

Re: Pictures of TLAH Build - Making some progress...

#14 Post by Scott Brochu »

You do some really nice clean work. :clap:
Following this to the end. :)
Drumming is a way of life.
ME LIKE TO HIT THINGS!
http://billfitzmaurice.info/forum/viewt ... 26&t=11232

User avatar
djohnson573
Posts: 324
Joined: Tue Oct 28, 2008 7:41 am
Location: Florida

Re: Pictures of TLAH Build - Making some progress...

#15 Post by djohnson573 »

Lee, these are looking VERY nice. Please keep those pictures coming!
Dennis

Built/Own:
- 4 x Titan 39 (14"W) BP102 loaded
- 2 x TLAH
- 4 x OT12 Deltalite 2512 loaded
On Deck:
- 3 Auto Tubas

Post Reply