Second BFM Build: 2 x J12 Lites

Post your build odyssey here.
Message
Author
Jools4001
Posts: 154
Joined: Fri Apr 12, 2013 7:33 am
Location: London
Contact:

Re: Second BFM Build: 2 x J12 Lites

#16 Post by Jools4001 »

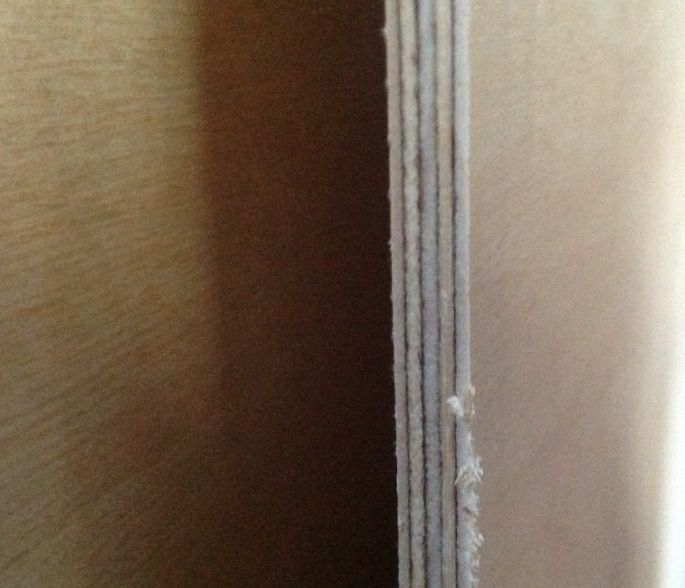
Chris_Allen wrote:That ply doesn't look like birch and it only appears to have 3 plys.
Image

This stuff is expensive BB from a reputable supplier and appears to have 5 plys to me :D (although you're right - the 3mm sheet is only 3 ply, as should be expected)

I may ask a lot of newbie questions in BFM land but I am a very experienced DIY'er and have tackled enough woodworking projects to know my Ash from my elbow. Don't be fooled by poor 'phone based' photography and colour contrast caused by shadows. In real life this is all the palest blonde and is patch and void free. It is from the same order as the 12mm sheet that I built my W8's from and that ply was such good quality it was a real pleasure to work with.

The fuzzy edge on the 6mm sheet is from my jigsaw, since after working out the cutlists for the J12, I stole enough from the 6mm sheet to make my crossovers.

Anyway, the smallest things thwart the build...I could've sworn I had 1000 12mm staples but I was wrong, they're only 8mm, which should be fine for putting the sheaths on but not for tacking through a 6mm sheet with only 2mm at best driving into the part to be tacked. I have some more 10 and 12mm staples on order but they won't be with me until Wednesday; so the build start is delayed.

On the plus side I have 50 1016 piezos and all the crossover components on order with Leland, so hopefully they'll turn up by the time I need them.
2 x 3012 HO Jack 12 Lites
2 x Delta Pro 8b Wedgehorn 8 Monitors
Subs? Big question mark!

sine143
Posts: 3066
Joined: Sat Feb 06, 2010 3:27 pm
Location: Raleigh NC

Re: Second BFM Build: 2 x J12 Lites

#17 Post by sine143 »

1/2" BB is 9 ply and comes in 5x5. here in the US, 4x8 domestic birch (commonly used by cabinet builders) is available as 5ply, but has a VERY this face veneer, which is detrimental is speaker building applications that utilize butt joints (dadoes are fine). scour the surface with a knife, and see if there is a thin veneer on the outside
Built:
2x Tuba 30s delta12lf loaded (gone)
4x Otop12 d2512 loaded
8x t48s (18, 18, 24, 24, 30, 30) 3015lf loaded
2x AT (1 mcm, 1 gto 804)
2x SLA Pro (dayton pa6, 6 goldwood piezo loaded)
1x bastard XF208

2x OT212 (delta pro 450a loaded, eminence psd)

User avatar
DJPhatman
Posts: 5411
Joined: Mon Aug 14, 2006 5:08 am
Location: Warren, MI
Contact:

Re: Second BFM Build: 2 x J12 Lites

#18 Post by DJPhatman »

sine143 wrote:1/2" BB is 9 ply and comes in 5x5. here in the US, 4x8 domestic birch (commonly used by cabinet builders) is available as 5ply, but has a VERY this face veneer, which is detrimental is speaker building applications that utilize butt joints (dadoes are fine). scour the surface with a knife, and see if there is a thin veneer on the outside
Jools4001 is building Jack lites, which uses 6mm(1/4") plywood, not 12mm(1/2") plywood. He has the right stuff.

Subscribed, Jools4001. Please remember to take lots of pictures, and post them here, during the build process.
I know money often seals the deal, but seriously, quality is an investment, not an expense... Grant Bunter
Accept the fact that airtight and well-braced are more important than pretty on the inside. Bill Fitzmaurice

sine143
Posts: 3066
Joined: Sat Feb 06, 2010 3:27 pm
Location: Raleigh NC

Re: Second BFM Build: 2 x J12 Lites

#19 Post by sine143 »

Bahaha im a dummynsorry jools!
Built:
2x Tuba 30s delta12lf loaded (gone)
4x Otop12 d2512 loaded
8x t48s (18, 18, 24, 24, 30, 30) 3015lf loaded
2x AT (1 mcm, 1 gto 804)
2x SLA Pro (dayton pa6, 6 goldwood piezo loaded)
1x bastard XF208

2x OT212 (delta pro 450a loaded, eminence psd)

User avatar
DJPhatman
Posts: 5411
Joined: Mon Aug 14, 2006 5:08 am
Location: Warren, MI
Contact:

Re: Second BFM Build: 2 x J12 Lites

#20 Post by DJPhatman »

sine143 wrote:Bahaha im a dummynsorry jools!
Nah, you just skip through the tulips, missing the roses! :hyper: :loler:
I know money often seals the deal, but seriously, quality is an investment, not an expense... Grant Bunter
Accept the fact that airtight and well-braced are more important than pretty on the inside. Bill Fitzmaurice

Jools4001
Posts: 154
Joined: Fri Apr 12, 2013 7:33 am
Location: London
Contact:

Re: Second BFM Build: 2 x J12 Lites

#21 Post by Jools4001 »

DJPhatman wrote: Subscribed, Jools4001. Please remember to take lots of pictures, and post them here, during the build process.
Will do. And thanks everyone for all the advice; it's nice to know that everyone is concerned that no mistakes are made.


Sine, no problem, but just for the record, here is one of the only shots I've got of the W8 under construction where the 9 plies of the 12mm stuff are in evidence. Again, the perspective of the shot looks as if the outer plies are thinner and I suppose they are very slightly thinner, but to my eyes it only looks like the outer plies have been slightly compressed (or maybe they've been through a thickness sander) during the manufacturing process. Whatever, they are MUCH thicker than veneer.

Image
2 x 3012 HO Jack 12 Lites
2 x Delta Pro 8b Wedgehorn 8 Monitors
Subs? Big question mark!

sine143
Posts: 3066
Joined: Sat Feb 06, 2010 3:27 pm
Location: Raleigh NC

Re: Second BFM Build: 2 x J12 Lites

#22 Post by sine143 »

yeah thats the right stufff. the veneered bs crap is like, PAPER thin. you almost cant tell its been veneered cause its so thin.
Built:
2x Tuba 30s delta12lf loaded (gone)
4x Otop12 d2512 loaded
8x t48s (18, 18, 24, 24, 30, 30) 3015lf loaded
2x AT (1 mcm, 1 gto 804)
2x SLA Pro (dayton pa6, 6 goldwood piezo loaded)
1x bastard XF208

2x OT212 (delta pro 450a loaded, eminence psd)

Jools4001
Posts: 154
Joined: Fri Apr 12, 2013 7:33 am
Location: London
Contact:

Re: Second BFM Build: 2 x J12 Lites

#23 Post by Jools4001 »

OK, so I've fallen off the Planet BFM for a few months. Long story, but my wife has Multiple Sclerosis so I'm in the planning stages of a house extension and remodelling exercise to enable our house to cope with degenerative mobility problems and try to 'future proof' it for those needs. So what with talking to architects, and local authority planning officers and local authority conservation officers it's been taking a LOT of time...then my wife had a short MS relapse for a couple of weeks...and...and...and.

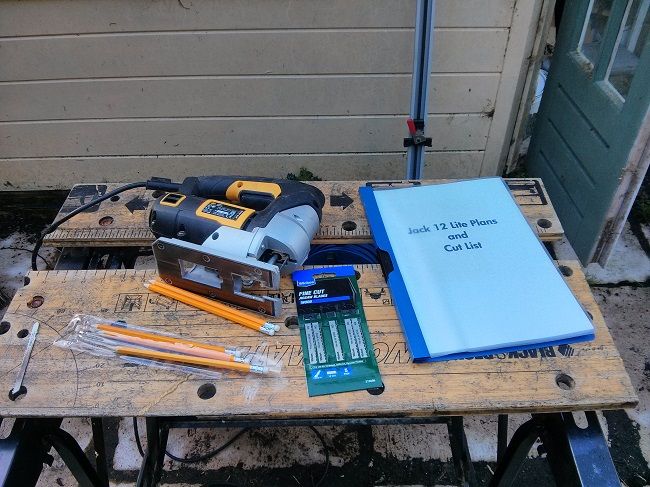
I don't have a workshop, or a garage, so I have to work outside. A month or so ago there was enough of a break in the English autumn weather to get some tools out on the patio next to my summerhouse and start making some sawdust...and yes, I do know that I need to wash the patio and summerhouse down, but my wife reminds me of that so you won't have to OK?

Image

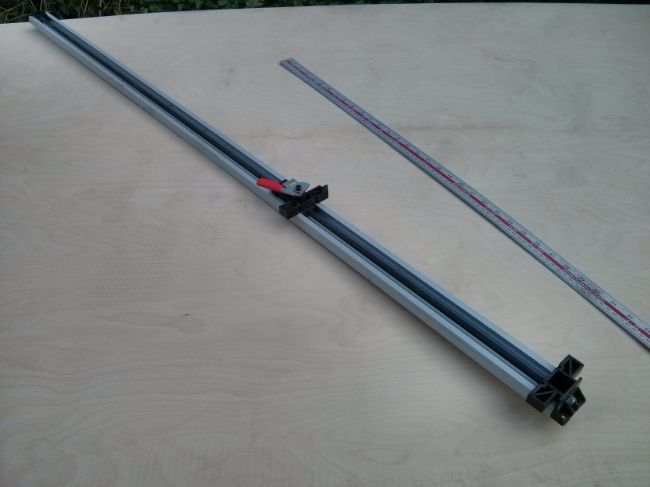
I decided to use a jigsaw to rough cut all my BB because the 1/4" stuff gets a bit bendy under the weight of my circular saw (I don't have a table saw but Santa might bring one), but this is a tool that I find indispensable for making accurate cuts in sheet materials

Image

It's a guide clamp that you simply clamp across your work piece and then use as a cutting jig for your jigsaw, circular saw or router. Works really well one you've worked out the offset needed for each tool and also seems to keep cuts nice and square if you take care over the clamping bit.

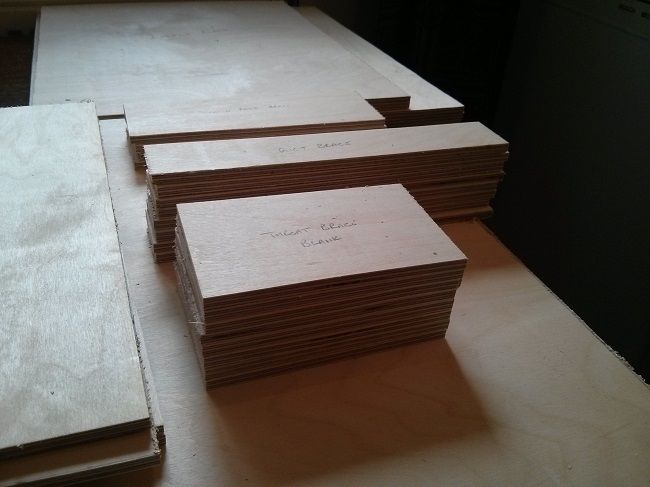
So after around 8 hours of sawing I had a pile of rough sawn blanks, each cut slightly oversize (about 1/8") for the component they are intended for.

Image

...and managed to transfer them back into the kitchen before the rain came down.

A couple of weeks of MS'y type crap to take care of and my wife went into a nursing home for a week's respite care, to give me a break...or rather, the chance to cover the kitchen in a fine layer of BB sawdust.

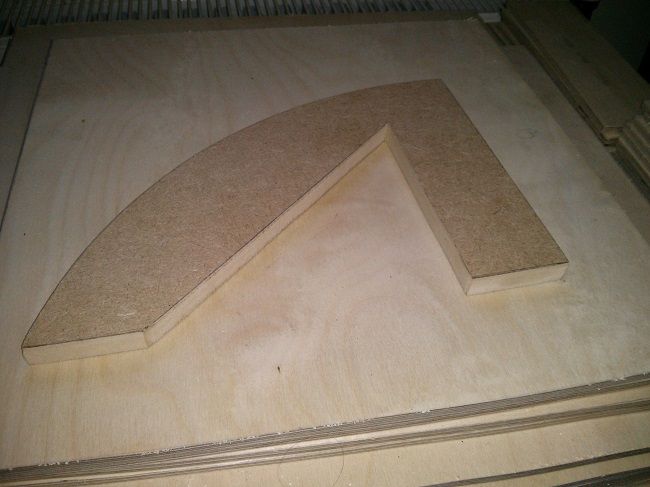
I decided to deviate from the plans!!! Yes, I know...but I couldn't trust myself to shoot staples through the horn sheaths into the edge of a piece of 1/4" ply...so I thought I would give myself something beefier to aim at and make the horn braces out of 1/2" MDF...

Image

Ha.....Only kidding! But I am still deviating from the plans

There are 20 of these horn braces to be cut in a pair of J12 Lites, and that is a lot of work to measure and cut out individually...even if you make one first and draw around it for a cutting guide, you've still got to cut them all out accurately and with minimum variation....but I have a router, and I'm determined to use it, so I made a template out of the MDF.

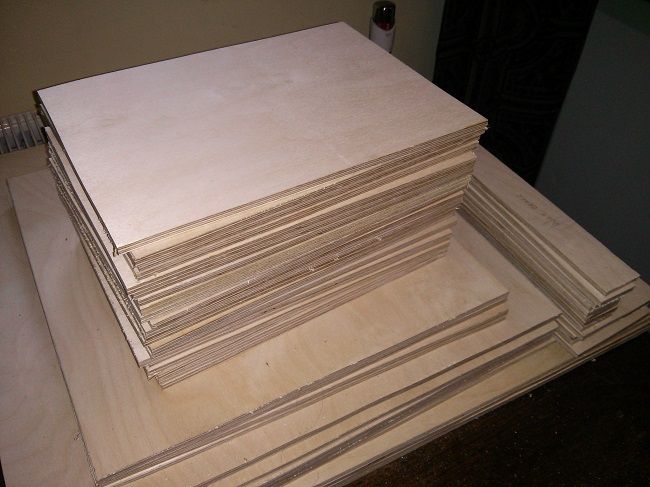
Then I turned a pile of 10" x 7" horn brace blank rectangles....

Image

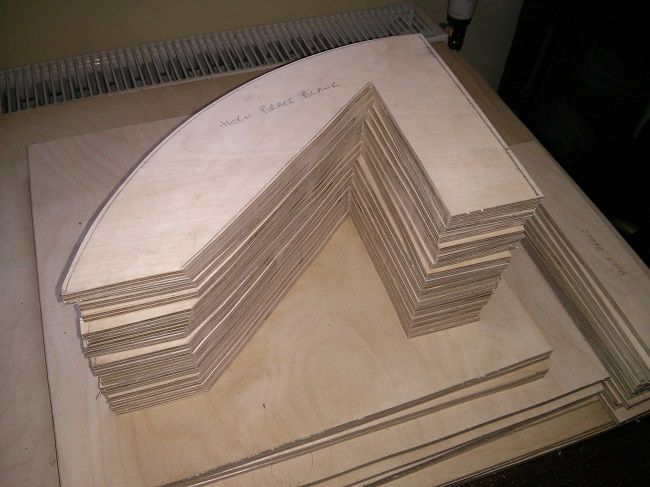
Into something more closely resembling horn braces

Image

And that's it for the moment, my wife is home again now and doesn't want BB sawdust in her food for some reason.

Next on the agenda is to trim the top, bottom and side panels exactly to size. I will do this with a guide jig and a pattern following bit so that each panel has perfectly straight, perfectly square edges and corners and is perfectly sized before drawing out the layout marks.

In the first ooops of this build, having cut the 1/8" panel of BB I find that it is 4mm and not the 3mm that I ordered. I've worked out that 4mm is 5/32" instead of 1/8". It still bends OK in a test around my MDF template, but I will have to adjust the layout to account for that fraction oversize.

Once the layout is done I will sand the MDF template to a finely honed degree of accuracy against the layout marks, then I will drill some countersunk holes in it that will allow me to screw through the rough cut horn braces and sandwich them between the template and a 1/2" MDF sacrificial baseboard. I'll then be able to gang cut them 5 at a time, with a profiling bit in the router, into what I hope will become 20 clones of the template...all with perfectly square edges to make glue up easier.

That's the theory anyhow...but it will have to wait for another break in the weather...Or maybe my wife would like to visit her mother for a couple of weeks... :lol:
2 x 3012 HO Jack 12 Lites
2 x Delta Pro 8b Wedgehorn 8 Monitors
Subs? Big question mark!

User avatar
DJPhatman
Posts: 5411
Joined: Mon Aug 14, 2006 5:08 am
Location: Warren, MI
Contact:

Re: Second BFM Build: 2 x J12 Lites

#24 Post by DJPhatman »

Jools4001, my heart-felt best wishes go out to you and your missus with the MS. I know what a burden it can/will be, so good on you for supporting her through this difficult journey. Do not feel guilt when you need to take a break from the daily grinds, or if she changes attitude toward you. Seek out a support group, and get together with them. You don't have to do this alone.
I know money often seals the deal, but seriously, quality is an investment, not an expense... Grant Bunter
Accept the fact that airtight and well-braced are more important than pretty on the inside. Bill Fitzmaurice

User avatar
Charles Jenkinson
Posts: 1127
Joined: Sat Aug 06, 2011 3:25 pm
Location: Manchester, UK

Re: Second BFM Build: 2 x J12 Lites

#25 Post by Charles Jenkinson »

Sheesh!, more POWER to you and your wife, Jools. :-)

Charles
2xJ12L (3012HO) switchable/melded
2xT30

Words&graphics - Audio&Acoustics - Hardware&DSP; 3 different paradigms.

Jools4001
Posts: 154
Joined: Fri Apr 12, 2013 7:33 am
Location: London
Contact:

Re: Second BFM Build: 2 x J12 Lites

#26 Post by Jools4001 »

Thanks guys. Yeah, MS is a bitch but we've lived with it for 8 years now and we're learning how to cope with it, but enough of that....

Playing music is a huge release and has never been more important than it is now. I'm looking forward to getting the J12 Lites done as part of a PA project that will hopefully give me and the band the chance to play through the best stuff possible for a band at our level and remove all PA based excuses. :lol:
2 x 3012 HO Jack 12 Lites
2 x Delta Pro 8b Wedgehorn 8 Monitors
Subs? Big question mark!

User avatar
LelandCrooks
Posts: 7242
Joined: Thu May 04, 2006 9:36 am
Location: Midwest/Kansas/Speaker Nirvana
Contact:

Re: Second BFM Build: 2 x J12 Lites

#27 Post by LelandCrooks »

My wife went through a bout of transverse mylitis in the late nineties. A really rare form similar to MS. Not fun. We found 1 Dr who knew anything about it in Dallas. He wanted to put her in a study group because hers was odd. No insurance, we couldn't do it. I paid those medical bills for 5 years.
Hang in there, build speakers.
If it's too loud, you're even older than me! Like me.
http://www.speakerhardware.com

Jools4001
Posts: 154
Joined: Fri Apr 12, 2013 7:33 am
Location: London
Contact:

Re: Second BFM Build: 2 x J12 Lites

#28 Post by Jools4001 »

Well...In the first sentence of the J12 Lite Plans it says "The Jack 12 Lite is recommended for experienced woodworkers. There are quite a few construction steps, so take your time, undertaking only a few steps a day." I can certainly say that I've taken the plans to heart in this respect because I'm only averaging a few steps per week :lol:

Anyway, I've made some progress of the last couple of days.

My idea to make a template for the horn braces and gang cut them with a pattern following bit on the router worked well, up to a point...because I was half way through them when my finger nudged the routers locking lever and the router sprang upwards, taking a nice bite out of the template and the braces being processed. As with so many things, the theory may be good but it has to be backed up with decent execution...anyway I had to revert to cutting out the last 8 of the 20 horn braces required individually with the jigsaw. Oh well, they would've had to have been done like that anyway, so nothing ventured nothing gained.

Anyway, after a lot of cutting and shaping I was ready to make with the PL. Here is one of the horn braces glued up and waiting to be applied to one of the top/bottom panels. This is actually the last of the braces that I fixed to the top and bottom panels, I had just opened a new tube of PL and, as everyone who has worked with this will know, with every tube you open there is a slightly different flow rate that you have to get used to...so this brace has about twice as much PL on it as the others.
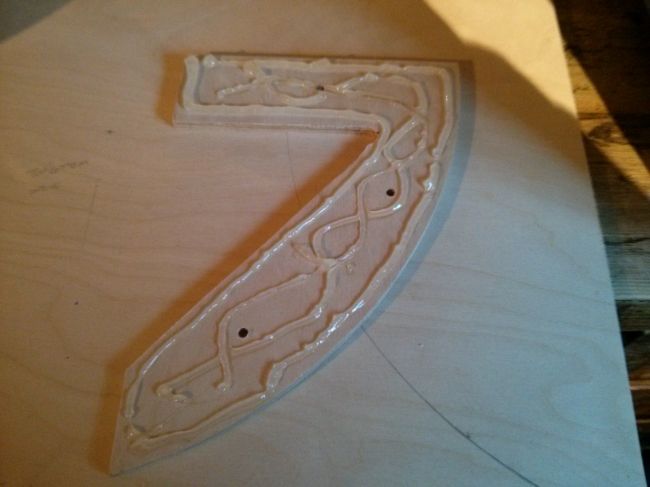
Image

All the other braces had a nice small bead of PL squeeze out at the glue line, this was the only one that had too much.
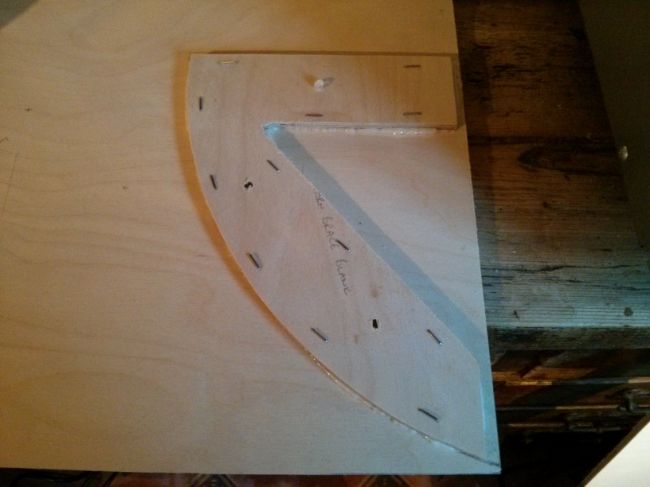
Image

So, after an hour or so working at gluing and stapling I had my two tops and bottoms with the horn braces installed all lined up in my worksho...errrr...kitchen!
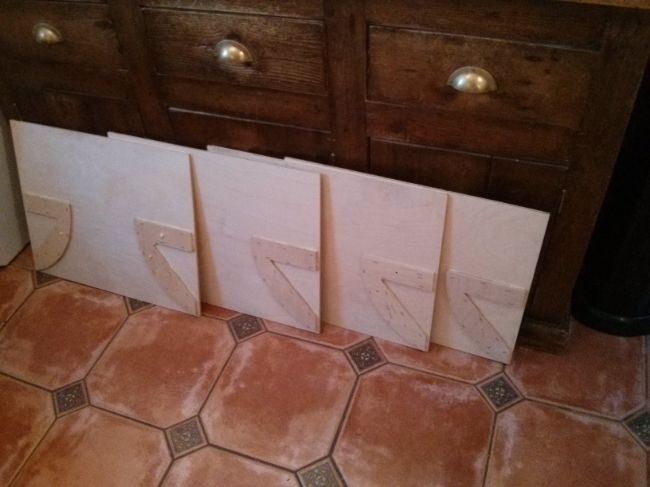
Image

So then, time to turn my attention to more cutting and shaping. One of the lessons learned on this build is that, since I don't have a table saw, I am having to finesse each rough cut blank and do a double operation on each piece cutting it to exact size...very time consuming...and I'm pining for a well set up table saw so that I can cut straight to finished size (and angles) I'm also thinking ahead about how I'm going to manage a melded array using just a jigsaw, but I'll cross that bridge when I come to it. And...onto the baffle...

Don't underestimate the amount of time these take. On the plans it looks quite straightforward, and it isn't rocket science... but again, the execution takes some careful marking out and nibbling away with the jigsaw so as not to overcut any of the lines.

Here, I've started by drilling the 1/2" ports and, while I've got the drill out, putting in some starter holes for the baffle cutouts.
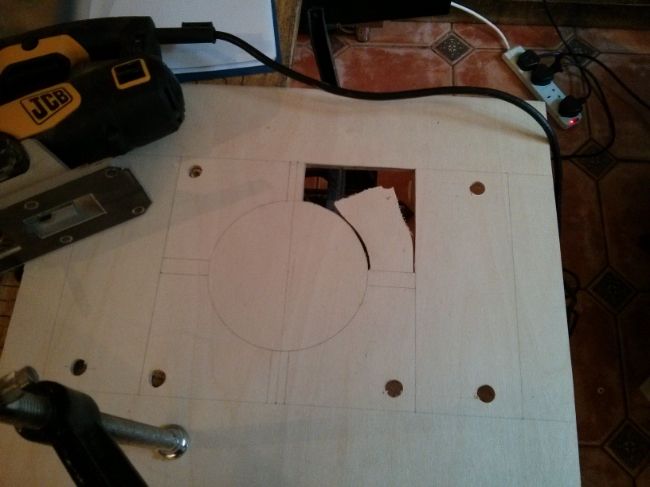
Image

And, after an hour or so of patient and careful work, I'm rewarded with a reasonable looking baffle.
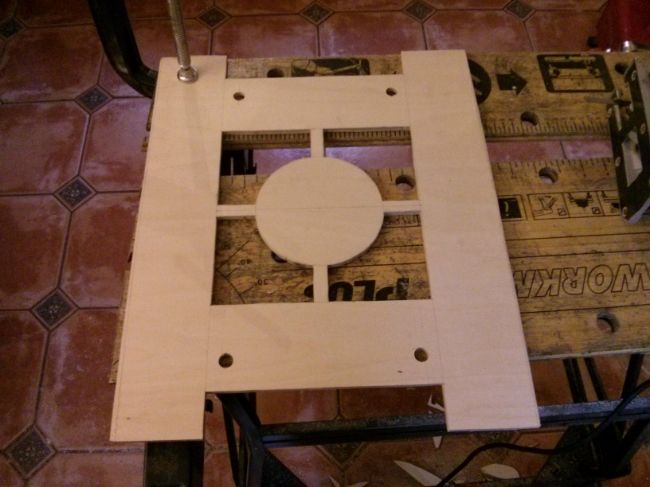
Image

At last...I've now cut all the major components and can get on with the exciting construction stuff and gluing the baffle to the base...but after spending a hour or more on the baffle, just 10 minutes later the first f...err...mess up...

I found that my Stanley electric stable/brad gun is challenged getting into the tight 6mm corner required to fix the baffle to the bottom horn brace...it seemed fine at first, but as the PL expanded the staples just pulled through the first layer of ply, since they were only like splinters under your skin to start with...The gobs of PL are due to a rush of blood to the head and simply reapplying more PL and having a second go before the first lot had dried...still no joy...
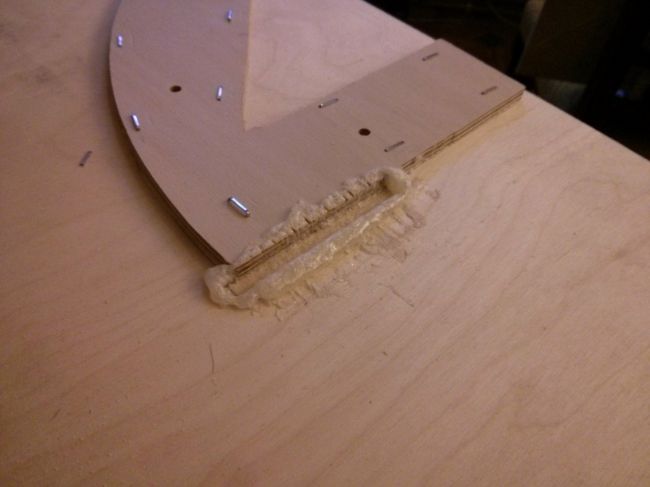
Image

No option but to let the PL dry, chisel it off and have a rethink...

Cleats are the answer...getting the first joint on the baffle is the key, thereafter, everything can anchor around it. So I cut a small piece of 6mm ply to double up on the thickness of the bearing surface...Here it is being glued up.
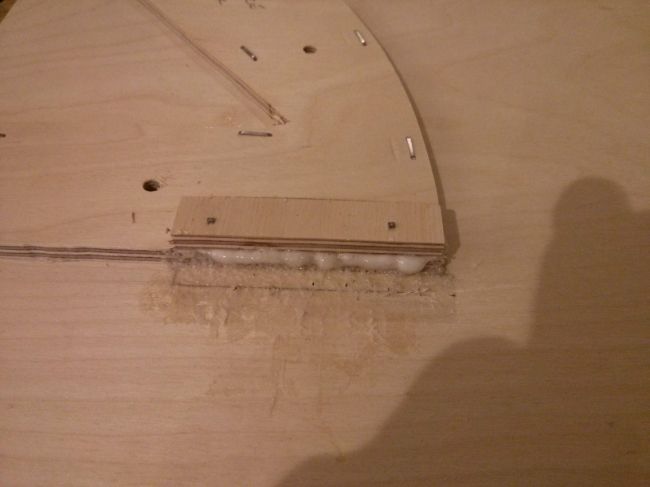
Image

The eagle eyed amongst you will have noticed that I've also swapped from stapes to brads. I was using 12mm staples, following the mantra I learned in woodwork classes 40 years ago, that the fasteners should be double the length of the thickness you're joining, but...if you misfire with a staple and get it in the wrong place you've now made two holes in the wrong place instead of one...and the gluing surface of your carefully prepared piece can start to look like a pepperpot very quickly.

Anyway...cleats are the answer. Once the cleats had been fixed, dried and excess PL cleaned up, 30 seconds later the baffle was mounted and trued to the bottom panel.
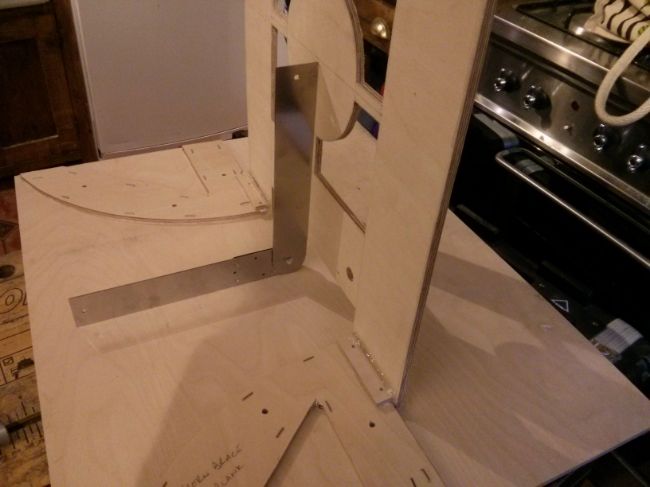
Image

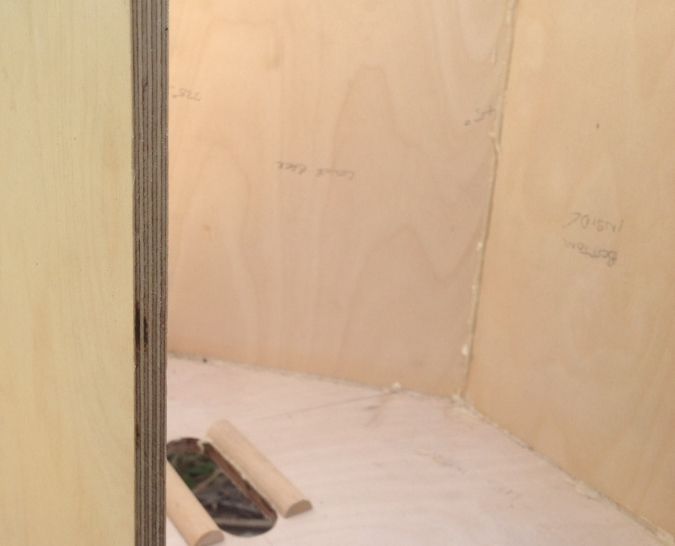
And not long afterwards, the sides and top panel joined in the fun...so we now have something that is starting to take shape as a speaker cab. You can see I've also put a backing piece on the inside of each side panel so that I will be able to route for sprung handles later on...I was unsure of whether to meddle with the plans, but I saw a post where Harley had done this soooo...it's all good.
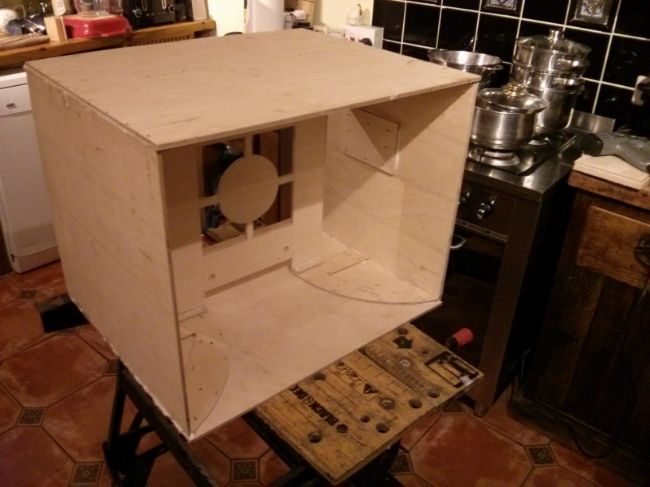
Image

That's it for now...next step is to get cab 2 to the same stage. When I put my W8's together I was driven by gig schedules to get 1 done then the other...so the second one still isn't finished. It's functional, but still needs cosmetics finishing. I want to get both of these finished and completed at the same time...
2 x 3012 HO Jack 12 Lites
2 x Delta Pro 8b Wedgehorn 8 Monitors
Subs? Big question mark!

Grant Bunter
Posts: 6912
Joined: Mon Nov 28, 2011 11:12 am
Location: Ilfracombe Queensland Australia
Contact:

Re: Second BFM Build: 2 x J12 Lites

#29 Post by Grant Bunter »

Looking good so far Jools!
Keep up the good work mate...
Built:
DR 250: x 2 melded array, 2x CD horn, March 2012 plans.
T39's: 4 x 20" KL3010LF , 2 x 28" 3012LF.
WH8: x 6 with melded array wired series/parallel.
Bunter's Audio and Lighting "like"s would be most appreciated...

ncgrove
Posts: 457
Joined: Wed Jul 06, 2011 7:38 pm
Location: Colorado Springs, CO

Re: Second BFM Build: 2 x J12 Lites

#30 Post by ncgrove »

Jools4001 wrote: I'm also thinking ahead about how I'm going to manage a melded array using just a jigsaw
Just go to Lowes or Home Depot and get a cheap plastic miter box/back saw combo. It has 90 degree and 45 degree guides, so you can cut the pizeo horns with no table saw.

It's a bit of an arm workout, but you get to keep all of your fingers attached to your hands. I used a dremmel tool with a sanding drum bit to trim down the screws on the horn. If you alternate horn orientations, you might be able to skip that step.

Bottom line, don't sacrifice any fingers.

Post Reply