Router templates and logo's

Helpful hints on how to build 'em, and where to get the stuff you need.
Message
Author
User avatar
AntonZ
Posts: 2687
Joined: Sun May 14, 2006 6:00 am
Location: NL

Router templates and logo's

#1 Post by AntonZ »

I'm currently building a WH8. I already have one WH8 that performs fine for me, it was built from the older version plans (pre summer 2011 update). Since the newer plans are a considerable update, response may differ more than marginally. I prefer my monitors to EQ equally, don't have time to build two cabs and feel bad about dumping a cab that is working fine for me. So I'm building a new cab from the old version plans. Hence no full build thread. There is one thing I'd like to share though.

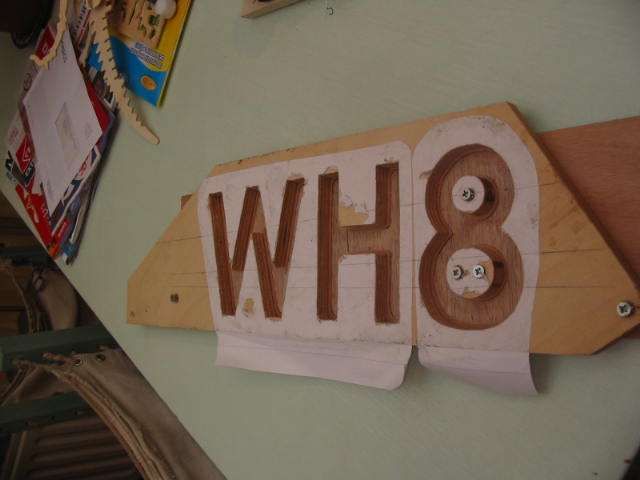
I have always been impressed by the routered logo's/names on the sides of cabs. Makes them look less DIY, more professional. So I took some scrap ply, printed super large font WH8 on some paper, stuck it to the ply with glue and hit it with the jig saw. Of course I forgot to take the width of the router bit and pattern follow ring into account, so I had to use the center parts as well to not make a proper mess of the "8".
Image

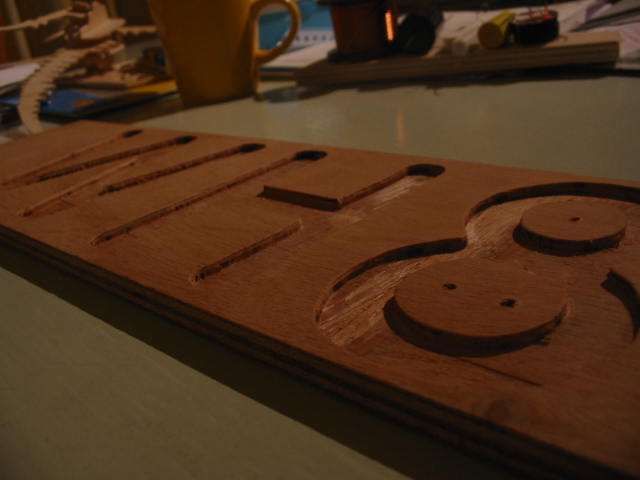
Then try the template on another piece of scrap ply. The shape is not bad, much better than I had expected. But I routed way too deep.
Image

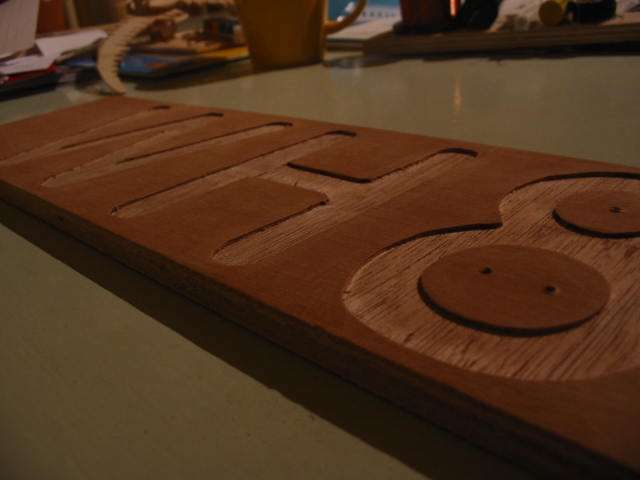
Changed depth to approximately 1 mm (a tad under 1/16" if your mind is not metric). It looks much better at this depth.
Image

Then I screwed the router template to the cab shell and routed away. The logo is on both sides now, so in either wedge position it shows.
Image

Image

Also, note the two small openings left and right. That's where the connectors will go. One left, one right for easy daisy chaining on stage. Not my own idea mind you, someone has mentioned this in the past and it seems like a good idea to me.

Thanks to Dave Perry for allowing me to pick his brain on how to work router templates. Any errors or stupidities in execution are mine.

User avatar
DJPhatman
Posts: 5411
Joined: Mon Aug 14, 2006 5:08 am
Location: Warren, MI
Contact:

Re: Router templates and logo's

#2 Post by DJPhatman »

Will you "engrave" the other cab?
I know money often seals the deal, but seriously, quality is an investment, not an expense... Grant Bunter
Accept the fact that airtight and well-braced are more important than pretty on the inside. Bill Fitzmaurice

User avatar
AntonZ
Posts: 2687
Joined: Sun May 14, 2006 6:00 am
Location: NL

Re: Router templates and logo's

#3 Post by AntonZ »

Yes sir 8)
I intend to make them near identical twins. Going to install grills on both, if I can find some suitable and affordable material locally.

bassmonster
Posts: 1384
Joined: Wed Jul 13, 2011 9:23 am

Re: Router templates and logo's

#4 Post by bassmonster »

Nice! :clap:

User avatar
Scott Brochu
Posts: 2473
Joined: Sat Mar 10, 2007 11:53 pm
Location: Maine
Contact:

Re: Router templates and logo's

#5 Post by Scott Brochu »

Very professional. :clap:
Drumming is a way of life.
ME LIKE TO HIT THINGS!
http://billfitzmaurice.info/forum/viewt ... 26&t=11232

User avatar
Tom Smit
Posts: 7569
Joined: Sat Jan 05, 2008 1:24 pm
Location: Sarnia, Ont. Canada

Re: Router templates and logo's

#6 Post by Tom Smit »

Thanks for sharing, Anton.
TomS

spongebob1981
Posts: 160
Joined: Sat Nov 21, 2009 8:36 pm
Location: Argentina

Re: Router templates and logo's

#7 Post by spongebob1981 »

I'm doing that same thing on my cabs but I found out that, unfortunately, if the ply is of not a great quality, it shows it big time. Forces me to sand the inner part of the letters.
YMMV
"Yep, deep orange" 2xJ10
(other site) 50W DIY Tube Head
----
"La música es el delirio. Bienvenidos al delirio."

User avatar
AntonZ
Posts: 2687
Joined: Sun May 14, 2006 6:00 am
Location: NL

Re: Router templates and logo's

#8 Post by AntonZ »

Same for me. For this cab I'm using poplar. It is nice, straight and light but the routering tends to leave some "threads" at the edges with poplar, more so than with birch I think. Couldn't find any good birch locally this time. Birch smells nicer, too. Curious to see how much the finished cab will weigh compared to the birch WH, and how easily it dents after finishing.

User avatar
LelandCrooks
Posts: 7242
Joined: Thu May 04, 2006 9:36 am
Location: Midwest/Kansas/Speaker Nirvana
Contact:

Re: Router templates and logo's

#9 Post by LelandCrooks »

Nice
If it's too loud, you're even older than me! Like me.
http://www.speakerhardware.com

User avatar
AntonZ
Posts: 2687
Joined: Sun May 14, 2006 6:00 am
Location: NL

Re: Router templates and logo's

#10 Post by AntonZ »

Need the extra wedge tomorrow, so I painted and finished the cab today. Installed crossover, damping, handle, sockets (both sides - for easy daisy chaining on stage), driver and wiring. Tested with some music to confirm the wiring and crossover. Then put the cover on.

Image

Grill and corners still to be installed, other than that it is done. I'm glad I tried the routering, quite happy with the result.

User avatar
Tom Smit
Posts: 7569
Joined: Sat Jan 05, 2008 1:24 pm
Location: Sarnia, Ont. Canada

Re: Router templates and logo's

#11 Post by Tom Smit »

That looks totally professional to me!
TomS

User avatar
escapemcp
Posts: 1219
Joined: Thu Feb 07, 2013 8:57 pm
Location: Bristol, UK

Re: Router templates and logo's

#12 Post by escapemcp »

Anton,

I routed my design onto the slopey front bit of my T30 last night (pics to follow in my thread (see sig below)), but after testing with just 1 coat of Duratex (and a open cell foam roller) on my much deeper test cut, I am unsure if I have routed deep enough on the actual speaker. I just saw that you mentioned that you routed to about 1mm. I have done about half that. Do you reckon it will show through enough?

Many thanks (for both the idea and your help :) )

Aidan

User avatar
AntonZ
Posts: 2687
Joined: Sun May 14, 2006 6:00 am
Location: NL

Re: Router templates and logo's

#13 Post by AntonZ »

With a textured paint job that might be a tad shy to show. If I were you I would try this router depth setting on a piece of scrap ply. So use your template on a scrap, same depth for the router, route away, a little quick sanding of the edges and apply your choice of paint finish. If it works, go ahead. If you feel it is too shy, put the template back onto the cab (screw holes not filled just yet, hopefully?) and set the router just a tad deeper. Again, I would first give the adjusted depth setting a quick try on scrap ply. Remember you can always take a little extra away from your cab, but you cannot add back after you have set your router too deep.

Personally, I feel the depth that I have used is just about perfect. I did however not take exact measurements so cannot tell if it was exactly 1mm.

Do bring on the pics once you are happy with the logo. Both before and after applying finish. A little explanation of how you made the template, the font you used, some pics with the template alone, routed but not painted and finished result are always welcome!

byacey
Posts: 947
Joined: Thu Jun 14, 2012 9:09 am
Location: Edmonton, Alberta, Canada

Re: Router templates and logo's

#14 Post by byacey »

I like the full width access panel. Is this a throwback from the earlier plans? This would certainly make it easier to access the crossover board for installation and servicing in the future. I like the scoop handle too; how well are they balanced when carrying? I know there isn't a lot of room for placing them.
Built
T48s
WH8s
SX212

User avatar
AntonZ
Posts: 2687
Joined: Sun May 14, 2006 6:00 am
Location: NL

Re: Router templates and logo's

#15 Post by AntonZ »

The full width access panel was in the plans for the previous version indeed. I find it hard enough to install a driver with the full width panel, cannot imagine what it would be like with a smaller opening. The scoop handle is pretty much center of gravity, works fine. Then again, if you intend to repeat this on the new plans, look carefully - dimensions have changed so I don't know if it fits that model. For this build I already had a completed cab available to guesstimate the correct position and it worked fine. I would not use this particular model handle on a birch cab though. The handle is plastic, works on a lighter poplar cab but the full 1/2" birch version might be a tad heavy for this handle.

Having a speakon connector on either side is utterly brilliant. Nobel prize for whomever came up with the idea. I love it for easy daisy chaining on stage.

Post Reply