Page 1 of 2
Truck Tuba 7" thick - 10" Infinity Sub
Posted: Sun Jul 24, 2022 5:37 pm
by howiez
Years ago we built a Truck Tuba into a cabinet to hold a PS4 and some games/accessories for my oldest sons college dorm. Now my youngest would like to build one for his Honda Pilot. He upgraded all the factory speakers to Infinity units last fall and purchased an Infinity 10" sub for this project. The T/S parameters fall right in the plans, bottom end of Fs, top end of Qts and middle of Vas. It has switchable 2/4ohm voice coils. I'm curious if we can leverage the 2Ohm. All the door speakers are 3Ohm and the system took those like a champ. And IIRC, his factory sub is actually 2Ohm so we're hoping it works and we also have 92dB of sensitivity. We went with 7" thick to clear his sub (about 1" behind vented motor) but not take up too much space in the Pilot rear end. We will be using the factory subwoofer amp to drive, splicing into the factory 10" harness and bypassing it.
He purchased 3 sheets of 24x30 BB at our local Woodcraft last fall sometime. It's taken us until yesterday (Saturday) to get around to making sawdust. I helped him lay out all the cut plans, and helped him rip down some pieces on the table saw. We also used a circular saw and a guide to get the outsides as well. Once we had the major/odd pieces cut out, we set the saw for 6" and ripped all the rest of the boards into strips to cut the internal panels. Then we set the table saw angle and finished off the angled ends where required.
Today I used a roto-zip with 4 passes per side, not cutting too deep, to make the driver clearance hole in the octagon, and the hole in the top/side panel. My oldest stole our router for wedding projects and he's away on his honeymoon so we didn't bother to go steal it back for 2 cuts. I will need it when we round corners nearing the finish line, but for now we are set to glue. The RotoZip works if you only take a 1/16 or so each pass, or take it super slow. And it has an included circle jig so I cut fairly competent circles. Only a little belt sander clean up to remove some odd edges where the RotoZip tilted and cut a bit less than our target radius.
We plan to glue, then shoot 18ga pins to hold it. We'll glue all the internal panels (hopefully) in one sitting and then wax paper over and use second side to clamp it all. Then my son plans to paint the inside (I've created a monster) like I have done with my THT and two Titans. He marked out all the interior points, drew it all up and taped one side off for paint.
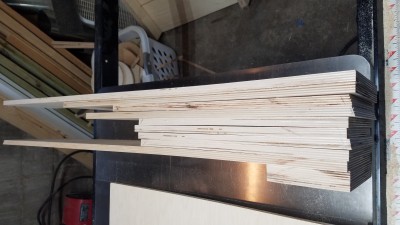
- Pile o' cut panels.
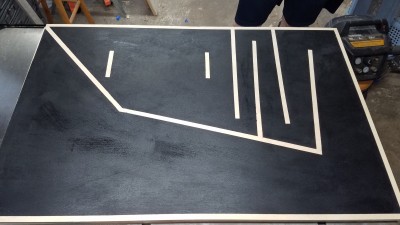
- last side panel, laid out and pre-painted
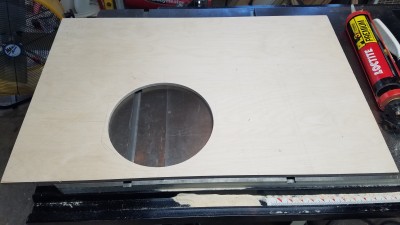
- Other side with driver hole
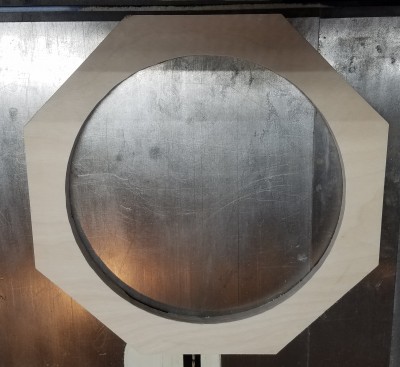
- Driver spacer
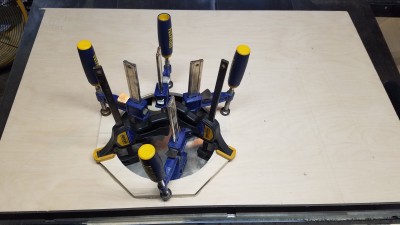
- spacer glued up and clamped
Re: Truck Tuba 7" thick - 10" Infinity Sub
Posted: Sun Jul 24, 2022 6:17 pm
by Bruce Weldy
It's great that you get to do a project like this with your son.
Re: Truck Tuba 7" thick - 10" Infinity Sub
Posted: Sun Jul 24, 2022 7:32 pm
by jimbo7
I can't look at these builds. They make me wanna dust off all my drivers and take out a loan for some wood. Looking forward to the build progress.
Re: Truck Tuba 7" thick - 10" Infinity Sub
Posted: Mon Jul 25, 2022 11:00 am
by howiez
jimbo7 wrote: ↑Sun Jul 24, 2022 7:32 pm
I can't look at these builds. They make me wanna dust off all my drivers and take out a loan for some wood. Looking forward to the build progress.
Right? My son was lamenting how much he paid for the BB last fall. I think the stickers were still on it for just under $40 a sheet. We still can't get 5x5 at Woodcraft and 4x8's are $124 at our local big box lumber yard. At least Aruaco is down to $60, it was $100 all last year.
Re: Truck Tuba 7" thick - 10" Infinity Sub
Posted: Mon Jul 25, 2022 3:10 pm
by Seth
Howie, that's awesome man

I like hearing of the father son comradery, sharing interest in audio as well as the passion to build. Too cool.
I remember your college tuba build. You guys are gonna be floored when you fire up this new one in the Pilot! I built mine 8½ wide and made a different driver choice than you guys, but I'm confident you'll have similar results, with extremely visceral output all the way down to and below 20Hz... unless the factory sub amp has a highpass filter on it.
I really wish I could get Arauco out here in California. I've found it in ¾", but no one stocks the ½" near me. It looks like a real decent product and I'm always happy to shave a little weight off of a build.
Looking forward to watching the come together

Re: Truck Tuba 7" thick - 10" Infinity Sub
Posted: Tue Jul 26, 2022 4:02 pm
by howiez
Ok, maybe there won't be a lot of visual detail to this build. Being my second, it's easier. Since we had precut all the panels, this was nearly a slam dunk. I had let the baffle/driver mount set an hour or so and used the chisel trick to clean up the squeeze out. So that part turned out nice and clean. Then Monday late afternoon we glued in panels 1 through 9 all at once and used the top(bottom?) to clamp overnight. We had cut all to length, except panel 3, the one with angles both ends. That one is harder to get on a table saw, being over 45deg, so I decided to let it fly. I'll cut flush with my router after the last side is glued on.
We had layed out all the build lines inside and out on both sides. This gave us nailing guides, paint guides, etc. We started with panel 1 and panel 8 glued and nailed together. I used a cleat to line them up while my son shot 2 pins in them for temporary hold. That gave us some support as we laid it on the side. Then we glued those two to the side, using a cleat at the corner to align, like the plans show. Then we worked down the edge and nailed those two to hold them while we raced ahead. Next, panel 4, then 2, using a carpenters square to hold them perpendicular while my son shot a few pins in them, both through panel 1 and the side. Then on to panel 7 and 6. A little hard to nail 6 and 7 together, but he pulled it off without any nails shooting out the side. Panel 7 to panel 1 was much easier to pin. Next panel 3 and 5, using a square again to help align. Lastly, panel 9, a few pins and we were done. I threw some wax paper over each joint that would touch the second side, then we dropped it on. We started at one corner, squaring up, then clamping. Then we'd work on to the next corner, pulling everything as close as we could. This is much easier with BB over Aruaco, but either would have worked fine. Then after 4 corners were clamped, we dropped two battens across the middle and clamped those to squeeze all the way across. I went back 90min later and scraped the outside squeeze out. My son did the mouth, his wing span allows him to reach all the way in the mouth. So we'll have nice clean corners where you can see in.
Tonight we may clean up a little PL, paint the inside and perhaps glue the other side on, we'll see how fast the paint sets up. Have to do a little wiring/soldering, and once paint is dry, I'll silicone the speakon in the mouth. I think he plans to use the driver to layout bolt holes and pre-drill for T-nuts and 10-32 hardware, we'll see.
Here are some clamp pictures, not much to look at until I take the clamps off here shortly. OK, in the third picture you can see my overkill DR200/T48 stack. Yes, we had them playing, it's mandatory while working in the shop!
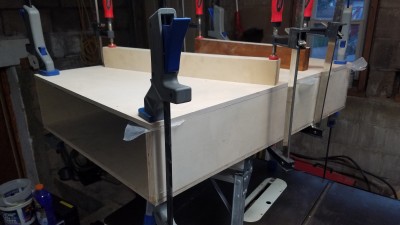
- clamp view panel 1
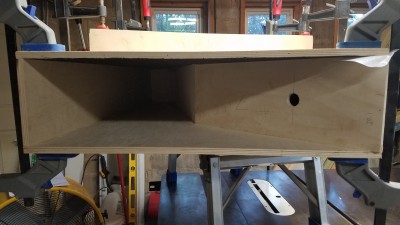
- clamp view mouth
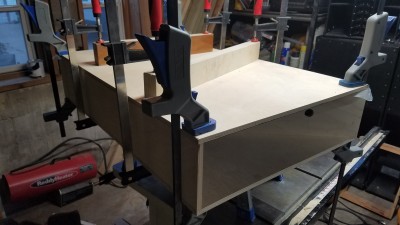
- clamp view panel 9
Re: Truck Tuba 7" thick - 10" Infinity Sub
Posted: Tue Jul 26, 2022 7:49 pm
by howiez
It's been 24 hours, I took the clamps off and cleaned up the mouth a bit more. I'm leaving all the PL squeeze out and my goobers in the path. It's just too tiny to get in there. I was difficult to paint, I need to get a spray gun...
Hopefully later tonight we'll glue the other side on so we can maybe try it out next weekend.
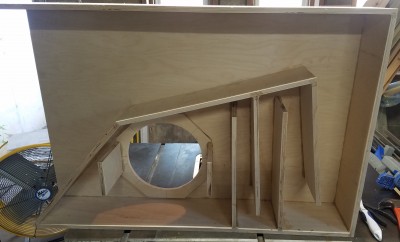
- Guts after some cleanup
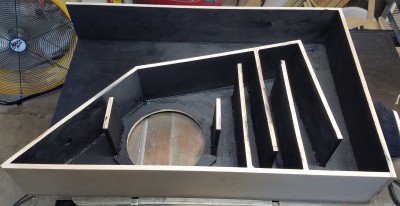
- Insides painted
Re: Truck Tuba 7" thick - 10" Infinity Sub
Posted: Sat Jul 30, 2022 8:42 am
by howiez
Re: Truck Tuba 7" thick - 10" Infinity Sub
Posted: Sat Aug 06, 2022 8:07 am
by howiez
Not much to update, my son's been busy at work so not much progress. He sanded out all the spot putty, and routered the edges with a 3/8 roundover. We should be able to Duratex today, but I only have pictures of him starting to primer. If I remember, I'll take another snap all dressed in black before we Duratex.
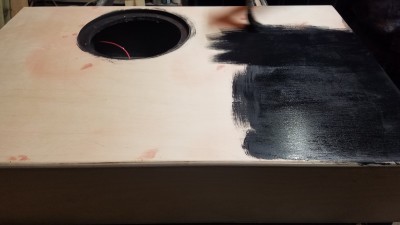
- Start of Primer
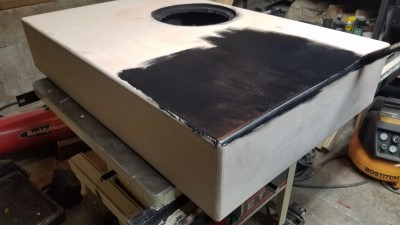
- Start of primer ISO
Re: Truck Tuba 7" thick - 10" Infinity Sub
Posted: Sat Aug 06, 2022 9:55 am
by himhimself
Looking good, Howie. I'm curious though, as to why you bothered to paint the entire interior.
Re: Truck Tuba 7" thick - 10" Infinity Sub
Posted: Sat Aug 06, 2022 12:14 pm
by howiez
Shot of the back side primed. Going to put Duratex on the back today. Humid as heck here, so I don't know if we'll be able to do the front/top tomorrow.
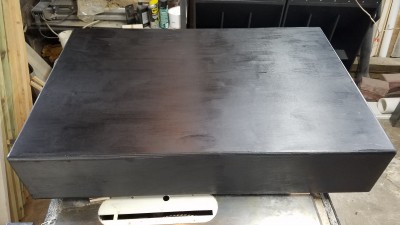
- Primed
Re: Truck Tuba 7" thick - 10" Infinity Sub
Posted: Tue Sep 06, 2022 2:05 pm
by CarterKraft
Awesome job.
These things are pretty surprising in bedrooms.
Re: Truck Tuba 7" thick - 10" Infinity Sub
Posted: Wed Sep 21, 2022 4:52 pm
by howiez
CarterKraft wrote: ↑Tue Sep 06, 2022 2:05 pm
Awesome job.
These things are pretty surprising in bedrooms.
Thanks!
They seem to work very well in any small to medium sized room. My oldest rocked his dorm for a few years with one.
Re: Truck Tuba 7" thick - 10" Infinity Sub
Posted: Wed Sep 21, 2022 5:54 pm
by Seth
howiez wrote: ↑Wed Sep 21, 2022 4:52 pm
Thanks!
They seem to work very well in any small to medium sized room. My oldest rocked his dorm for a few years with one.
Well... How'd it go, wiring it to the factory amp and all?
Re: Truck Tuba 7" thick - 10" Infinity Sub
Posted: Thu Sep 22, 2022 1:23 pm
by Chris_Allen
I really like the style of the Truck Tuba - looks surprisingly big next to the Titan 48.