Page 1 of 3
Add it again...T30's at 21"
Posted: Sun Sep 17, 2017 10:15 am
by chrisj360
Hello everyone...it's been a bit. Hope everyone has been well. It looks like it from the posts.
Started building my second round of T30's that will be a bit smaller than my original 28" ones. This pair will be at 21 inches to better fit in my car. Putting matching Lab12's in them. Can't wait for the drivers to arrive...
Cheers and have a great day!
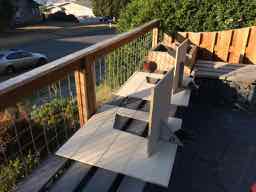
- IMG_1993.jpg (10.11 KiB) Viewed 3365 times
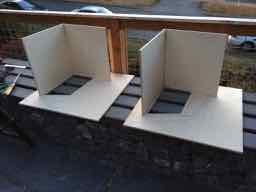
- IMG_1994.jpg (7.97 KiB) Viewed 3365 times
Re: Add it again...T30's at 21"
Posted: Tue Sep 19, 2017 6:19 am
by Padde298
Re: Add it again...T30's at 21"
Posted: Tue Sep 19, 2017 11:08 am
by chrisj360
Since we're back in monsoon season here in the PNW, here's my new tiny workshop:
- IMG_1999.jpg (9.67 KiB) Viewed 3299 times
- IMG_2001.jpg (9.91 KiB) Viewed 3299 times
I've made circles! Baffles are cut:

- IMG_2002.jpg (8.18 KiB) Viewed 3299 times
Spacers are next...
Re: Add it again...T30's at 21"
Posted: Tue Sep 19, 2017 2:49 pm
by Chris_Allen
All man caves start small.
Re: Add it again...T30's at 21"
Posted: Fri Sep 22, 2017 10:26 pm
by chrisj360
Not a super exciting update but one nonetheless. Since I cannot do more until the drivers arrive, I rough cut a handful of the other pieces.
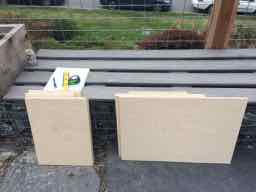
- IMG_2004.jpg (8.54 KiB) Viewed 3234 times
Got thru a number of panels and some of the braces...
Cheers!
Re: Add it again...T30's at 21"
Posted: Sat Oct 21, 2017 2:05 am
by chrisj360
Braces made...
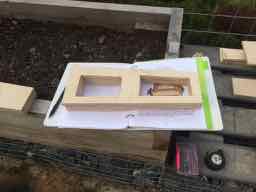
- IMG_2005.jpg (8.55 KiB) Viewed 3129 times
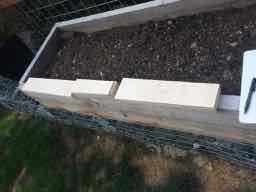
- IMG_2006.jpg (8.5 KiB) Viewed 3129 times
Drivers arrived:
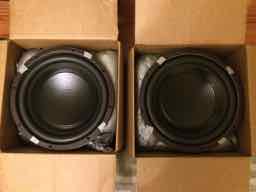
- IMG_2012.jpg (7.84 KiB) Viewed 3129 times
Baffle testing:
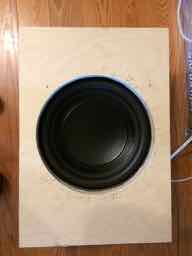
- IMG_2018.jpg (7.5 KiB) Viewed 3129 times
Re: Add it again...T30's at 21"
Posted: Sat Oct 21, 2017 5:22 pm
by chrisj360
The morning's progress. Time to walk my dog and let some PL harden up.
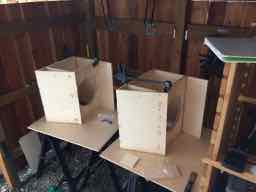
- IMG_2025.jpg (8.42 KiB) Viewed 3111 times
Definitely easier to do the Lab mods early rather than at the end like last time.
Side note, my measuring tape fell into an inter-dimensional hole and is missing. Been bugging me since yesterday...
Re: Add it again...T30's at 21"
Posted: Sat Oct 21, 2017 10:17 pm
by chrisj360
Called it a day with the Lab mod panels set. Anyone have any good tips for securing the angle braces? Every time I try and screw in (pre-drilled hole), it pushes it around. With the odd angle, haven't found a good way of clapping it.
Now wake up early before work and see what I can bang out.
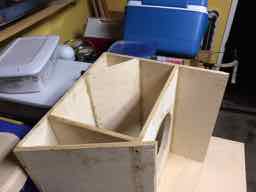
- IMG_2027.jpg (8.34 KiB) Viewed 3103 times
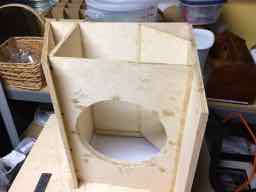
- IMG_2028.jpg (8.55 KiB) Viewed 3103 times
Re: Add it again...T30's at 21"
Posted: Sat Oct 21, 2017 11:43 pm
by DJPhatman
chrisj360 wrote:Anyone have any good tips for securing the angle braces? Every time I try and screw in (pre-drilled hole), it pushes it around. With the odd angle, haven't found a good way of clapping it.
Brad nailer and a small "pancake" style air compressor. Practice on scraps first, until you get really comfortable using it. Shoot the brads in a "V" formation, or "\ /" or "/ \".
Re: Add it again...T30's at 21"
Posted: Sun Oct 22, 2017 9:58 am
by chrisj360
Thanks for the tip. However, until I either win the lotto or the tool gods gift me with a one, I am stuck doing with my screwdriver. Luckily with this build, I have a new tenant with some tools. Was able to borrow their screwdriver so I could have one for the screws and one for drilling the pilot holes. No more changing out the bit every time.
Small victories, right?
Re: Add it again...T30's at 21"
Posted: Sun Oct 22, 2017 10:24 am
by Bill Fitzmaurice
chrisj360 wrote:until I either win the lotto or the tool gods gift me with a one, I am stuck doing with my screwdriver.
A compressor and brad nailer won't set you back all that much, and a compressor has a dozen uses, not the least of which is saving you from having to drive around town looking for gas station that still has an air pump for your tires. For instance:
https://www.lowes.com/pd/Bostitch-6-Gal ... d/50396510
Re: Add it again...T30's at 21"
Posted: Mon Oct 23, 2017 12:34 am
by Padde298
DJPhatman wrote:chrisj360 wrote:Anyone have any good tips for securing the angle braces? Every time I try and screw in (pre-drilled hole), it pushes it around. With the odd angle, haven't found a good way of clapping it.
Brad nailer and a small "pancake" style air compressor. Practice on scraps first, until you get really comfortable using it. Shoot the brads in a "V" formation, or "\ /" or "/ \".
+1

Re: Add it again...T30's at 21"
Posted: Mon Oct 23, 2017 1:47 pm
by Think
Are the electric nailers/tackers any good? In reviews I read that they lack power, but they might be powerfull enough/fine for this job.
Has anyone experience with them?
You can use a compressor with a paint bucket to spray paint, dust off electronics and others and many more uses.
To inflate a car tire you can also use a bicycle pump; mountain bikes use the same valves as cars.
Re: Add it again...T30's at 21"
Posted: Tue Oct 24, 2017 9:28 am
by chrisj360
Thanks for the suggestions. I'll keep in mind for the future when I've got some extra cash or I think I know of a place where I could rent one for a couple days. For this build, I'll have to keep trucking with the screw gun.
Re: Add it again...T30's at 21"
Posted: Sun Oct 29, 2017 10:39 am
by chrisj360
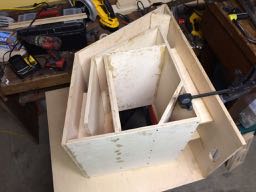
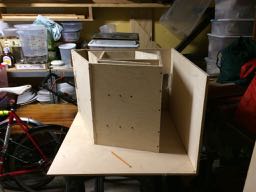
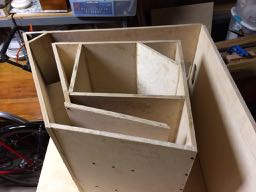
Was hoping to get both the side panels on yesterday but only managed to get to basically panel 10 on both.
I really hate the braces. I don't know what I am doing wrong but I rough cut them per the plans and then on both builds feel like I spend more time either re-cutting/kerfing/sanding them than any other part of the build. I know it's due to an earlier combination of panels coming together (chickens coming home to roost...) but everything seemed like the plans were being followed and going smoothly with panels 1-5.
When building two at a time, has anyone else noticed that one box everything seems to go fine with and the other is like a needy child demanding twice as much attention? Again, I know it's a culmination of minor missteps that lead up to something being out of square or braces re-done, but holy moly.
I did catch (too late though) that I did screw on panel six wrong (to the bottom of panel 4 instead of flush...not quite sure if that describes it proper), however the only thing it seemed to affect is not having the extra to cut off of panel seven at the top. Fingers crossed...
- IMG_2038.jpg (14.05 KiB) Viewed 2967 times
- IMG_2039.jpg (13.62 KiB) Viewed 2967 times
- IMG_2041.jpg (13.42 KiB) Viewed 2967 times