Page 4 of 8
Re: T60 build. Finally.
Posted: Tue Jul 16, 2013 12:13 am
by MissileCrisis
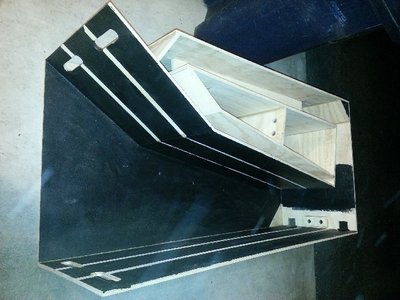
Painting mouth, going to touch up once braces are in. Note that the specs are dust and are now vacuumed out.
Re: T60 build. Finally.
Posted: Tue Jul 16, 2013 3:22 am
by Titanium Hand
Looking good MissileCrisis

Big ups to your old man for even letting you look at his tools, let alone to use them and help you along the way !
Definitely going the right way pre-painting the mouth and side panels, no doubt you'll be pre-painting the mouth braces to. I don't know how people manage a satisfactory finish without doing it that way, I know I couldn't have

Re: T60 build. Finally.
Posted: Wed Jul 17, 2013 12:23 am
by MissileCrisis
Making braces like the pro's (well... trying)
First, installing panel 12 and de-warping it with quality screws.

- Panel 12 glued and screwed
Braces time!
The tall front braces will be made tomorrow (and the rear long braces will get painted/sanded/bondo/etc..)
Re: T60 build. Finally.
Posted: Thu Jul 18, 2013 12:27 am
by MissileCrisis
Rookie mistake: shook paint can before making sure the lid was sealed tight, managed to splatter all over myself and the garage (good one Will). After that things got better though. I'm discussing with my dad the best way to make the single piece glued double thick access panel flanges. No air leaks at the moment, PL squeeze-out everywhere. You guys don't know how anal I'm being with my joinery but I swear if this one has any leak issues the speaker gods hate me. Installed panel 13 and rear braces.
Side panel painting
Panel 13 glued and 1 screw + 1 clamp.
Braces installed, touch up painting will be tomorrow
Re: T60 build. Finally.
Posted: Sat Jul 20, 2013 12:21 am
by MissileCrisis
My dad took my brother to Oregon (school) so I worked alone tonight on some bondo and PLing the wires going to the rear speakons. I finished approximately half of the bondo and the rest will be done tomorrow along with install of quarter/half rounds, cutting out of the flanges/access panels, and triple checking that there are no air leaks anywhere.
Re: T60 build. Finally.
Posted: Sun Jul 21, 2013 1:32 am
by MissileCrisis
Goal, turn the thing on tomorrow. Likely: get it all buttoned up but will wait for things to set. Worst case: don't get final side on.
Anyways, some picture progress.
Re: T60 build. Finally.
Posted: Sun Jul 21, 2013 5:57 pm
by MissileCrisis
Just painted horizontal braces and front braces. Glued together baffle flanges (double thick carved around driver backer). Hoping to get all the internals airtight and tested. Going to try a ground breaking seal testing technique. I'll post when I a have results.
Re: T60 build. Finally.
Posted: Mon Jul 22, 2013 12:48 am
by MissileCrisis
Getting there, plan on finishing Saturday if Murphy doesn't have his way.

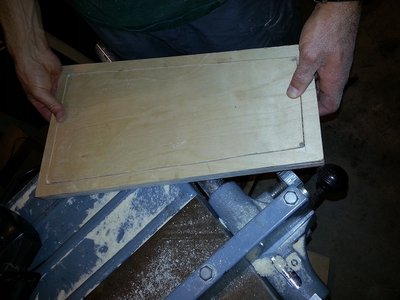
- Double thick flanges (single piece), not messing around, going to have lots of meat to drill into for access covers.
Re: T60 build. Finally.
Posted: Tue Jul 23, 2013 1:12 am
by MissileCrisis
Flange #2 went on tonight, tomorrow will be cubby hole cut-out, horizontal struts (front one needs to be cut/painted, rear are ready for install
), and putting on the side. Wednesday will be installing the driver and every leak test imaginable.
Don't use bare hands with PL, even with gloves it finds ways to get on you
Almost There!
Re: T60 build. Finally.
Posted: Wed Jul 24, 2013 12:07 am
by MissileCrisis
Put on the final side tonight. All that is left is install the driver, leak test, install the access panels, leak test. Then finishing + wheels, etc...
Just wondering, what SPL should I expect in the first (no access panel) leak test at 1 W?
Glued and Screwed
Adding weight to ensure the entire panel is flush with my PL and all the invisible areas are squeezed out.
Yes those are our extra bathroom tiles and a concrete block.
Re: T60 build. Finally.
Posted: Wed Jul 24, 2013 3:25 am
by Michael Ewald Hansen
MissileCrisis wrote:
Just wondering, what SPL should I expect in the first (no access panel) leak test at 1 W?
None, as you shouldnt do leak test or any tests without the access panel on

Re: T60 build. Finally.
Posted: Wed Jul 24, 2013 6:40 am
by escapemcp
Michael Ewald Hansen wrote:MissileCrisis wrote:
Just wondering, what SPL should I expect in the first (no access panel) leak test at 1 W?
None, as you shouldnt do leak test or any tests without the access panel on

Eh? I thought you had to have the cover off to check the seal around the driver... or is there another way


Re: T60 build. Finally.
Posted: Wed Jul 24, 2013 6:45 am
by Bill Fitzmaurice
escapemcp wrote:
Eh? I thought you had to have the cover off to check the seal around the driver..
+1.
Re: T60 build. Finally.
Posted: Wed Jul 24, 2013 7:06 am
by Michael Ewald Hansen
escapemcp wrote:Michael Ewald Hansen wrote:MissileCrisis wrote:
Just wondering, what SPL should I expect in the first (no access panel) leak test at 1 W?
None, as you shouldnt do leak test or any tests without the access panel on

Eh? I thought you had to have the cover off to check the seal around the driver... or is there another way


Thats true, I replied too fast

In my haste the reply was mainly for the SPL.. Ofcourse you need to leak test the driver without the access panel, as it would otherwise be impossible.. Im pretty preoccupied with a dissertation, so my head spins sometimes! hehe..
Re: T60 build. Finally.
Posted: Wed Jul 24, 2013 8:09 am
by MissileCrisis
That was the plan, install driver -> leak test driver mount; install access panels -> leak test those edges. Thanks for confirming guys.

