He means "turn it down and prop it up on something"
10v won't hurt it all, and running at 19 Hz means nobody will hear it except the dog, and he won't hear much.
myn's Tuba HT Build Thread
-
bgavin
- Posts: 5738
- Joined: Thu May 04, 2006 10:58 am
- Location: Sacramento, Moderator/Licensed BF Builder
- Contact:
Re: myn's Tuba HT Build Thread
My biggest worry is that when I'm dead and gone, my wife will sell my toys for what I said I paid for them.
-
Pixelmaster
- Posts: 117
- Joined: Fri Mar 21, 2008 11:09 pm
- Location: Atlanta
- Contact:
Re: myn's Tuba HT Build Thread
I think your finish is looking very nice.
The approach I took with the Duratex was to spray it from a pressure pot. Very consistent texture and finish is possible with this type of application.
I still say your finish is looking very nice!
Lee
The approach I took with the Duratex was to spray it from a pressure pot. Very consistent texture and finish is possible with this type of application.
I still say your finish is looking very nice!
Lee
Re: myn's Tuba HT Build Thread
[== 10/1/2009 ==]
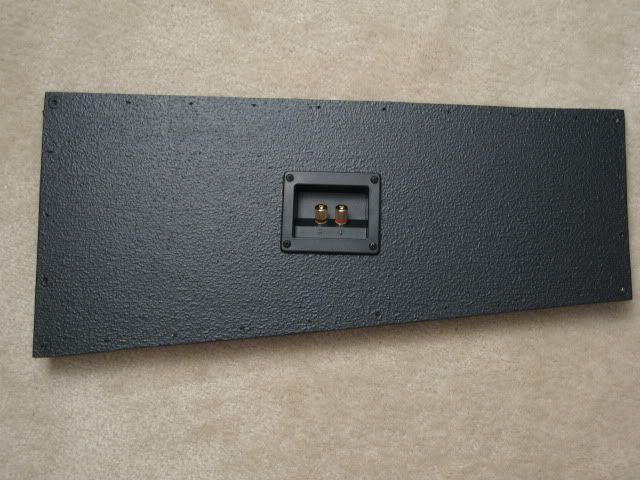
My Tuba HT is almost finally complete. I just finished putting the final coat of Duratex on the bottom of the enclosure as well as wiring up the Dayton DVC. I had a bunch of 12 ga speaker wire that I typically use however the Dayton DVC's speaker connectors couldn't handle double twisted 12 ga wire so I dug up some 15 year old 14 gauge laying around and used that instead. Old speaker wire shouldn't make a diff should it?
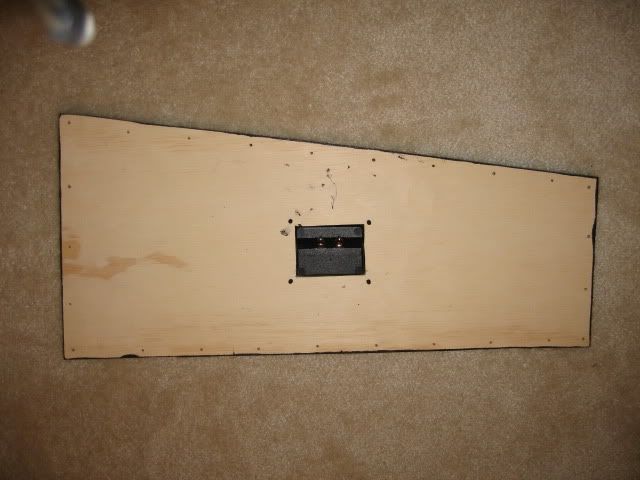
I also started the driver break in tonight. I am feeding it a sweep from 10hz - 100hz from my Behringer EP2500 amp giving it about 16 volts to the FreeAir oriented Dayton DVC.
To ensure the rear pole-vent was kept from being obstructed I built a square baffle between two saw-horses. I than just sat the driver top mounted and started the break in.
There is always a nice distinct aroma in the air when the brand new drivers are being broken in. I believe its the glue used on the voice coil and former.
Oh yeah, while setting it up the positive and negative leads from my EP2500 crossed causing some pretty nice sparks. Enough to actually cause some black marks on the banana plugs. Lesson learned.. Tape them up and like Ghostbusters, Don't let them cross..
Here's a short video of the break in and some of the gear (DCX/EP2500/BFD/CleanBox) I will be using:
http://www.youtube.com/watch?v=GschL-5QHas
http://www.youtube.com/watch?v=GschL-5QHas[/youtube]
My Tuba HT is almost finally complete. I just finished putting the final coat of Duratex on the bottom of the enclosure as well as wiring up the Dayton DVC. I had a bunch of 12 ga speaker wire that I typically use however the Dayton DVC's speaker connectors couldn't handle double twisted 12 ga wire so I dug up some 15 year old 14 gauge laying around and used that instead. Old speaker wire shouldn't make a diff should it?
I also started the driver break in tonight. I am feeding it a sweep from 10hz - 100hz from my Behringer EP2500 amp giving it about 16 volts to the FreeAir oriented Dayton DVC.
To ensure the rear pole-vent was kept from being obstructed I built a square baffle between two saw-horses. I than just sat the driver top mounted and started the break in.
There is always a nice distinct aroma in the air when the brand new drivers are being broken in. I believe its the glue used on the voice coil and former.
Oh yeah, while setting it up the positive and negative leads from my EP2500 crossed causing some pretty nice sparks. Enough to actually cause some black marks on the banana plugs. Lesson learned.. Tape them up and like Ghostbusters, Don't let them cross..
Here's a short video of the break in and some of the gear (DCX/EP2500/BFD/CleanBox) I will be using:
http://www.youtube.com/watch?v=GschL-5QHas
http://www.youtube.com/watch?v=GschL-5QHas[/youtube]
Re: myn's Tuba HT Build Thread
A caveat on old wire. I recently attempted to use old speaker wire on a Wedgehorn. The solder would not flow because of the amount of oxidation on the wire. It was obvious so I simply got some new wire for the hook up. So anyone having a problem with getting the solder to flow oxidation may be a problem with old wire.
2-Jack 10
2-Wedgehorn 8
1-Auto Tuba
2-Wedgehorn 8
1-Auto Tuba
Re: myn's Tuba HT Build Thread
CLR cleaner will clean up old oxidized wires, makes exposed ends look new. Solder flows well afterwards...
JSS
JSS
Re: myn's Tuba HT Build Thread
CLR looks like an efficient and eco friendly product... http://www.live-the-organic-life.com/ca ... mover.html
But these wires were so bad I just chucked 'em. Literally probably 30 years old and a nice green tint seen through the clear plastic insulation. I ended up using the wire Leland sent with the kits. Worked out ok. I was a little disappointed my old wire didn't work after saving it for just such a special project for all these years... LOL...
But these wires were so bad I just chucked 'em. Literally probably 30 years old and a nice green tint seen through the clear plastic insulation. I ended up using the wire Leland sent with the kits. Worked out ok. I was a little disappointed my old wire didn't work after saving it for just such a special project for all these years... LOL...
2-Jack 10
2-Wedgehorn 8
1-Auto Tuba
2-Wedgehorn 8
1-Auto Tuba
-
RubiconProSound

- Posts: 597
- Joined: Sun Aug 27, 2006 3:10 am
- Location: Pollock Pines CA. (between Lake Tahoe and Sacramento...)
Re: myn's Tuba HT Build Thread
Just a tip:
I hang my woofers free air with coat hangers when I break them in. I just loop the wire of the coat hanger through one of the screw holes and hang them. It works great, and at 10 volts/20 Hz in free air you'll barely hear them. If you're worried about them falling off just twist the wire so it can't come undone.
I hang my woofers free air with coat hangers when I break them in. I just loop the wire of the coat hanger through one of the screw holes and hang them. It works great, and at 10 volts/20 Hz in free air you'll barely hear them. If you're worried about them falling off just twist the wire so it can't come undone.
Built so far:
AutoTuba. TAT, T18, T30, T39, SLA, SLA Pro, DR200, Omni 12TB, Omni 12 Sub, Omni 10.5,
AutoTuba. TAT, T18, T30, T39, SLA, SLA Pro, DR200, Omni 12TB, Omni 12 Sub, Omni 10.5,
Re: myn's Tuba HT Build Thread
[== 10/4/2009 ==]
So while I wait for my 14 gauge speaker wire to come in I decided maybe I could try some free-air breaking in of the driver inside the THT itself with the access panel wide open.. Yeah curiosity overwhelmed me.
Anyways. I didn't give it much juice. My receiver was at -57 (-60 is as low as it goes) and my amp was giving it maybe 5 volts. I couldn't believe the amount of sound that was coming out of the horn even in it's unjust state (no access panel, Driver not even strapped down, not corner loaded). So if this is the MINIMUM bass I can expect, I think I may be in for a treat .
.
Oh yeah, also was fiddling with the speaker gasket tape for the access flanges. The speaker gasket tape I bought is 1/2" thick so I am wondering what the best strategy for application was as the screws that secure the access panel will have to go straight though the gasket tape if I plan on using it as is at 1/2"
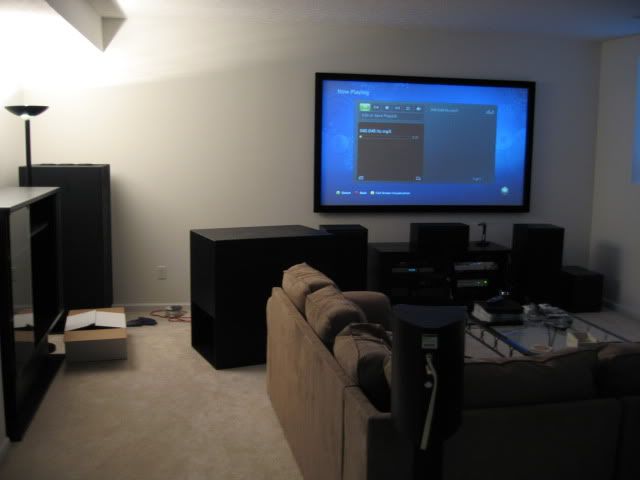
Objects in picture are larger than they appear. For scale, the screen is 94" diag.
So while I wait for my 14 gauge speaker wire to come in I decided maybe I could try some free-air breaking in of the driver inside the THT itself with the access panel wide open.. Yeah curiosity overwhelmed me.
Anyways. I didn't give it much juice. My receiver was at -57 (-60 is as low as it goes) and my amp was giving it maybe 5 volts. I couldn't believe the amount of sound that was coming out of the horn even in it's unjust state (no access panel, Driver not even strapped down, not corner loaded). So if this is the MINIMUM bass I can expect, I think I may be in for a treat
Oh yeah, also was fiddling with the speaker gasket tape for the access flanges. The speaker gasket tape I bought is 1/2" thick so I am wondering what the best strategy for application was as the screws that secure the access panel will have to go straight though the gasket tape if I plan on using it as is at 1/2"
Objects in picture are larger than they appear. For scale, the screen is 94" diag.
Re: myn's Tuba HT Build Thread
With the cover off, don't feed it much signal below 22-25Hz. Below Fc, the excursion control comes from the small rear chamber. Also, you are getting to hear the backwave, so it will sound louder with the access cover off. You can use a steel straightedge and a good utility knife with a new blade to cut that tape in half, put one strip inside the screws, one outside the screws.
Glad to hear the first test went well. My guess is that you will have all the punch and low end you need, you just have to find a good equalization solution to deal with room effects....It's the flaw in my system. One seat has a 45Hz boost, another a 45Hz dip, and so on. If I equalize perfectly for one seat, the other seats suffer from HUGE peaks and dips (like 20dB swings), so I let Audyssey do the spatial averaging and EQ for me. A compromise, but the best I can do with one sub.
94" Diagonal???!!! You must have a projector setup, right?
JSS
Re: myn's Tuba HT Build Thread
[== 10/7/2009 ==]
Just a quick update. I'm currently waiting for my 14 gauge speaker wire to arrive from MonoPrice. I decided against the old 14 gauge I had laying around with the little bit of corrosion. I know it probably doesn't make a difference but if nothing more its a peace of mind ensuring me everything was done right. I believe this THT deserves the new stuff
I did try 12 gauge speaker wire which I have hundreds of feet of but the doubled up wiring for a 4 ohm parallel load won't fit the Dayton DVC's terminals. 14 gauge fits perfectly.
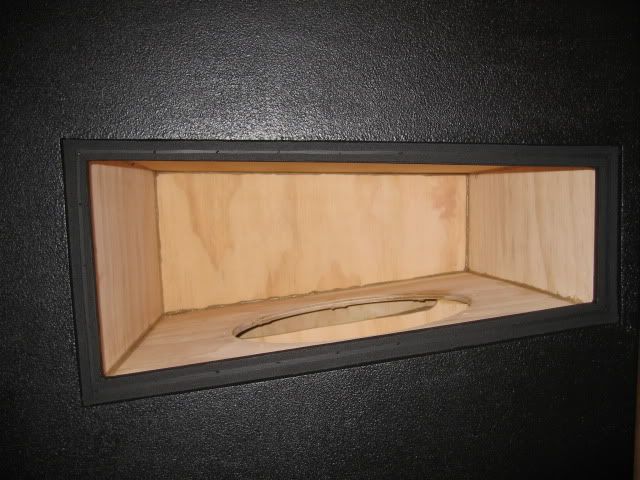
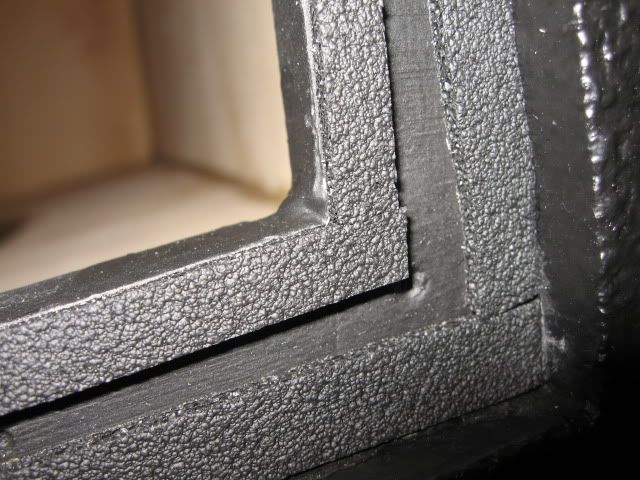
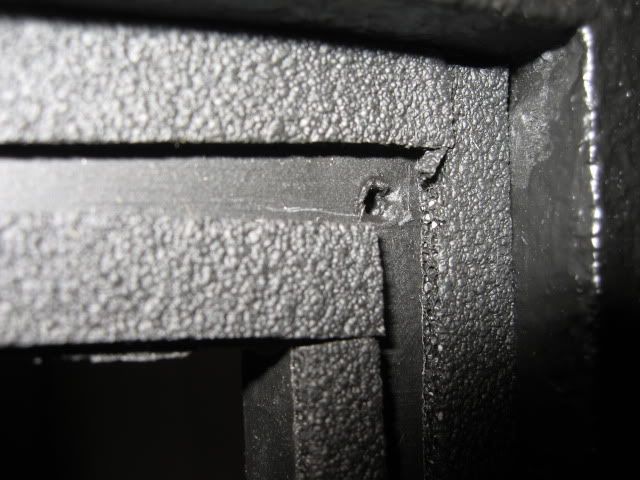
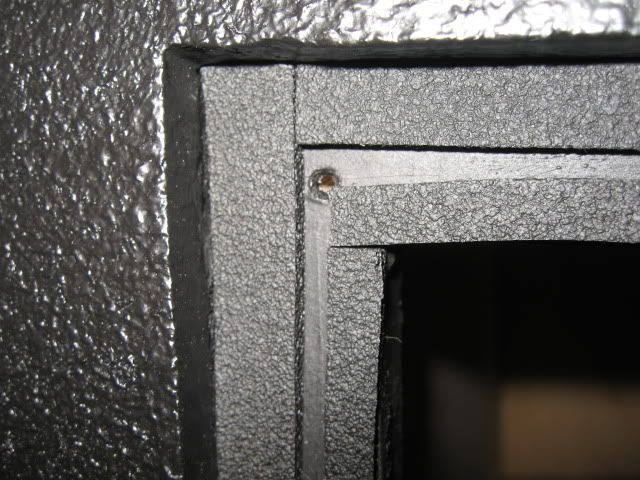
Everything is basically done. All that is left is the driver wiring, installation and the screwing/securing of the access panel. Taking MaxMercy's advice again I have two layers of speaker gasket around the access panel (inside and outside of the screws). There is a tiny gap between the butted joints as shown in the pics but I am hoping the redundancy in layers will take care of any possible leaks.
This weekend can't come quick enough Expect to see some impressions with a review and measurements shortly.
Just a quick update. I'm currently waiting for my 14 gauge speaker wire to arrive from MonoPrice. I decided against the old 14 gauge I had laying around with the little bit of corrosion. I know it probably doesn't make a difference but if nothing more its a peace of mind ensuring me everything was done right. I believe this THT deserves the new stuff
I did try 12 gauge speaker wire which I have hundreds of feet of but the doubled up wiring for a 4 ohm parallel load won't fit the Dayton DVC's terminals. 14 gauge fits perfectly.
Everything is basically done. All that is left is the driver wiring, installation and the screwing/securing of the access panel. Taking MaxMercy's advice again I have two layers of speaker gasket around the access panel (inside and outside of the screws). There is a tiny gap between the butted joints as shown in the pics but I am hoping the redundancy in layers will take care of any possible leaks.
This weekend can't come quick enough
Re: myn's Tuba HT Build Thread
Wait a minute...
Make those butt joints bevel/scarf joints. My tape is one piece for each layer (just like yours, one inside the screws, one outside), but it meets with the tape cut at a bevel, not at 90 degrees, for a greater overlap and less chance of leaks (longer path length and greater tape overlap for the possible leak site).
JSS
Re: myn's Tuba HT Build Thread
Hrm.
So you're saying you used only 2 strips (1 for the outside and 1 for the outside), where as I used 8 strips (4 for the outside and 1 on the inside)?
How do you go around the corners without causing the gasket tape to buckle up and wrinkle?
And as I understand the tape ends with an angled scarf joint joining the two ends?
Did you make your gasket tape width smaller by cutting it? I had a hard time keeping it even, having to recut it many times. Even while using a straight edge and fresh blade on my utility knife I found the gasket tape moved around causing inconsistencies in the width.
Re: myn's Tuba HT Build Thread
I don't see the need to have two separate strips, although what you've done will work. I use a wide 1 1/4" piece and mount it on the cover instead of the cabinet and put the screws right thru it. I think it's easier and has more sealing surface.
Tomorrow I'm going to stop procrastinating - WB
Re: myn's Tuba HT Build Thread
So you're saying you used only 2 strips (1 for the outside and 1 for the outside), where as I used 8 strips (4 for the outside and 1 on the inside)?
Yup. I got a lesson in laying down foam tape with my SLAs....they have long scarfed strips as well.
How do you go around the corners without causing the gasket tape to buckle up and wrinkle?
Carefully. Thinner tape will go around corners easier, but the PE stuff is VERY flexible, and I had no trouble getting it around the corners. You have to strecth the outside of the corner some, and compress the inside of the corner some. slight wrinkling is OK, but wrinkles that span the thickness/depth of the tape are no bueno.
And as I understand the tape ends with an angled scarf joint joining the two ends?
Yes. IMO, a butt joint just leaves too much room for leaks vs a scarf.
Did you make your gasket tape width smaller by cutting it?
Yup. Best done with two people (one holding the straightedge, the other cutting), and an EXTREMELY sharp knife. The person withthe straightedge is smashing the hell out of the tape to hold it still. If you are doing it solo, use a high quality pair of scissors, and live with the small differences in width, which will be of no consequence anyway..
JSS
Re: myn's Tuba HT Build Thread
I really like the idea of putting the gasket tape on the access panel itself.
I'm now thinking about using a hybrid approach placing a single strip around the inside of the screw holes on the access panel itself and keeping the outside tape fixed to the access flange as it is today.
As there is currently barely a 1/4" on the inside of screw holes in the access flange I could make use of the surface area of the access panel and let the overage not be an issue as it will be fixed to the access panel. No thining/cutting of the gasket tape will be required.
Whatcha think?