What ever you do do not use Elmas Wood filler. The stuf does not take Duretex well at all.
Just incase you had any.
I have swapped to bondo also and tested some on my AT's and worked like a charm.
myn's Tuba HT Build Thread
-
Scott Brochu

- Posts: 2473
- Joined: Sat Mar 10, 2007 11:53 pm
- Location: Maine
- Contact:
Re: myn's Tuba HT Build Thread
Drumming is a way of life.
ME LIKE TO HIT THINGS!
http://billfitzmaurice.info/forum/viewt ... 26&t=11232
ME LIKE TO HIT THINGS!
http://billfitzmaurice.info/forum/viewt ... 26&t=11232
Re: myn's Tuba HT Build Thread
Scott Brochu wrote:What ever you do do not use Elmas Wood filler. The stuf does not take Duretex well at all.
Just incase you had any.
I have swapped to bondo also and tested some on my AT's and worked like a charm.
Thanks for the heads up. I actually used elmers wood filler in the interior of the horn to patch holes. The only Duratex region that still has elmers wood filer is the mouth which will be covered in flat black latex first before Duratex. I hope that is enough for Duratex to stick well.
Re: myn's Tuba HT Build Thread
[== 8/14/2009 ==]
Today I busted out the dense 4" foam roller and painted the back of the mouth area with the flat black latex paint (Glidden) I had mixed up last weekend. It seemed to go on pretty good. Really really black.
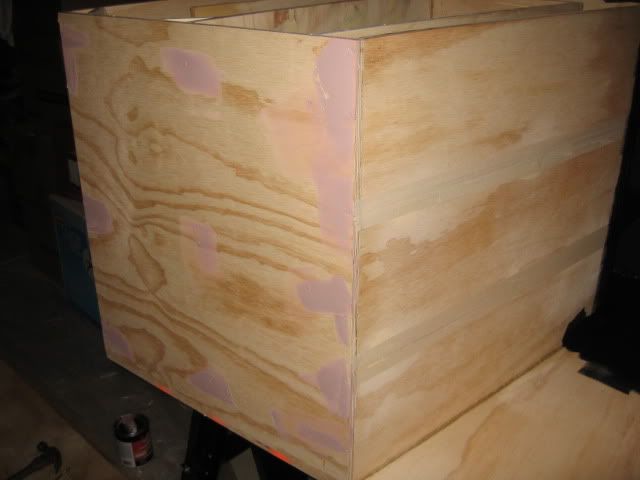
Thanks to the suggestions here I also started the screw hole filing, using Bondo. Note to self.. Do not Bondo next to furnace as the fumes may not only catch fire but also circulate all through the house giving you a headache and making you feel light headed. Seriously.. I am moving my project outside tomorrow to finish up the Bondo work.
Tomorrow I'd like to sand down the Bondo on the side panel and finally put the cover on. If all goes well, Sunday I can begin the straight flush trimming and roundovers.
Question, What is everyone using to secure the access panel to the flanges? Got pics of your secured access panel?
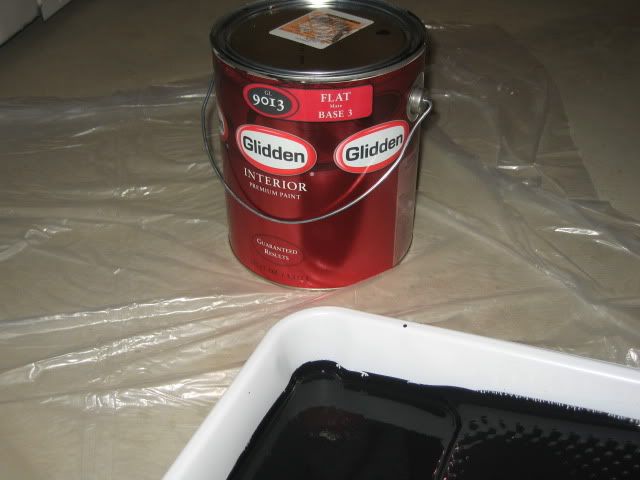
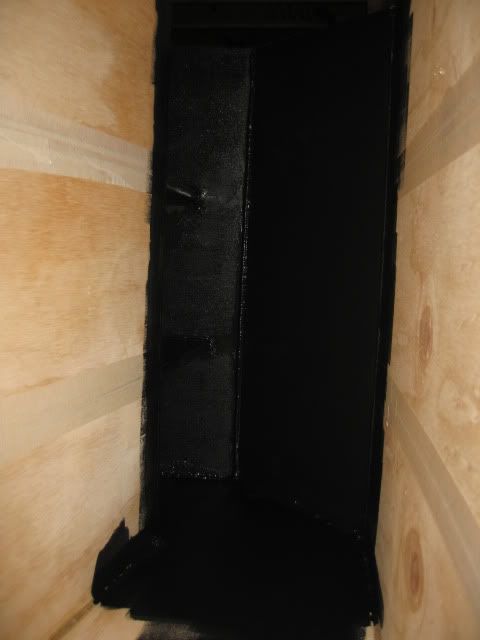

Today I busted out the dense 4" foam roller and painted the back of the mouth area with the flat black latex paint (Glidden) I had mixed up last weekend. It seemed to go on pretty good. Really really black.
Thanks to the suggestions here I also started the screw hole filing, using Bondo. Note to self.. Do not Bondo next to furnace as the fumes may not only catch fire but also circulate all through the house giving you a headache and making you feel light headed. Seriously.. I am moving my project outside tomorrow to finish up the Bondo work.
Tomorrow I'd like to sand down the Bondo on the side panel and finally put the cover on. If all goes well, Sunday I can begin the straight flush trimming and roundovers.
Question, What is everyone using to secure the access panel to the flanges? Got pics of your secured access panel?
-
Scott Brochu
- Posts: 2473
- Joined: Sat Mar 10, 2007 11:53 pm
- Location: Maine
- Contact:
Re: myn's Tuba HT Build Thread
Thats what I thought also. So on my last build of the O15TB I used the wood filler and an expensive spray paint, I think it was rust oliem or something. But I coated the cab in a few coats first before duretex. It helped in some places but in others, where I used a lot of Elmas filler, it flaked off when touched after drying. Right down to the wood filler layer.
Drumming is a way of life.
ME LIKE TO HIT THINGS!
http://billfitzmaurice.info/forum/viewt ... 26&t=11232
ME LIKE TO HIT THINGS!
http://billfitzmaurice.info/forum/viewt ... 26&t=11232
Re: myn's Tuba HT Build Thread
[== 8/15/2009 ==]
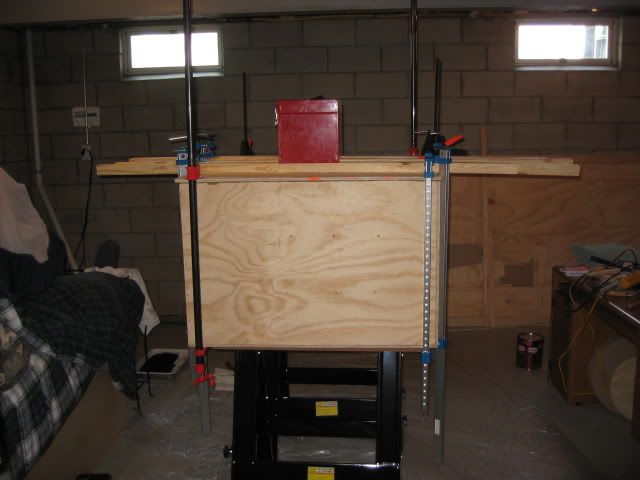
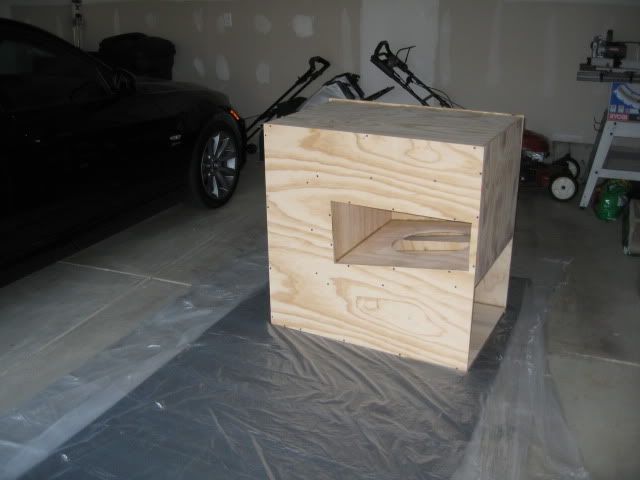
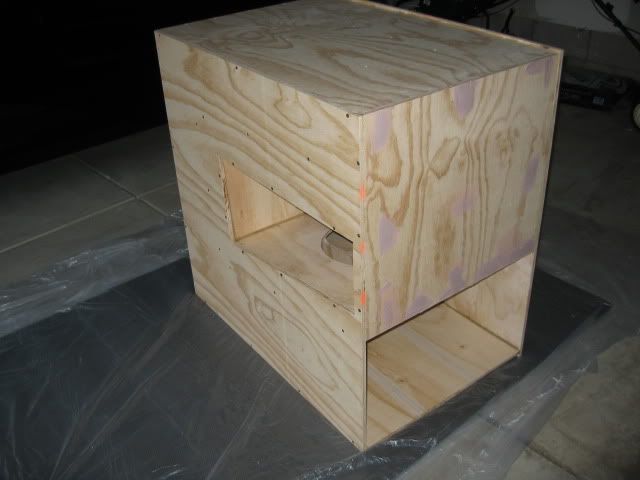
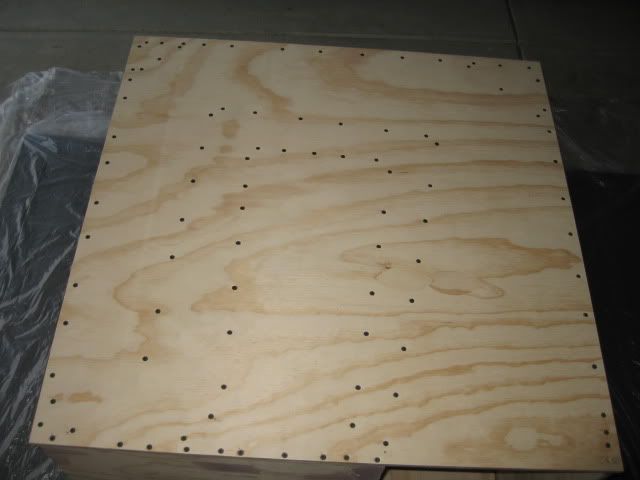
I put the other side panel on today. The marker/reference screws worked out perfectly. I set 6 screws in to the side panel so they would protrude at least an inch and aligned them to the existing predrilled holes in the ajoining vertical panels. This allowed the side panel to hover overtop the PL'd edges resulting in no lateral movement and a very very clean compression.
I did learn something today that I wish I had tried at the very begining of the build. The PL instructions on the side of the tube state to poke a small hole at the tip of the spout. This time instead I cut off the top leaving a larger opening. This not only made the flow of PL better but my arm wasn't near as tired. It took me only 5 mins to apply the PL EXTREMELY generously on the edges. If I had done the same using just a hole poke I am sure it would have taken at least 30 mins and my arm would have been aching right now.
I also read a few posts about people applying water to the joints before PLing. I tried this on an earlier panel but didn't see any benefit. I am suspect my humdity levels were high enough that it didn't matter? For this last panel I didn't apply water.
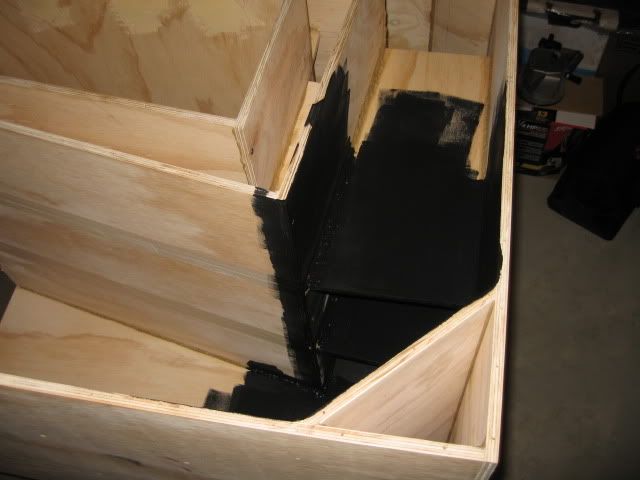
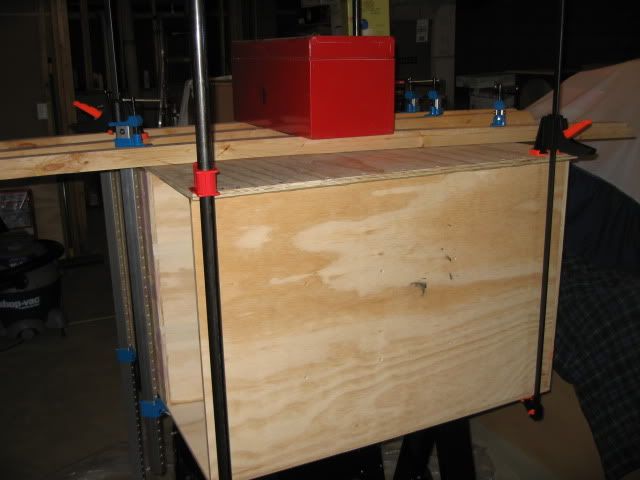
Using 100+ screws to affix the side panel + excessive PL squeezeout is giving me a confident feeling about this enclosure being air tight. Not to sound overly paranoid, I proceeded to also compound clamp as well. Pics below.
I do have an outstanding question:
Mouth Opening Squeeze Out
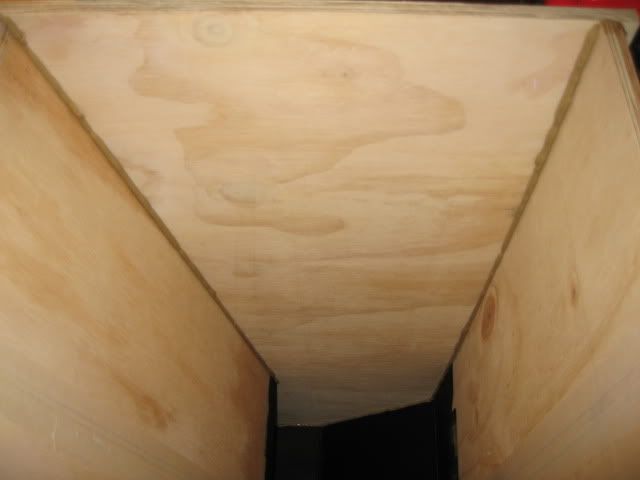
First turn after mouth opening Squeeze Out
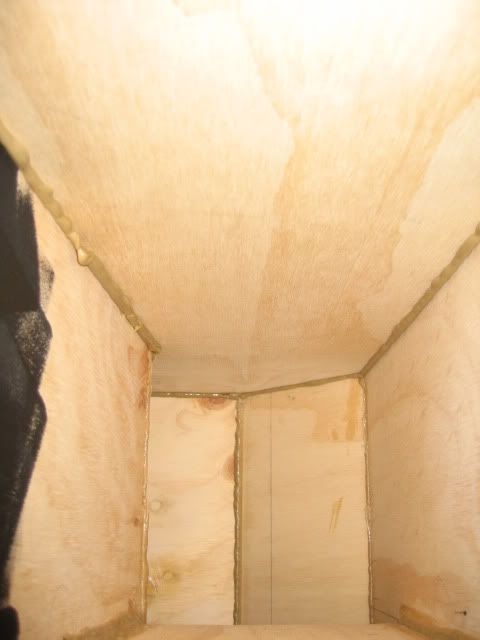
Looking up into access panel checking out Squeeze Out
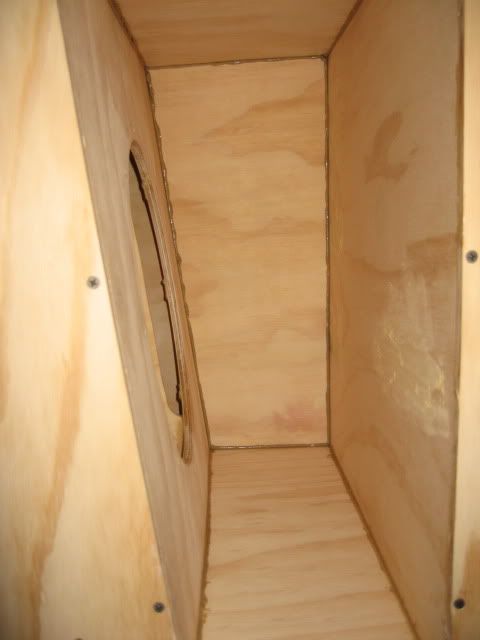

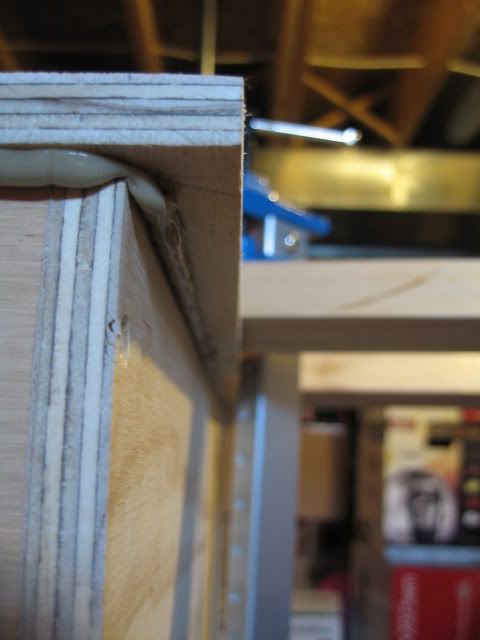
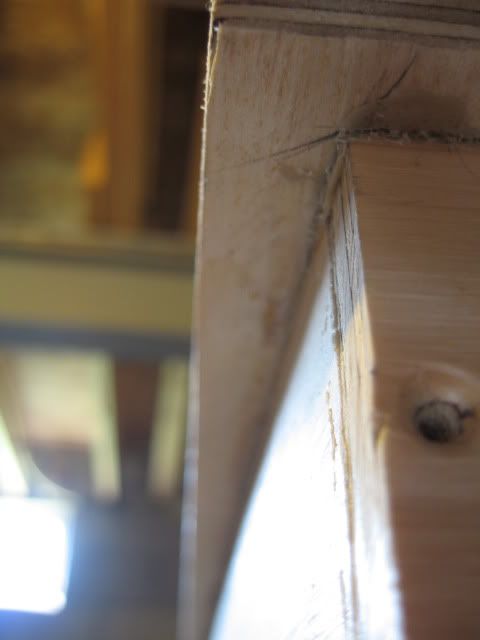
Intentional overhang + Squeeze Out
I put the other side panel on today. The marker/reference screws worked out perfectly. I set 6 screws in to the side panel so they would protrude at least an inch and aligned them to the existing predrilled holes in the ajoining vertical panels. This allowed the side panel to hover overtop the PL'd edges resulting in no lateral movement and a very very clean compression.
I did learn something today that I wish I had tried at the very begining of the build. The PL instructions on the side of the tube state to poke a small hole at the tip of the spout. This time instead I cut off the top leaving a larger opening. This not only made the flow of PL better but my arm wasn't near as tired. It took me only 5 mins to apply the PL EXTREMELY generously on the edges. If I had done the same using just a hole poke I am sure it would have taken at least 30 mins and my arm would have been aching right now.
I also read a few posts about people applying water to the joints before PLing. I tried this on an earlier panel but didn't see any benefit. I am suspect my humdity levels were high enough that it didn't matter? For this last panel I didn't apply water.
Using 100+ screws to affix the side panel + excessive PL squeezeout is giving me a confident feeling about this enclosure being air tight. Not to sound overly paranoid, I proceeded to also compound clamp as well. Pics below.
I do have an outstanding question:
- 1) Question, What is everyone using to secure the access panel to the flanges? Regular drywall screws? Socket Caps with Hurricane Nuts? Do you use a washer behind the screw head to get more surface area grab? Got pics of your secured access panel?
Mouth Opening Squeeze Out
First turn after mouth opening Squeeze Out
Looking up into access panel checking out Squeeze Out
Intentional overhang + Squeeze Out
Re: myn's Tuba HT Build Thread
That's what I do, filler first, flat black latex second, then the Duratex and it's never flaked off. But it's true Duratex will flake off of wood filler. Bondo is ideal, but I haven't used it yet, except for a pre-mixed version which didn't work out to well.myn wrote: Thanks for the heads up. I actually used elmers wood filler in the interior of the horn to patch holes. The only Duratex region that still has elmers wood filer is the mouth which will be covered in flat black latex first before Duratex. I hope that is enough for Duratex to stick well.
Btw, very nice build.
Tomorrow I'm going to stop procrastinating - WB
-
David Carter

- Posts: 1850
- Joined: Mon Jan 01, 2007 7:20 am
- Location: (East) Tennessee, USA
Re: myn's Tuba HT Build Thread
I use socket head cap screws with h-nuts. Here's a pic of the access cover on my first T39 about 18 months ago. Don't pay attention to the crooked jigsaw cuts.myn wrote:
- 1) Question, What is everyone using to secure the access panel to the flanges? Regular drywall screws? Socket Caps with Hurricane Nuts? Do you use a washer behind the screw head to get more surface area grab? Got pics of your secured access panel?

Dave
Built:
- Omni 10 (S2010 + piezo array)
- 2 x DR250 (DL II 2510 + melded array)
- 2 x Titan 39 (BP102 - 14"W)
- 2 x Titan 39 (3012LF - 20"W)
- 4 x DR200 (Delta Pro 8B + melded array)
Built:
- Omni 10 (S2010 + piezo array)
- 2 x DR250 (DL II 2510 + melded array)
- 2 x Titan 39 (BP102 - 14"W)
- 2 x Titan 39 (3012LF - 20"W)
- 4 x DR200 (Delta Pro 8B + melded array)
Re: myn's Tuba HT Build Thread
I used twenty-four #12 sheet metal screws. I was going to use threaded inserts and button-head socket cap screws, but since the access cover was only ever going to see the ground, I decided not to beautify it...
JSS
JSS
Re: myn's Tuba HT Build Thread
I'd really love to use socket head cap screws on the access panel but my thoughts on the burden of aligning that many screws to it's corresponding hurricane nuts scares me.
Madisound sells socket head screws with a pointy end that can be driven directly into wood. I am thinking maybe this would be decent? If I could find some matching black oxide washers I think this would be a good combo.
MaxMercy: Were you afraid that regular screws may strip out after repeated screwing?
Thoughts?
There are a variety of sizes available. What size would work best on the access panel?:
Screw #10: 1.125" Hex Socket Head, Black Ox & Wax Finish (OXSOCKET10X1.25)
Screw #6: 0.75" Hex Socket Head, Black Ox & Wax Finish (OXSOCKET6X3/4)
Screw #8: 1" Hex Socket Head, Black Ox & Wax Finish (OXSOCKET8X1)
-
bgavin
- Posts: 5738
- Joined: Thu May 04, 2006 10:58 am
- Location: Sacramento, Moderator/Licensed BF Builder
- Contact:
Re: myn's Tuba HT Build Thread
Drill your pilot holes first.
Use a caliper to determine the shank diameter between the threads.
Yes, you can jam this thing into the wood, but that wood has to go somewhere (read: splits).
After all this work, don't cut a corner and skip the pilot holes.
Use a caliper to determine the shank diameter between the threads.
Yes, you can jam this thing into the wood, but that wood has to go somewhere (read: splits).
After all this work, don't cut a corner and skip the pilot holes.
My biggest worry is that when I'm dead and gone, my wife will sell my toys for what I said I paid for them.
Re: myn's Tuba HT Build Thread
+1 on the pilot holes.... #12 sheet metal screws are big hardware (probably overkill). Unless you plan on getting into and out of the driver enclosure a lot (I don't), I have zero worries about stripping. I set my cordless drill on the highest torque setting and they are not even close to stripping. Also, I am using 24 of them, so no worries. The load on one particular screw is very minimized.
The thread on the screws you have pictured are very similar to sheet metal screw threads...
JSS
The thread on the screws you have pictured are very similar to sheet metal screw threads...
JSS
-
David Carter
- Posts: 1850
- Joined: Mon Jan 01, 2007 7:20 am
- Location: (East) Tennessee, USA
Re: myn's Tuba HT Build Thread
If I'm understanding your concern correctly, the way I resolved that issue is by drilling two holes in opposite corners while holding the cover very firmly in place. I then installed the h-nuts for those two holes. Next I went ahead and put in the screws through those two holes to hold the cover down tight while I drilled the rest of the holes. Perfect alignment without worrying about the cover shifting at all during the drilling process.myn wrote:I'd really love to use socket head cap screws on the access panel but my thoughts on the burden of aligning that many screws to it's corresponding hurricane nuts scares me.
Dave
Built:
- Omni 10 (S2010 + piezo array)
- 2 x DR250 (DL II 2510 + melded array)
- 2 x Titan 39 (BP102 - 14"W)
- 2 x Titan 39 (3012LF - 20"W)
- 4 x DR200 (Delta Pro 8B + melded array)
Built:
- Omni 10 (S2010 + piezo array)
- 2 x DR250 (DL II 2510 + melded array)
- 2 x Titan 39 (BP102 - 14"W)
- 2 x Titan 39 (3012LF - 20"W)
- 4 x DR200 (Delta Pro 8B + melded array)
Re: myn's Tuba HT Build Thread
Thats a great idea! I thought for some reason that the access cover flanges were only 1/2" and that I would be battling with the hurricane nut overhang from the backing if I didn't get it perfectly aligned but it appears it calls for 3/4". which gives me a little more room that I thought.
Did you use a washer underneath the button head of the socket cap?
Thanks.
Did you use a washer underneath the button head of the socket cap?
Thanks.
Re: myn's Tuba HT Build Thread
[== 8/17/2009 ==]
Yesterday I took it easy, letting the PL fully cure. Last night I used a chisel and got the majority of the external squeezeout removed.
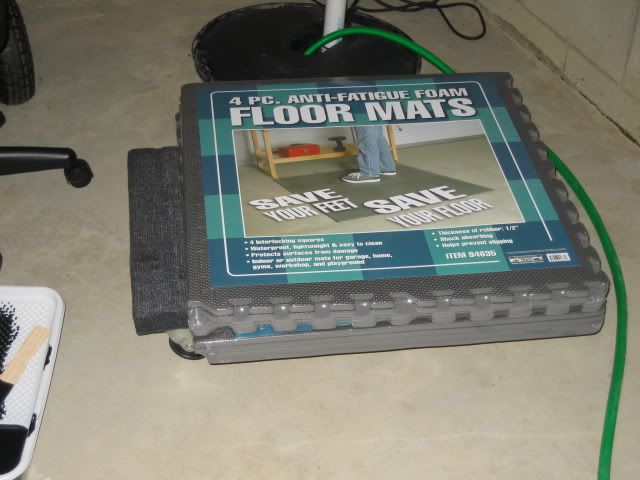
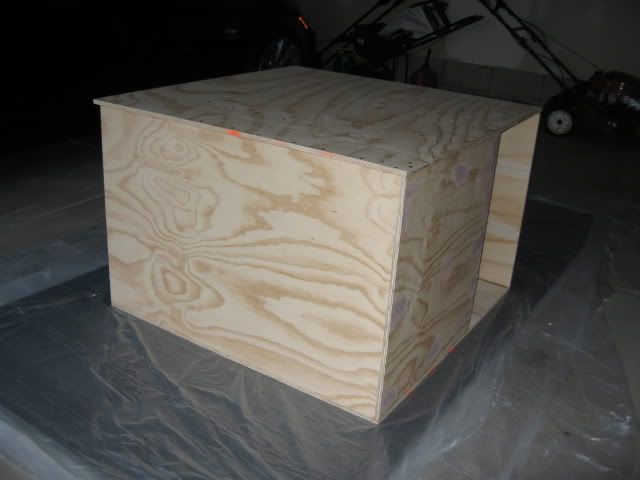
Today was moving day, For the THT that is. I relocated it into the garage for the final finishing (flush trim, round overs and sanding). I let it rest ontop of these 4 peace anti-fatigue foam floor mats that were on sale at Harbor Freight for $6.99. They seemed to fit the bill perfectly, protecting the corners and edges of the wood and allowing me to easily roll it around.
After lifting it out of the basement into the garage my Wife commented on how light it was. She was thinking it was going to be as heavy as the smaller 14cu MDF EBS/LLT enclosure I built last year. I think she was pleasantly surprised, as was I . I don't think I'd want to make it any wider though.
Unfortunately this week is looking pretty grim as far as Sun goes.. Oh well, I'll do what I can in the garage.


Yesterday I took it easy, letting the PL fully cure. Last night I used a chisel and got the majority of the external squeezeout removed.
Today was moving day, For the THT that is. I relocated it into the garage for the final finishing (flush trim, round overs and sanding). I let it rest ontop of these 4 peace anti-fatigue foam floor mats that were on sale at Harbor Freight for $6.99. They seemed to fit the bill perfectly, protecting the corners and edges of the wood and allowing me to easily roll it around.
After lifting it out of the basement into the garage my Wife commented on how light it was. She was thinking it was going to be as heavy as the smaller 14cu MDF EBS/LLT enclosure I built last year. I think she was pleasantly surprised, as was I
Unfortunately this week is looking pretty grim as far as Sun goes.. Oh well, I'll do what I can in the garage.
Re: myn's Tuba HT Build Thread
DAMN. You took zero chances on the screwing-on of the other side!!! I bet you went through at least one battery on your drill/driver....
Looking good. You'll be testing that driver in there soon...can't wait to hear what you think about it.
JSS
Looking good. You'll be testing that driver in there soon...can't wait to hear what you think about it.
JSS