
just sand the access panel and you'll be fine.
And, depending on where you decide to put the wiring connection on the outside of the box, you can put it on the access panel and run the wire straight to the driver, or you can place it anywhere else - drill holes through the panels for a relatively direct path to the driver chamber. Just make sure that you use a good sealant to fill those holes after you run the speaker wire!
myn's Tuba HT Build Thread
Re: myn's Tuba HT Build Thread
Low End Junkie for over 20 years.
4 DR250s
4 Tuba36s @ 30" wide
2 ATs
...and a very serious addiction to the smell of BB sawdust and curing PL.
4 DR250s
4 Tuba36s @ 30" wide
2 ATs
...and a very serious addiction to the smell of BB sawdust and curing PL.
Re: myn's Tuba HT Build Thread
[== 6/12/2009 ==]
I had to take a day off last night. A crazy thing happen to me while driving back to work from the Dentist. My sunroof exploded! Litterly. BMW doesn't want to admit it's a manufacture's defect so I am going to have to claim it under insurance. Scared the crap out of me!
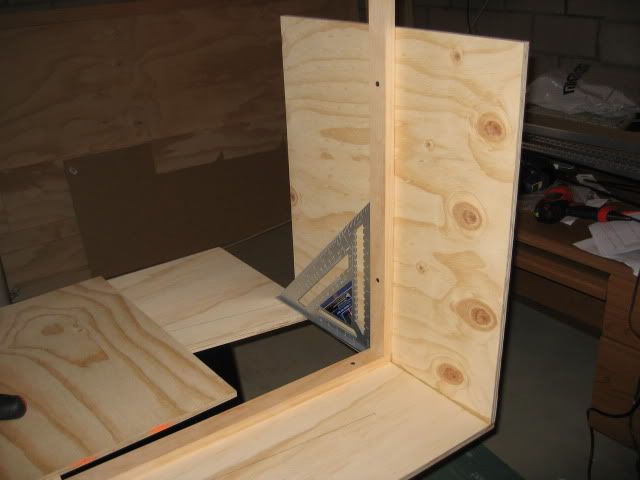
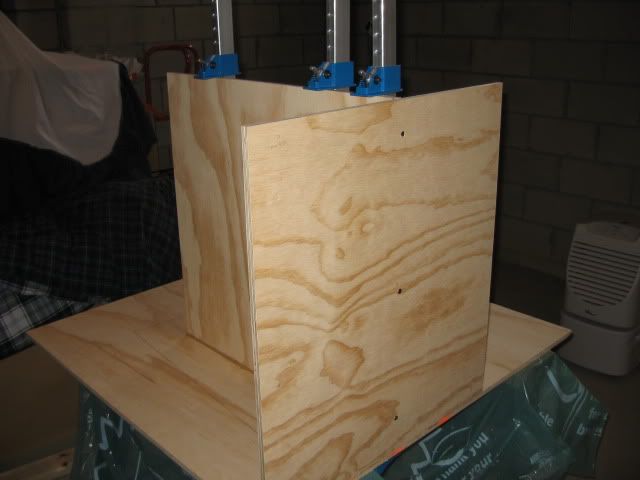
In any case, I managed to get panel 1 cut and glued/clamped in today.
Instead of using my table saw, I decided to use the circular saw. Djohnson573 made the recommendation to me to use a t-bevel and align the circular saw blade with the it which mimics the angle on the panel. This really turned out to work out well:
As for the clamping, I decided to listen to jcmbowman and use his method with the exception I kept the clamps on for now but I did remove the guide board to prevent the PL sticking from it. Tommorow I'll extract the screws:
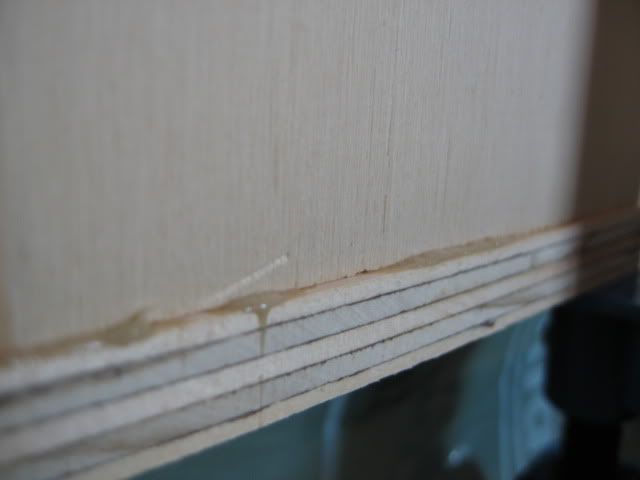
Now I heard LOTS of folks say how sticky and disgusting the PL Premium can be and the Plans iterate this same message. I made the assumption it was similar to Liquid Nails which I am used to using on my past speaker projects. This stuff is STICKY and hard to get off. I am glad I was wearing gloves. It seems to do a great job of securing the panels though.
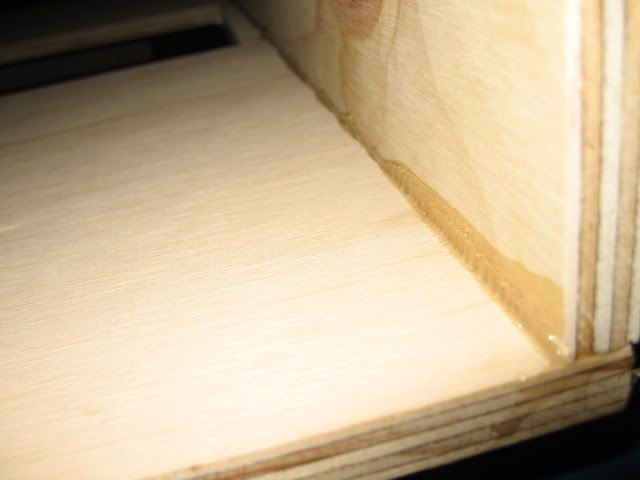
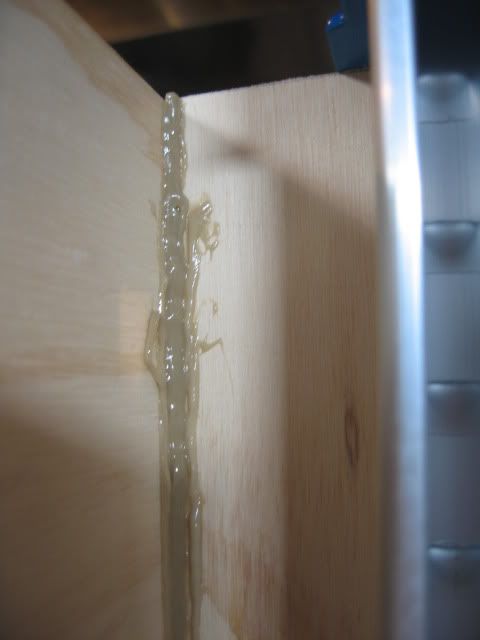
Here is my first panel being glued with PL Premium. I am unsure of how much overflow/squirt-out should occur. Please let me know if this looks okay and if I should use more/less on the next panel. Also. What do people do in situations where another panel buts up against the edge of another panel that has PL Overflow? Do you just scrape it off in that area so the panels can butt up against each other tightly?:


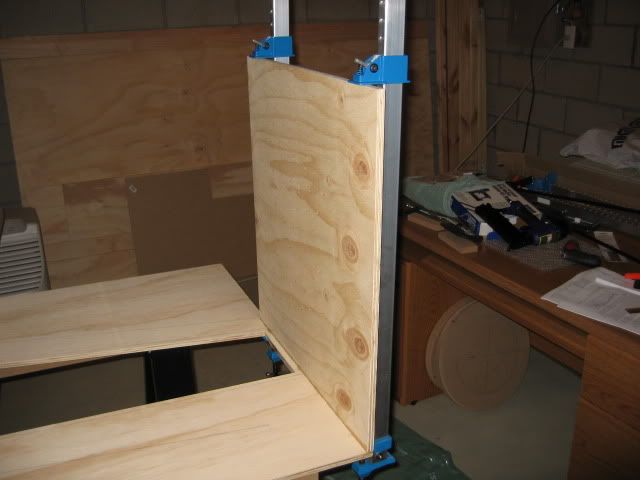
After screwing and clamping I removed the guideboard:
Tomorrow I plan on doing panel 2.
I had to take a day off last night. A crazy thing happen to me while driving back to work from the Dentist. My sunroof exploded! Litterly. BMW doesn't want to admit it's a manufacture's defect so I am going to have to claim it under insurance. Scared the crap out of me!
In any case, I managed to get panel 1 cut and glued/clamped in today.
Instead of using my table saw, I decided to use the circular saw. Djohnson573 made the recommendation to me to use a t-bevel and align the circular saw blade with the it which mimics the angle on the panel. This really turned out to work out well:
5. Place one edge of your T-bevel on your table saw table or circular saw base plate, hold the other edge against the blade, and adjust accordingly to get the exact angle that you took from the layout drawing on your speaker side. IMHO, if you did an accurate layout drawing, this method is much more accurate than relying on the saw markings.
As for the clamping, I decided to listen to jcmbowman and use his method with the exception I kept the clamps on for now but I did remove the guide board to prevent the PL sticking from it. Tommorow I'll extract the screws:
I predrill, primarily because I have a much easier time getting the panels lined up perfectly square before I put the PL on.
1) Line up the next panel
2) clamp
3) predrill screw holes (I go about 3/8" into the piece I'm attaching)
4) unclamp
5) apply PL
6) Clamp
7) screw, making sure to hit the hole on the panel being attached
take off clamps and admire perfect alignment of panel.
Now I heard LOTS of folks say how sticky and disgusting the PL Premium can be and the Plans iterate this same message. I made the assumption it was similar to Liquid Nails which I am used to using on my past speaker projects. This stuff is STICKY and hard to get off. I am glad I was wearing gloves. It seems to do a great job of securing the panels though.
Here is my first panel being glued with PL Premium. I am unsure of how much overflow/squirt-out should occur. Please let me know if this looks okay and if I should use more/less on the next panel. Also. What do people do in situations where another panel buts up against the edge of another panel that has PL Overflow? Do you just scrape it off in that area so the panels can butt up against each other tightly?:
After screwing and clamping I removed the guideboard:
Tomorrow I plan on doing panel 2.
Re: myn's Tuba HT Build Thread
Did you put a square between the bottom and upright panels to make sure that they are
square, ie, not off by a few degrees? I just started an auto tuba and used this procedure
which I learned from either MYORK or fender3x I think, can't remember.
square, ie, not off by a few degrees? I just started an auto tuba and used this procedure
which I learned from either MYORK or fender3x I think, can't remember.
TomS
-
LelandCrooks

- Posts: 7242
- Joined: Thu May 04, 2006 9:36 am
- Location: Midwest/Kansas/Speaker Nirvana
- Contact:
Re: myn's Tuba HT Build Thread
+1. If that 1st panel is off by a bit, it will throw the whole box out, and you will struggle the whole time. I have an old carpenters square that I clamp to the panels. There's also a square jig recommended in the plans. I like the square better though.tammojsmit wrote:Did you put a square between the bottom and upright panels to make sure that they are
square, ie, not off by a few degrees? I just started an auto tuba and used this procedure
which I learned from either MYORK or fender3x I think, can't remember.
If it's too loud, you're even older than me! Like me.
http://www.speakerhardware.com
http://www.speakerhardware.com
-
djohnson573

- Posts: 324
- Joined: Tue Oct 28, 2008 7:41 am
- Location: Florida
Re: myn's Tuba HT Build Thread
myn, seriously heed the advice above. That has got to start out perfectly square. I even clamped my first panel to a pair of framing squares as seen below:

BTW, the PL amount/sqeeze out is you are experiencing is what I am used to. And, yes, take a chisel and remove any PL that interferes with an ajoining panel.
BTW, the PL amount/sqeeze out is you are experiencing is what I am used to. And, yes, take a chisel and remove any PL that interferes with an ajoining panel.
Dennis
Built/Own:
- 4 x Titan 39 (14"W) BP102 loaded
- 2 x TLAH
- 4 x OT12 Deltalite 2512 loaded
On Deck:
- 3 Auto Tubas
Built/Own:
- 4 x Titan 39 (14"W) BP102 loaded
- 2 x TLAH
- 4 x OT12 Deltalite 2512 loaded
On Deck:
- 3 Auto Tubas
Re: myn's Tuba HT Build Thread
Myn,
Looking good! I have one panel to go before I attach the the other side....looks like I may be able to be done before the end of June (knock on wood)...
JSS
Looking good! I have one panel to go before I attach the the other side....looks like I may be able to be done before the end of June (knock on wood)...
JSS
-
bgavin
- Posts: 5738
- Joined: Thu May 04, 2006 10:58 am
- Location: Sacramento, Moderator/Licensed BF Builder
- Contact:
Re: myn's Tuba HT Build Thread
I lay a bead of PL then spread with a putty knife. Ditto for the mating piece.
Leave the squeeze out until it dries.
Take a scraper to the dried squeeze out, and it comes off very clean.
If you wipe it wet, it will spread and leave a much wider layer of PL on the wood around the joint.
This is problematic if you plan to stain, etc.
Leave the squeeze out until it dries.
Take a scraper to the dried squeeze out, and it comes off very clean.
If you wipe it wet, it will spread and leave a much wider layer of PL on the wood around the joint.
This is problematic if you plan to stain, etc.
My biggest worry is that when I'm dead and gone, my wife will sell my toys for what I said I paid for them.
Re: myn's Tuba HT Build Thread
maxmercy: DAG! you're really quick. I'm currently trending about a panel a day. At this rate I will be done in 8 more days. Got any pics? How you finishing it? Similar to your mains? If so, how do you keep the PL all neat and tidy for the mouth and bracing that is visible?
bgavin: Great idea. I think I am going todo that for my next panel. My hand is actually tired from squeezing the trigger on the caulking gun trying to extract the PL out. It comes out so sloooow. I think if I used a putty knife to spread it, it would make it more even.
[== 6/13/2009 ==]
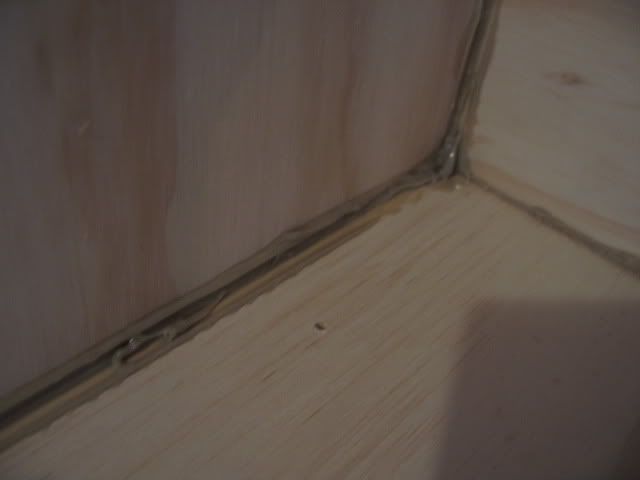
Today I installed Panel 2. I forgot to mention in my previous post that I did square everything up. I am using a roofing triangle to handle the squaring.
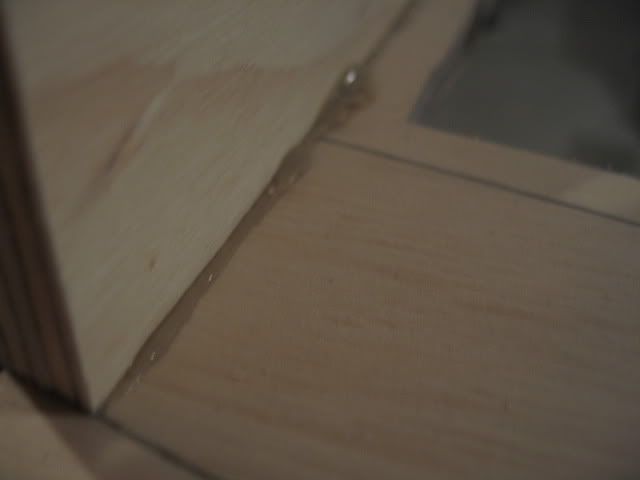
I think I put less PL on this panel as it didn't squirt out NEAR as much as the previous panel. I applied more PL to the seam similar to a caulk. I'm overly paranoid about getting this air tight. The next panel will have alot more PL.
You can see not much PL oozed out on this panel. Is this a bad thing?

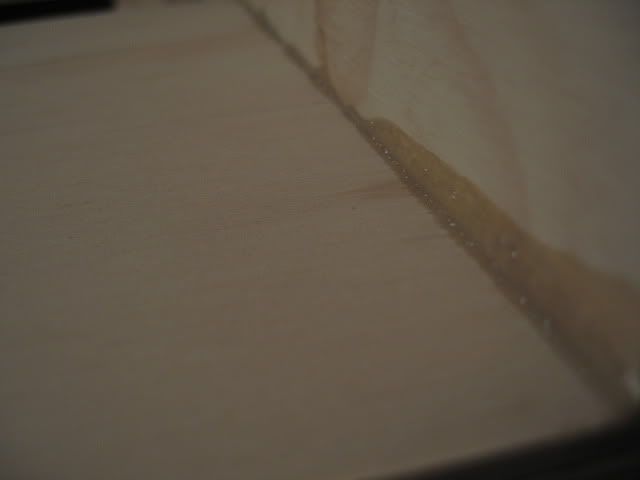
So I decided to us PL as a caulk.
This disfigurement is on the side panel. No Panel buts up against this area but I still think I should do something with it. Some wood filer okay?

bgavin: Great idea. I think I am going todo that for my next panel. My hand is actually tired from squeezing the trigger on the caulking gun trying to extract the PL out. It comes out so sloooow. I think if I used a putty knife to spread it, it would make it more even.
[== 6/13/2009 ==]
Today I installed Panel 2. I forgot to mention in my previous post that I did square everything up. I am using a roofing triangle to handle the squaring.
I think I put less PL on this panel as it didn't squirt out NEAR as much as the previous panel. I applied more PL to the seam similar to a caulk. I'm overly paranoid about getting this air tight. The next panel will have alot more PL.
You can see not much PL oozed out on this panel. Is this a bad thing?
So I decided to us PL as a caulk.
This disfigurement is on the side panel. No Panel buts up against this area but I still think I should do something with it. Some wood filer okay?
Re: myn's Tuba HT Build Thread
Hey myn,
Using dadoes really speeds up the assembly process. I also caulk my joints after clamping, just to be sure.. DO not worry about the gouge in the wood unless the defect goes all the way through...it's inside anyway. I will finish it like the mains, but the horn mouth will have a cloth grille over it held in place by magnets (I have 2 cats that do NOT need to get stuck inside the THT, they would sleep in the TT before I put a grille on it as well). I paint the inside of the horn mouth black before I install the top, for easier access. I just finished putting the top on, actually:

You can see the dadoes as the unpainted grooves in the horn mouth.
Here's a pic of the center SLA before wetsand and polish (tomorrow, probably):
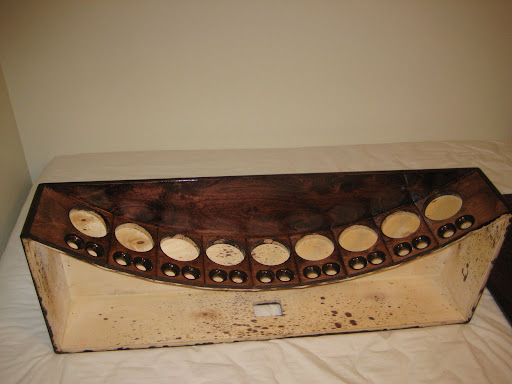
JSS
Using dadoes really speeds up the assembly process. I also caulk my joints after clamping, just to be sure.. DO not worry about the gouge in the wood unless the defect goes all the way through...it's inside anyway. I will finish it like the mains, but the horn mouth will have a cloth grille over it held in place by magnets (I have 2 cats that do NOT need to get stuck inside the THT, they would sleep in the TT before I put a grille on it as well). I paint the inside of the horn mouth black before I install the top, for easier access. I just finished putting the top on, actually:
You can see the dadoes as the unpainted grooves in the horn mouth.
Here's a pic of the center SLA before wetsand and polish (tomorrow, probably):
JSS
Re: myn's Tuba HT Build Thread
maxmercy wrote:Hey myn,
but the horn mouth will have a cloth grille over it held in place by magnets (I have 2 cats ...
JSS
TomS
Re: myn's Tuba HT Build Thread
maxmercy: Nice work! I love that finish on your speakers. Can't wait to see the finished THT and hear your impressions. I was LOLing when I was reading about your cats. I can just picture one of them crawling inside the inner caverns of the THT to the point where it gets so small it gets stuck.. Good idea with the grill.
What do you caulk with? The PL or something else?
And how wide is yours?
What do you caulk with? The PL or something else?
And how wide is yours?
Re: myn's Tuba HT Build Thread
There was someone else on the forum that tore apart a THT on the spot because their cat was stuck inside as well...It was after reading that story that I decided not to take chances.
Actually, the cats do not claw at the current grille, they have a few scratching posts and old chairs they do that to...strangely enough, they would sit in the TT even while it was playing, before the grille went on, but they run and hide when they hear the garbage truck...odd.
I do caulk with the PL, it's there and convenient...and it expands.
My THT panels are the normal 23.5" wide, maybe a touch more, as I got the panel sides parallel in less saw passes than I had originally intended. The photo is not distorted. This thing is a BEAST.
JSS
-
djohnson573
- Posts: 324
- Joined: Tue Oct 28, 2008 7:41 am
- Location: Florida
Re: myn's Tuba HT Build Thread
Hmm...I would have thought that 25hz @45 volts would pop a cat out of most of Bill's designs. 
Dennis
Built/Own:
- 4 x Titan 39 (14"W) BP102 loaded
- 2 x TLAH
- 4 x OT12 Deltalite 2512 loaded
On Deck:
- 3 Auto Tubas
Built/Own:
- 4 x Titan 39 (14"W) BP102 loaded
- 2 x TLAH
- 4 x OT12 Deltalite 2512 loaded
On Deck:
- 3 Auto Tubas
-
Sydney
Re: myn's Tuba HT Build Thread
I've had my cats bring in rodents, release them and then chase them into my T24.
This has happen more than a couple of times:
When the "sound treatment" is applied the critter will freeze at the bottom reflector ( knowing what's waiting on the outside ).
At that point I yell "Mouse", my dogs arrive, I stick my gloved hand in, direct the intruder out...
My dogs grab and take the new toy outside, and play with it, until it "breaks".
Re: myn's Tuba HT Build Thread
[== 6/14/2009 ==]
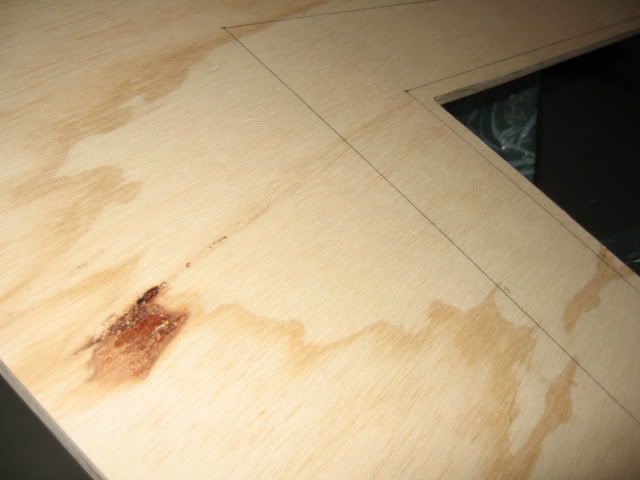
So today I made my first boo-boo. For Panel 3 I read the plans as having angle cuts like trapezoid \________/. When infact they were parallelograms \________\ . A couple of reason why I thought this. The angle is only 6 degrees so without blowing up the image in the plans, it's hard to tell which way it sways. The other factor was that the verbiage and arrow locations are below the panel it representing a parallelogram:
\__ X degrees front edge. X Degrees rear edge ___/
In any case, I recut out panel 3 and all is good. I am currently awaiting a Dayton DVC385-88 which should be here Tuesday. Interestingly enough PE recommended 1/4-20 bolts. I though they were 10-32. Does anyone have this driver and can confirm which size it requires?
I noticed that this panel was a little warped so I decided to clamp it to 1.5" thick MDF I had laying around. In hopes it would flatten the board out a bit. I also turned off the dehumidifier in the basement thinking it needs some moisture.
For Panel 4, I recon the angle cuts are trapezoids: /___________\ . These panel cuts will wait until the driver arrives.