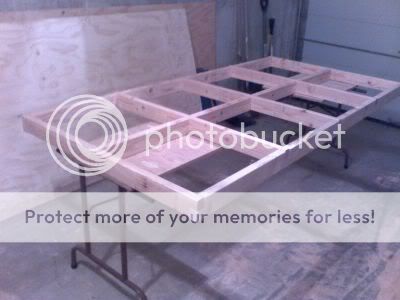
Aside from Bill's panel cutting jig and circular saw sleds, I needed a work surface. I don't have a dedicated work space, so I have to use my garage. A temporary "table" was the ticket. Tired of panels falling on my feet when resting on sawhorses or splintering during the last 1/4", I decided to build a panel cutting table:
Parts List
---------
- Folding banquet table legs
- 1" and 2" coarse drywall screws (deck screws or wood screws would work, too)
- 6 2" x 4" x 8'
- scrap 3/4" plywood (low quality is fine, used for leg supports)
Assembly
---------
- We all know a 2" x 4" is really a 1.5" x 3.5", right?
- Cut 3 2" x 4" x 8' in half, creating 6 2" x 4" x 4' - you'll need 5
- Start by making all of your cuts. I "notched" the ends with a jigsaw. I'm a mediocre woodworker, so you can see the not-so-straight cuts:

- I "notched" the inside cuts with repeated passes on a table saw. You'll need three inside notches per 8' side (2 sides):
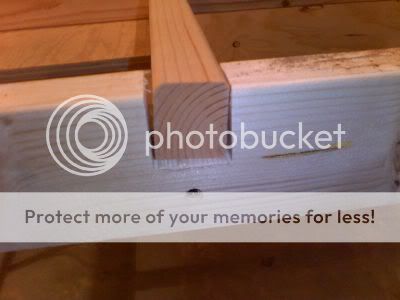
...and 1 notch for both ends and each of the 3 supports. This seems confusing and is a bit hard to describe, but it will make sense when looking at the pictures.
- DO NOT GLUE ANYTHING!! I'll explain later.
- Next, lay out the 2 8' sides and 8' middle support, notches facing up
- Place the 4' ends and 3 4' supports on top of the 8' boards, notches facing down
- Using 2" drywall screws, countersink and screw together the corners and 8' sides into the 4' supports. Keep the screws as low as possible; I'll explain later.
- Next countersink and screw the 8' middle support to the 4' supports. You'll need to "toenail" these in:
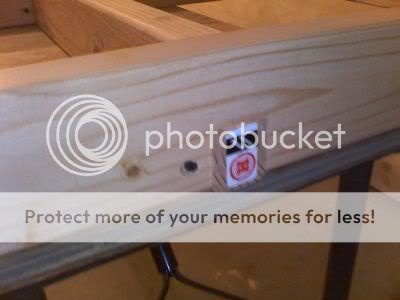
- It's time to attach the legs. You'll need 2 pieces of plywood, roughly 20" x 26" (26" to go from end to nearest support).
- Flip the table upside-down and attach the plywood with countersunk 1" drywall screws. DON'T USE 2"!! More on this later.

- Attach the legs with the hardware provided. If no screws provided, 3/4" panheads will do
- flip it over and you're done!!!
Notes
------
- DO NOT GLUE!! I know, we're so used to glueing these things, but you may need to replace supports over time. Remember, when you cut a panel, you'll need to set your circular saw a bit deeper than the actual panel size, so you'll be cutting into the table on every pass.
- Keeping the screws low prevents hitting them if you happen to leave your saw depth to deep
- Finally, use the 1" drywall screws to secure the plywood leg supports for the exact same reason as the previous note: so you don't hit them during cutting.
This turned out to be an invaluable project and made my build go that much easier. When finished, I just fold the legs and put it at one end of my garage. That's good because it's getting colder here in New England and I want my space back. Enjoy!


