Page 1 of 31
myn's Tuba HT Build Thread
Posted: Tue Jun 09, 2009 9:50 pm
by myn
So after much
discussion and contemplating between the different tuba designs I finalized on the Tuba HT. I was torn between it and the Table Tuba. The final decision came down to the realization that if I didn't build the Tuba HT, I'd regret it, wanting ultimately another table tuba which I don't have space for.
From the folks who remember my
original question thread, I wanted to compliment my existing subwoofer which is a Mach5Audio 18" IXL18.4 in a 13 cu foot EBS/LLT alignment tuned to 14hz. (below). Once my THT is completed I'll be doing some listening tests and ultimately decide if I should retain the LLT. I've got a DCX2496 that I'll end up using as the crossover for both of these.
My Existing EBS/LLT
http://i216.photobucket.com/albums/cc41 ... G_4112.jpg
This will be the diary of my build and progress, I'm sure I'll have some questions along the way:
[== Last Week ==]
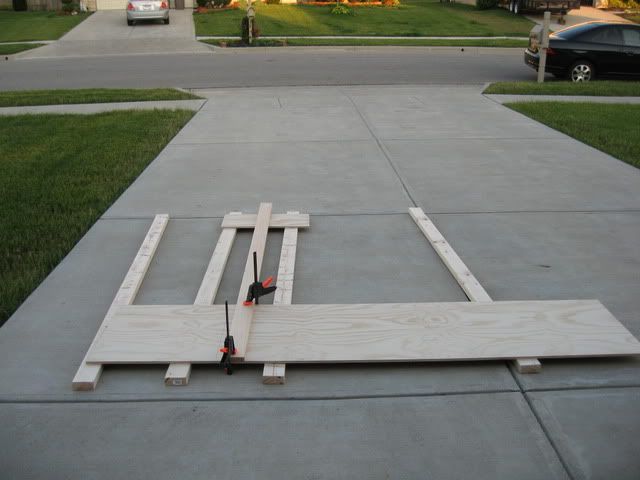
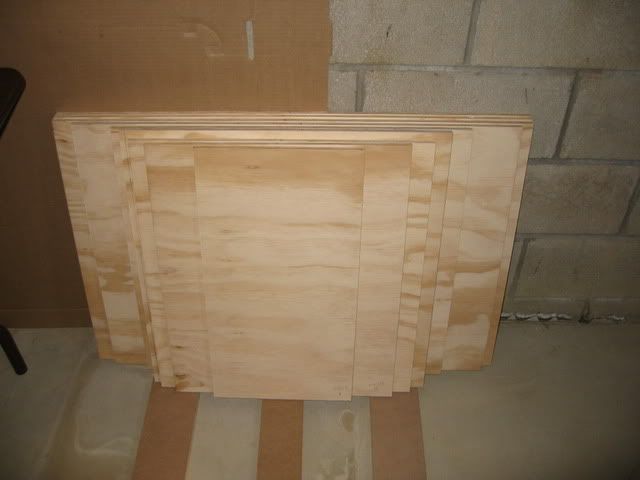
Last week I downloaded
Cut List which is a free Cut List program. It did a great job of optimizing a cutsheet for the Tuba HT based on the precut dimensions in the plans. This past weekend I cut up the panels (pics below)
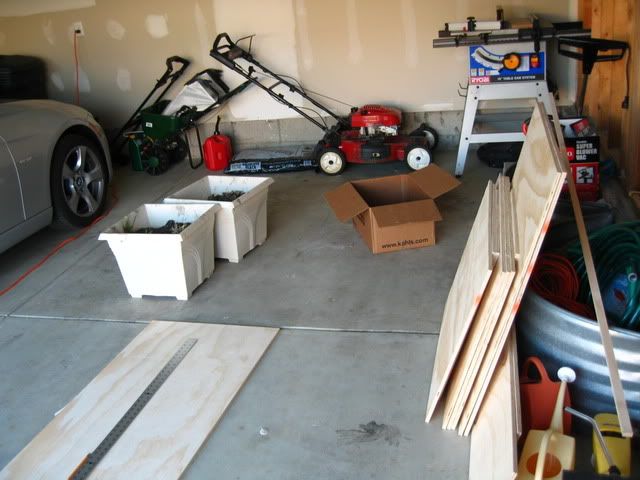
I decided to go with 23.5" wide panels (24.5" total width) as this is the most efficient use of lumber. Speaking of lumber, As there weren't any local lumber yards that cut down 4x8 sheets of Arauco I decided to take advantage of Ryder's current truck rental deal. $35 a day with 500 free miles. Great bang for the buck I must say. I stocked up at Menards in Marion OH which is about a 40 min drive.
As for the sub driver, I am currently leaning towards the
15" Dayton DVC for a couple of reasons. #1) The THT was designed around it's cousin, the tempest. #2) The gasket on it seems to be made for flush mount orientations. I was also thinking about the
Dayton Reference HO for $10 bucks more. Thoughts?
Re: myn's Tuba HT Build Thread
Posted: Tue Jun 09, 2009 9:57 pm
by myn
[ == This Weeks Plans (Week of 06/08/2009) ==]
1) Draw out panel configuration on side panel
2) Take the "plunge" and cut the access hole. I'm a little nervous about this step. Any advice?
3) Assemble at least 2 panels
Re: myn's Tuba HT Build Thread
Posted: Tue Jun 09, 2009 10:35 pm
by jcmbowman
myn wrote:2) Take the "plunge" and cut the access hole. I'm a little nervous about this step. Any advice?
Yes - get some scrap wood and practice a few times. After you've done it once or twice you'll be a LOT less nervous.
Re: myn's Tuba HT Build Thread
Posted: Wed Jun 10, 2009 7:36 am
by DJPhatman
Obtain the driver. You need to install and test fit it for the baffle, before it is installed. If you try to do this later, you will regret it. :iitp:
Re: myn's Tuba HT Build Thread
Posted: Wed Jun 10, 2009 8:57 am
by myn
Yeah, Gonna buy the Dayton DVC tonight.
Debating if I should buy some gasket material for the access covers from Parts Express as well or just use some weather stripping?
Re: myn's Tuba HT Build Thread
Posted: Wed Jun 10, 2009 9:01 am
by SoundInMotionDJ
myn wrote:Debating if I should buy some gasket material for the access covers from Parts Express as well or just use some weather stripping?
Use the stuff from parts express - it is not just weather stripping. The PE gasket will compress to nothing and stick to both sides forming a much better seal.
--Stan Graves
Re: myn's Tuba HT Build Thread
Posted: Wed Jun 10, 2009 9:43 am
by myn
SoundInMotionDJ wrote:myn wrote:Debating if I should buy some gasket material for the access covers from Parts Express as well or just use some weather stripping?
Use the stuff from parts express - it is not just weather stripping. The PE gasket will compress to nothing and stick to both sides forming a much better seal.
--Stan Graves
This it?
http://www.parts-express.com/pe/showdet ... er=260-542
Re: myn's Tuba HT Build Thread
Posted: Wed Jun 10, 2009 9:47 am
by bgavin
OP, I start plunge cuts with a fine tooth plywood blade, kerf at 0.090".
I plunge all four sides of the cover, just enough to get a saber saw blade into the cut.
The remainder of the cut is done with the saber saw.
My Bosch blade is a close match for the plywood blade.
I know my saber saw kerf is 1.565" from the guide, so I can match the plunge cut.
Completely build and complete the panel with the access cover before it is installed.
I do these early in the build cycle for ease of construction, plus I don't want to be bogged down with this near completion.
Re: myn's Tuba HT Build Thread
Posted: Wed Jun 10, 2009 10:09 am
by myn
bgavin wrote:OP, I start plunge cuts with a fine tooth plywood blade, kerf at 0.090".
I plunge all four sides of the cover, just enough to get a saber saw blade into the cut.
In my case I don't have another blade for my circular saw

. Would I still want to follow this, making as small of a plunge cut as possible and say finish it off with a jigsaw? Or would a longer cut with the circular saw be better?
Re: myn's Tuba HT Build Thread
Posted: Wed Jun 10, 2009 12:00 pm
by gdougherty
A low grade plywood blade is cheap at any hardware store. You won't be using it all that often.
Re: myn's Tuba HT Build Thread
Posted: Wed Jun 10, 2009 12:04 pm
by maxmercy
myn,
Great to see you are going to town on the THT. I have the first 4 panels glued up on mine (before brace fabrication comes into play), but since I just came off a 32 hour on-call shift, I'll be getting some z's this afternoon before I try to glue up a few more this evening...
JSS
Re: myn's Tuba HT Build Thread
Posted: Wed Jun 10, 2009 12:44 pm
by bgavin
I use as small a circular saw cut as possible. Just enough to cut through the wood.
The jigsaw blade isn't as wide as the circular saw, so you will see where the plunge was made.
A bit of sandpaper, black paint, and Duratex makes this invisible.
Re: myn's Tuba HT Build Thread
Posted: Wed Jun 10, 2009 10:28 pm
by myn
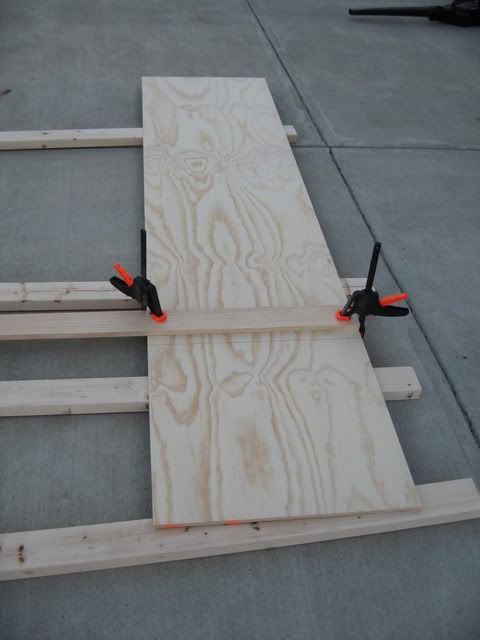
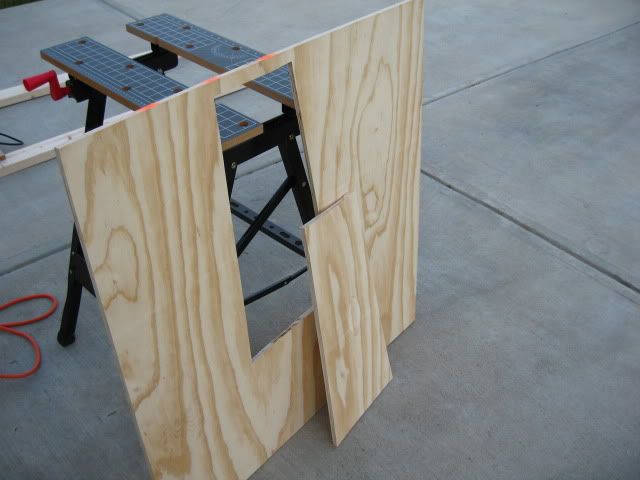
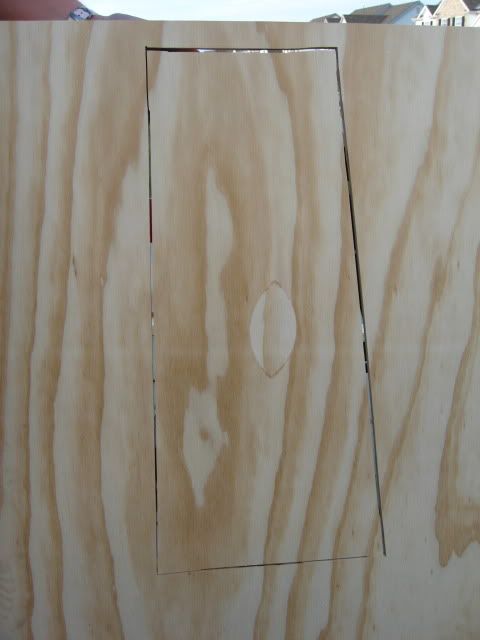
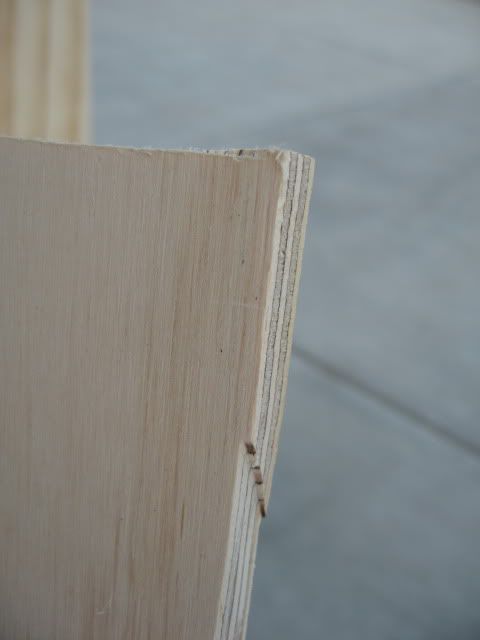
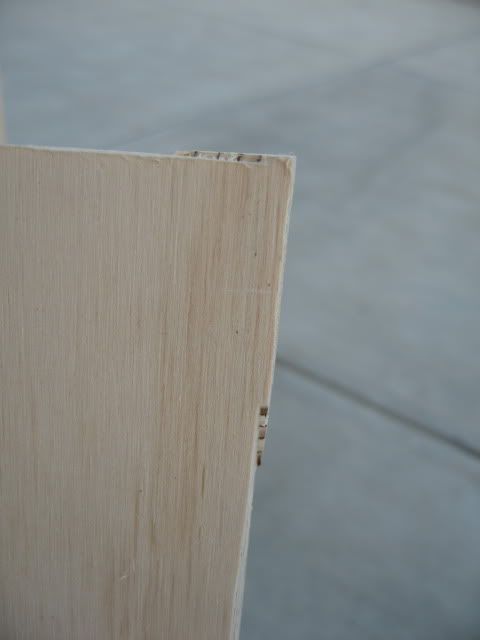
[== 6/10/2009 ==]
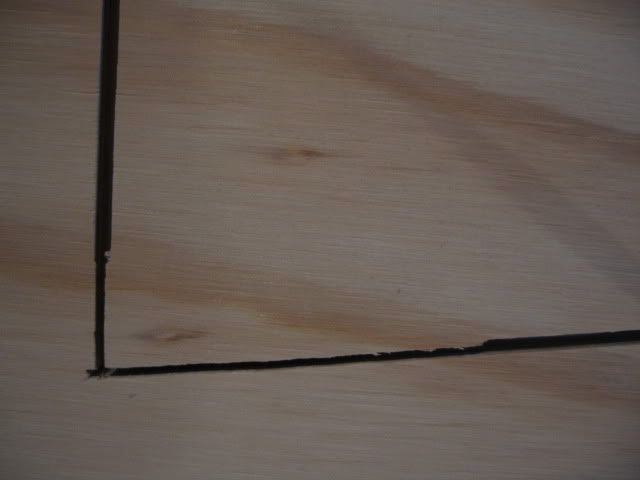
So more progress tonight. I cut out the access panel using my circular saw and finished the corners with a jigsaw. Not sure I am too impressed with the outcome. I took some pics below. As you can see there is a major diff between the kerf of my jigsaw to my circular saw (you guys warned me). I am guessing some sanding down of the access panel to make the edges flat and even will remedy this?
As far as the access hole itself though, it looks clean, no edges. It's just the access panel that looks like a mess.
Now I gotta start my Parts Express purchase list:
- 15" Dayton DVC
- The Plan calls for 3/16" bolts to secure the driver to the panel. I didn't see 3/16" bolts or hurricane nuts at Parts Express. What size works with the 15" Dayton DVC? In the past I've preferred socket head caps. I have two bags of 1/4-20 and 10-32 hurricane nuts in the basement from my last subwoofer builds. Will either of these work with the Dayton DVC?
- Terminal Plate/Binding Posts. I've always used a traditional recessed terminal in my past subwoofer projects. For this one I was considering using a Speakon adapter to try something new. I don't know much about them though. Are they easily implemented and can they adapt to standard non-pro speaker wire (+ / -)? What strategy/tips are people using to route the speaker wire within the internal maze? Drilling direct through the layers of panels or wrapping it around?
- Gasket for access panel. I was thinking of using this 1/2" speaker gasket tape. Is this what everyone is using for their access panels?
I missing anything else?
Thanks again for all the help.
Re: myn's Tuba HT Build Thread
Posted: Thu Jun 11, 2009 1:33 am
by Tom Smit
The odd-looking cuts are easily fixed by measuring the circular saw cut and installing a guide board (clamped to cover). Then run the jig saw along the guide board to finish the the saw cut width.
Hope this makes sense.
TomS
Re: myn's Tuba HT Build Thread
Posted: Thu Jun 11, 2009 6:20 am
by LelandCrooks
10-32 = 3/16 Just a finer thread than a std 3/16 bolt.