How to build a circular saw sled when you don't have a table saw
Posted: Sun Sep 06, 2015 10:47 pm
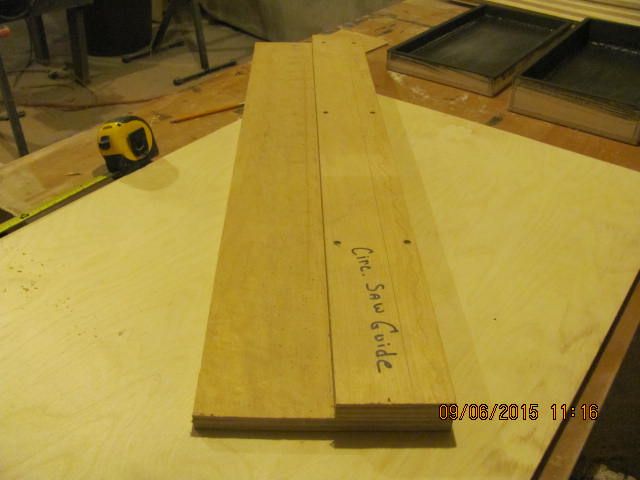
I have read many in older posts claim to not be able to do a good job cutting with a circular saw. Here is what you do to make a panel crosscut/rip jig for a circular saw. Rip one piece of 1/2" ply to 5", then another of the same thickness, rip to 10&1/2". Both should be 12" longer than any length cut your going to do. I like having a 5 footer and a 8 footer. Screw and glue the 2 pieces together flush along one long edge. If you have access to a table saw, but not at home, it's best to use that for this. Alternatively you can use the factory edges of a sheet at the staggered edges, with the rough cuts on the flush edge. Notice the pencil line along the right edge, this is the free area that the saw's motor does not go into, and is used to denote the clamping area. It winds up looking like this
After you have screwed and glued the jig together, use the circular saw you're going to be using with the jig ( this is important because different circular saws have differing shoe (table) widths), and run it tight to the upper plywood piece to cut the lower (wider) piece to the table width of the saw. Your jig is done.
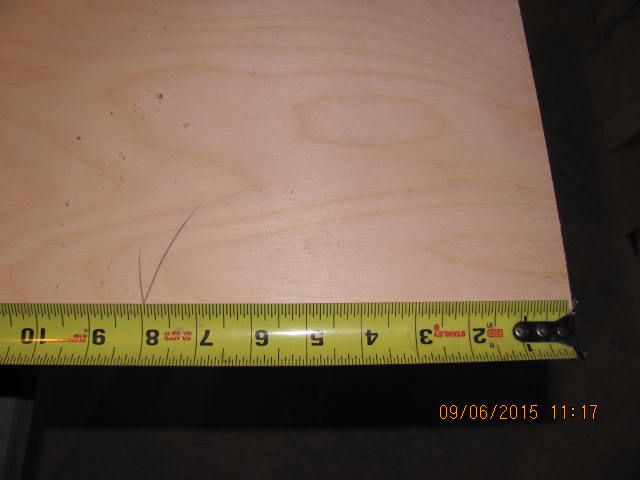
Now to use it, mark the cut you're going to make, paying attention to which side of the mark you're going to need to cut:
Now place the leading edge of the jig on that mark, the saw will cut exactly the leading edge of the jig. Pay attention to which side of the mark to cut, and use a framing square to square the jig to the piece.
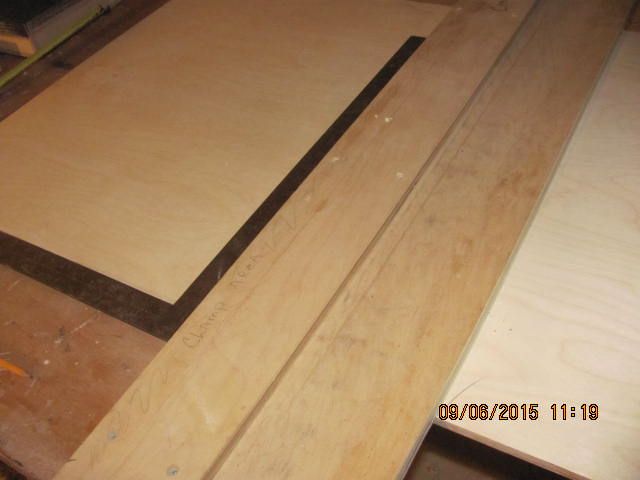
Now clamp the jig to the piece:

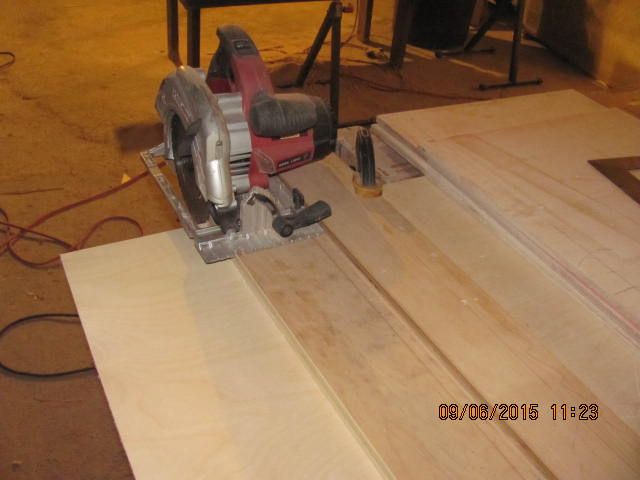
Now run the saw's table edge along the upper guide, making sure to keep pressure to keep the saw's table tight to the fence.
You have just made an absolutely perfect cut that would rival any table saw, and is easier than passing a large sheet of ply through a table saw.

After you have screwed and glued the jig together, use the circular saw you're going to be using with the jig ( this is important because different circular saws have differing shoe (table) widths), and run it tight to the upper plywood piece to cut the lower (wider) piece to the table width of the saw. Your jig is done.
Now to use it, mark the cut you're going to make, paying attention to which side of the mark you're going to need to cut:

Now place the leading edge of the jig on that mark, the saw will cut exactly the leading edge of the jig. Pay attention to which side of the mark to cut, and use a framing square to square the jig to the piece.

Now clamp the jig to the piece:

Now run the saw's table edge along the upper guide, making sure to keep pressure to keep the saw's table tight to the fence.

You have just made an absolutely perfect cut that would rival any table saw, and is easier than passing a large sheet of ply through a table saw.