Page 1 of 6
Wedgehorn 8's w/ horn finishing option
Posted: Sun Jun 07, 2015 8:21 pm
by heavybdrums
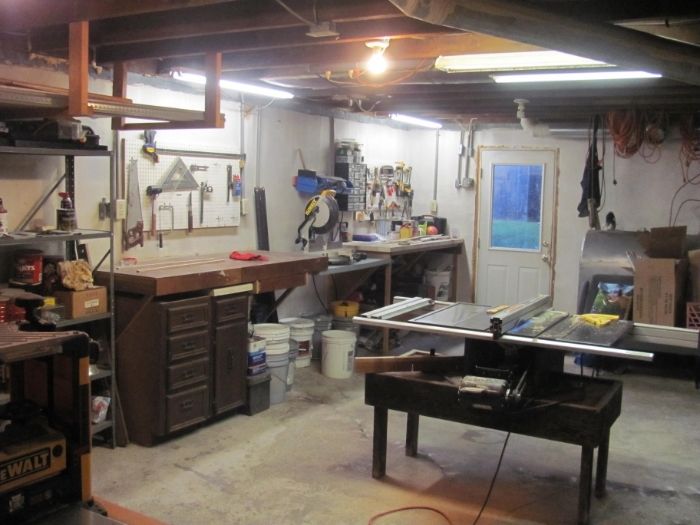
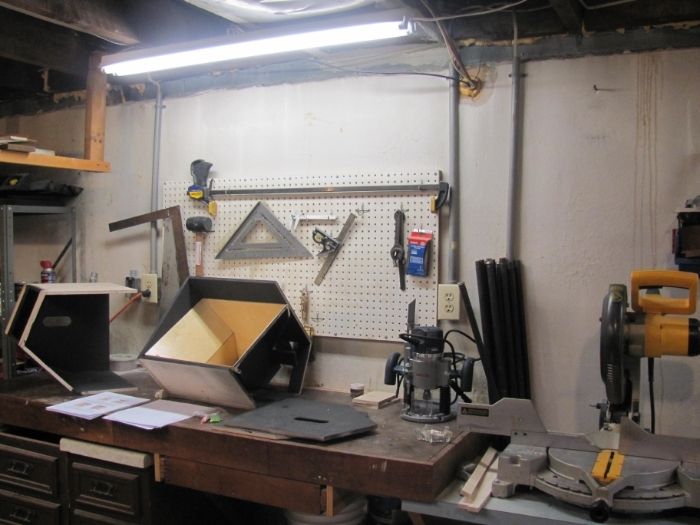
firstly here's my shop:
Re: Wedgehorn 8's w/ horn finishing option
Posted: Sun Jun 07, 2015 8:23 pm
by heavybdrums
O.O it works thanks for the pic sending tips Grant, in photobucket i have to resize the img file in the edit option to get them to fit. Can only fit 700x700 pixels, not the format of my camera atm.
Re: Wedgehorn 8's w/ horn finishing option
Posted: Sun Jun 07, 2015 8:50 pm
by heavybdrums
one
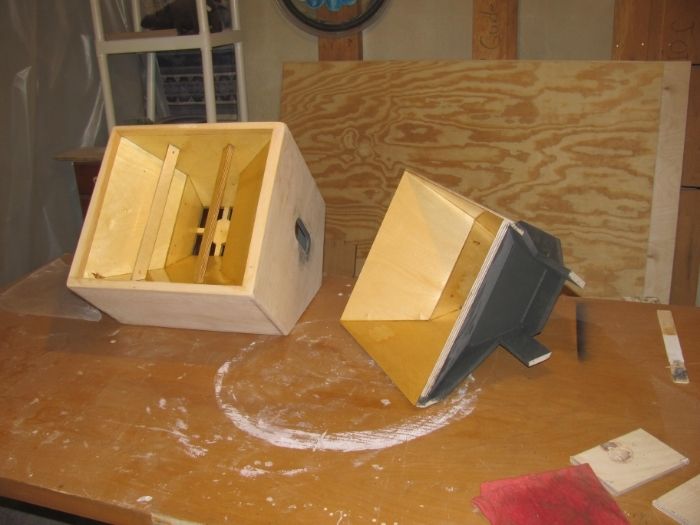
wedgehorn assembled another waiting. I'm sure the experienced builders here can see the 3 mistakes made in the lh assembled wh 8
Re: Wedgehorn 8's w/ horn finishing option
Posted: Sun Jun 07, 2015 9:00 pm
by heavybdrums
The inside of these wh 8's are finished in polyurethane. It is somewhat more trouble in sanding and scraping of excess glue on the inside of the horn required, and requires you to do the (1 coat/light sanding/recoating of the urethane) before installing the tweeter array baffles, then to finish them after installing. The inside(showing) side of the horn has to be scraped with a very sharp chisel and sanded with a detail sander with a pointy sanding disc on a multi cutter tool to remove any glue in there cuz it will show up very dark when the urethane is applied. To counteract the removal of excess glue from the inside of the horn i ran an extra bead of pl on the outside of each one, across every joint. I'm sure many will not want to go through this somewhat more trouble for a finish effect, but I thought it was worth it for this first build, also being a painter/carpenter finish is important to me. Only the inside of the horns will be finished in this way. The outside of the boxes will be finished in duratex as usual, but i thought it was a nice touch to have the player to whom the monitor is pointed to see the urethane finish inside. Also i painted the outside of the horns and inside of the cases a dark grey because i just don't like the sight of the raw blonde wood and glue splatter seen through the ports/handle holes. The very dark grey paint is just a cheapo interior flat brushable house paint.
Re: Wedgehorn 8's w/ horn finishing option
Posted: Sun Jun 07, 2015 9:10 pm
by heavybdrums
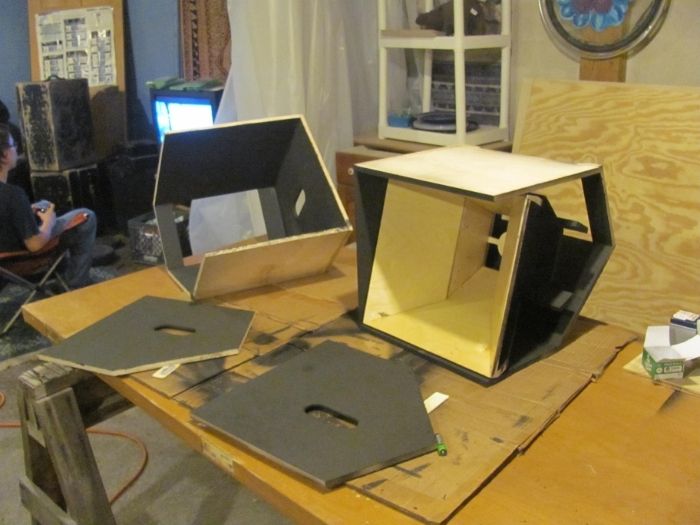
a couple more pics
Re: Wedgehorn 8's w/ horn finishing option
Posted: Sun Jun 07, 2015 9:11 pm
by heavybdrums
The screw bust-outs in the bottom left and right hand corners will be covered with the grille frame
Re: Wedgehorn 8's w/ horn finishing option
Posted: Sun Jun 07, 2015 9:13 pm
by heavybdrums

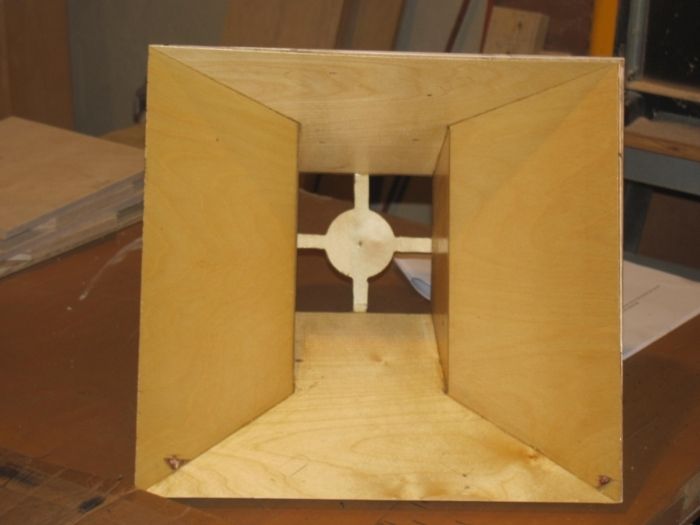
othe side of the horn assembly
Re: Wedgehorn 8's w/ horn finishing option
Posted: Sun Jun 07, 2015 9:14 pm
by heavybdrums
Note the extra beads of glue (pl) on the outside of the horn
Re: Wedgehorn 8's w/ horn finishing option
Posted: Sun Jun 07, 2015 9:22 pm
by heavybdrums
another shop picture showing my new Bosch plunge router with the new attached circle jig
Re: Wedgehorn 8's w/ horn finishing option
Posted: Sun Jun 07, 2015 9:27 pm
by heavybdrums
Yes boys-n-girls those are the plans..right there as the work is being done. Already through several mistakes i have found that you should have the plans right there reading and turning pages as you progress through each and every step of every build, no matter how many you have previously done. The plans are correct, constantly updated and are exactly to be followed to the letter. (assuming my custom finishing options are not a change in the actual build as spec'd).
Re: Wedgehorn 8's w/ horn finishing option
Posted: Mon Jun 08, 2015 6:35 am
by LelandCrooks
Nice
Re: Wedgehorn 8's w/ horn finishing option
Posted: Tue Jun 09, 2015 8:23 am
by Guitbusy
Great job, I am watching this thread as I am finishing up a couple Wedgehorn 6's. Thanks for the build thread.
Re: Wedgehorn 8's w/ horn finishing option
Posted: Tue Jun 09, 2015 5:17 pm
by heavybdrums
Guitbusy wrote:Great job, I am watching this thread as I am finishing up a couple Wedgehorn 6's. Thanks for the build thread.
ok..just to list a few mistakes i made on this my first BFM build that may save you from them are: 1) not cutting the horn mouth panels as mirror images, had to re-cut them. I would suggest reviewing the sketch-up drawings after marking and before cutting to make sure they wind up being mirror images in every way. The sketchup is very cool, you can grab and move individual parts around and rotate them to view. 2) Being somewhat impatient i fastened the horn assembly into the outer box before installing the tweeter array vertical braces. Not really a big problem just had to pre drill and drive 6# nails at an angle through them into the horn top and bottom. 3) once the horn assembly is all put together you pass it through the table saw to final cut it to size so it will fit nicely into the outer shell, once again the sketchup will show the orientation of the horn into the body so that you cut the correct size along each edge. I actually cut the horn to the wrong dimensions ( got up and down confused) and had to remake the whole thing over. Happily, now i have a full scale model of the horn at my disposal to view the orientation of all the parts, ok well i got something good out of it. Once the horns are constructed its all down hill from there but extra time spent on them will make the whole thing go easier.
Re: Wedgehorn 8's w/ horn finishing option
Posted: Tue Jun 09, 2015 9:02 pm
by Guitbusy
heavybdrums wrote:Guitbusy wrote:Great job, I am watching this thread as I am finishing up a couple Wedgehorn 6's. Thanks for the build thread.
ok..just to list a few mistakes i made on this my first BFM build that may save you from them are: 1) not cutting the horn mouth panels as mirror images, had to re-cut them. I would suggest reviewing the sketch-up drawings after marking and before cutting to make sure they wind up being mirror images in every way. The sketchup is very cool, you can grab and move individual parts around and rotate them to view. 2) Being somewhat impatient i fastened the horn assembly into the outer box before installing the tweeter array vertical braces. Not really a big problem just had to pre drill and drive 6# nails at an angle through them into the horn top and bottom. 3) once the horn assembly is all put together you pass it through the table saw to final cut it to size so it will fit nicely into the outer shell, once again the sketchup will show the orientation of the horn into the body so that you cut the correct size along each edge. I actually cut the horn to the wrong dimensions ( got up and down confused) and had to remake the whole thing over. Happily, now i have a full scale model of the horn at my disposal to view the orientation of all the parts, ok well i got something good out of it. Once the horns are constructed its all down hill from there but extra time spent on them will make the whole thing go easier.

Thanks for the tips.
Re: Wedgehorn 8's w/ horn finishing option
Posted: Wed Jun 10, 2015 10:02 pm
by caddylackn
Bill's plans are a lesson on both being patient and following directions. If you are not patient in reading and following the directions, it will bite you.
The good news is PL and Duratex will fix and cover up most mistakes


 wedgehorn assembled another waiting. I'm sure the experienced builders here can see the 3 mistakes made in the lh assembled wh 8

 othe side of the horn assembly