New Build - Pair of T39x24"
Posted: Tue Mar 19, 2013 3:10 pm
Well, this actually belongs in the "Almost Built and Now I Wish I had Taken More Pictures" section, but I couldn't find that in the index...
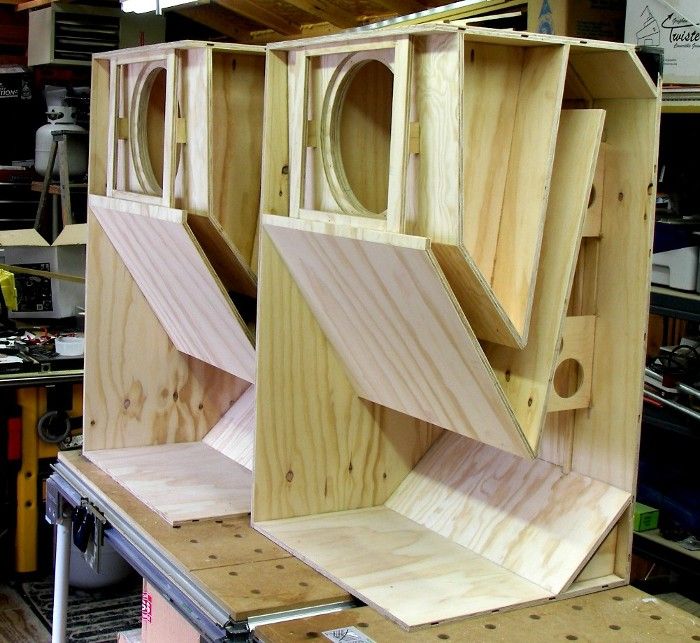
Here are some pics of my in progress T39 build, just prior to putting on the second side.
1 - Just prior to attaching the second side:
2 - Back and Side showing cutouts and insets for deep dish side handles, deep dish dual speakon, and rollers (all purchased for SpeakerHardware):

Notes
- The deep dual speakon dish will fit behind the lower reflector, but needs careful location to avoid hitting the reflector / leave room for speakon jack wiring / not get too close to the bottom edge
- The large side handle is located as low as possible in the reducer cavity for ease of carrying, but it won't align with the center of gravity front to back
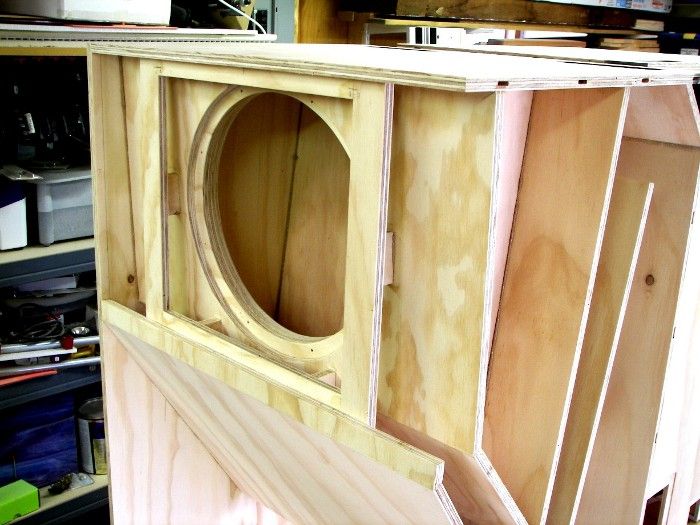
3 - Close up of the driver area showing the location of the flange braces. Their exact locations are not in the plans, but you can pull the dimensions off the SketchUp model.
4 - Side view showing the relative brace locations:
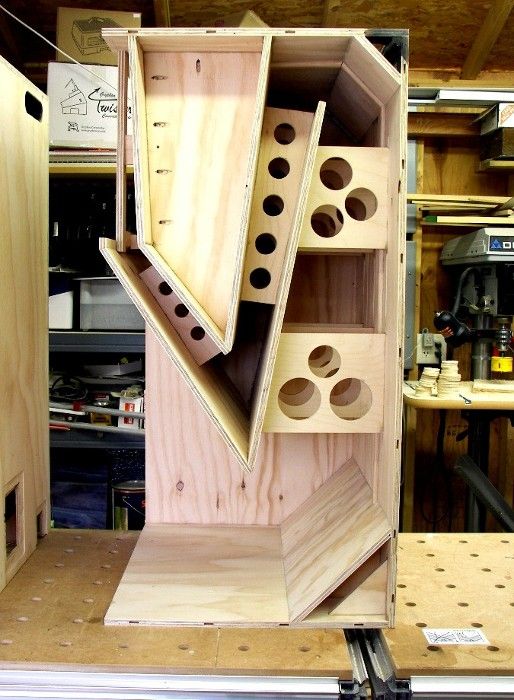
Notes
- Mini pocket hole screws worked really well to assemble and align the baffle/anchor/reducer assembly.
- I NEVER use them on an outside cabinet edge (they angle outward, hidden just under the surface lying in wait for the unsuspecting roundover/champher bit to come along).
5 - Close up of the top reflector area:
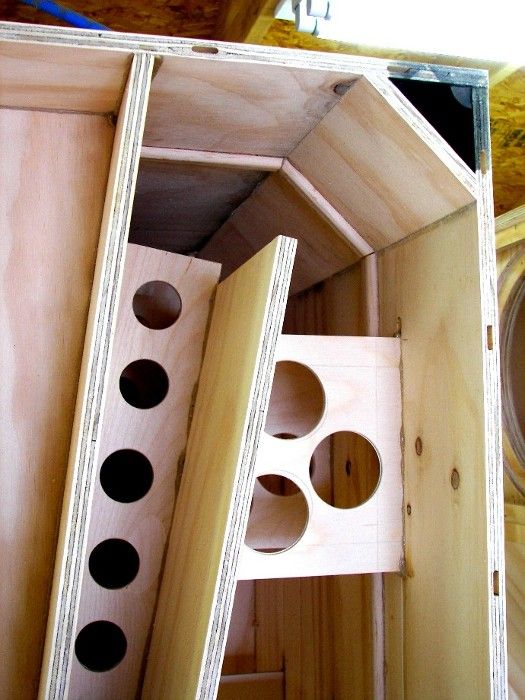
Notes
- Baltic Birch fanboys - those are NOT voids in the edge of the 1/2" Auarco plywood - those are 4mm Domino loose tenons (not so much for strength as to make assembly/alignment super easy)
- The funny looking wood strip is a molding I made to cover the speaker wire since the jacks are behind the lower reflector - you know, just in case a wire chewing squirrel climbs into the speaker (ok, mock if you will, I'm going overboard when a dab of PL will do it, but this is my first build.)
- Painted behind the upper reflector prior to assembly because I know how easy it would be to get a paintbrush in there later.
6 - What to do with the triangle shaped cutoffs after making the anchors?
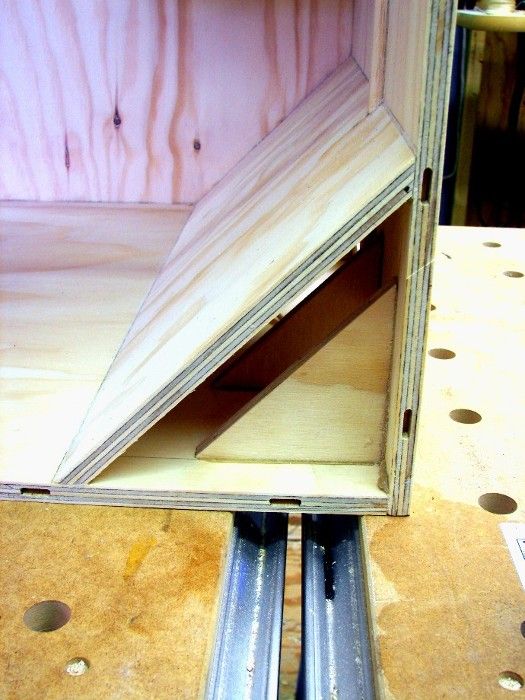
Notes - I was a little concerned about the screws for the wheel assemblies having enough wood behind them after insetting the wheel plate. The anchor cutoffs fit perfectly and are aligned right behind where the screws will go.
I will agree with many previous posts - fun and addictive. Ask me again after I attempt a pair of DR200s.....
Here are some pics of my in progress T39 build, just prior to putting on the second side.
1 - Just prior to attaching the second side:
2 - Back and Side showing cutouts and insets for deep dish side handles, deep dish dual speakon, and rollers (all purchased for SpeakerHardware):
Notes
- The deep dual speakon dish will fit behind the lower reflector, but needs careful location to avoid hitting the reflector / leave room for speakon jack wiring / not get too close to the bottom edge
- The large side handle is located as low as possible in the reducer cavity for ease of carrying, but it won't align with the center of gravity front to back
3 - Close up of the driver area showing the location of the flange braces. Their exact locations are not in the plans, but you can pull the dimensions off the SketchUp model.
4 - Side view showing the relative brace locations:
Notes
- Mini pocket hole screws worked really well to assemble and align the baffle/anchor/reducer assembly.
- I NEVER use them on an outside cabinet edge (they angle outward, hidden just under the surface lying in wait for the unsuspecting roundover/champher bit to come along).
5 - Close up of the top reflector area:
Notes
- Baltic Birch fanboys - those are NOT voids in the edge of the 1/2" Auarco plywood - those are 4mm Domino loose tenons (not so much for strength as to make assembly/alignment super easy)
- The funny looking wood strip is a molding I made to cover the speaker wire since the jacks are behind the lower reflector - you know, just in case a wire chewing squirrel climbs into the speaker (ok, mock if you will, I'm going overboard when a dab of PL will do it, but this is my first build.)
- Painted behind the upper reflector prior to assembly because I know how easy it would be to get a paintbrush in there later.
6 - What to do with the triangle shaped cutoffs after making the anchors?
Notes - I was a little concerned about the screws for the wheel assemblies having enough wood behind them after insetting the wheel plate. The anchor cutoffs fit perfectly and are aligned right behind where the screws will go.
I will agree with many previous posts - fun and addictive. Ask me again after I attempt a pair of DR200s.....