Page 5 of 10
Re: 8 x DR250 build
Posted: Sun Mar 06, 2016 12:07 am
by CoronaOperator
Thanks for the compliments guys. It's amazing what a coat of paint can do.
I painted them to try my finish out and I'm glad I did before I did the horns because there is an issue with it:
If you look closely you can see vertical lines everywhere. It seems the moisture from the water based paint is swelling the surface of the wood causing it to crack. I went and picked up a gallon of automotive sandable polyester primer to seal the horns before I use that finish. Now I have a new problem, that stuff is nasty to work with. I'm going to have to make a makeshift paint booth and exhaust the fumes in order to survive spraying that stuff. The 750 cfm fan from my shop air cleaner should do the trick.
Re: 8 x DR250 build
Posted: Mon Apr 04, 2016 11:22 pm
by CoronaOperator
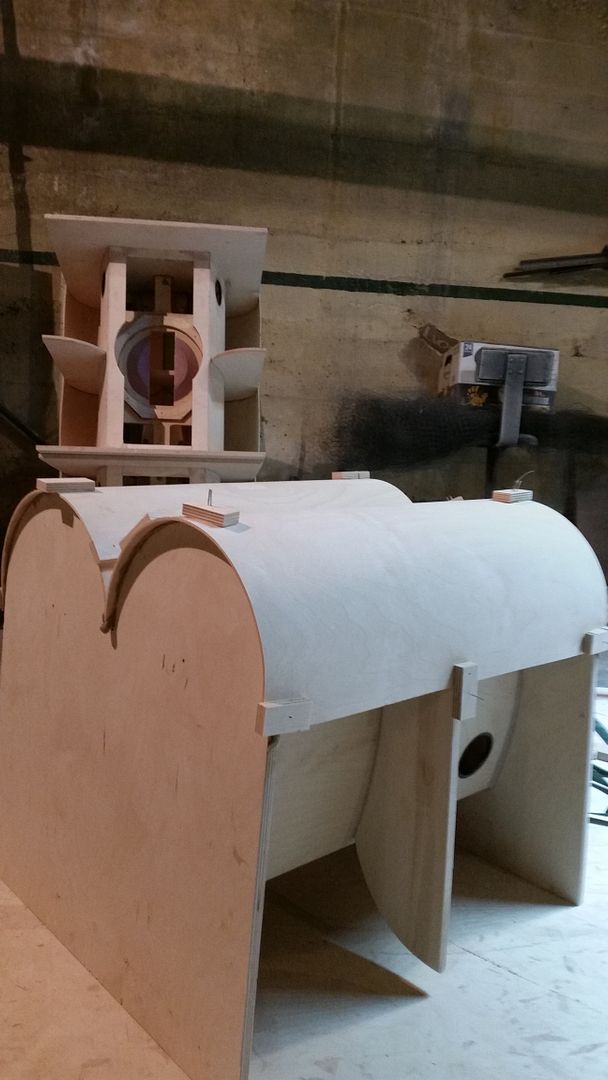
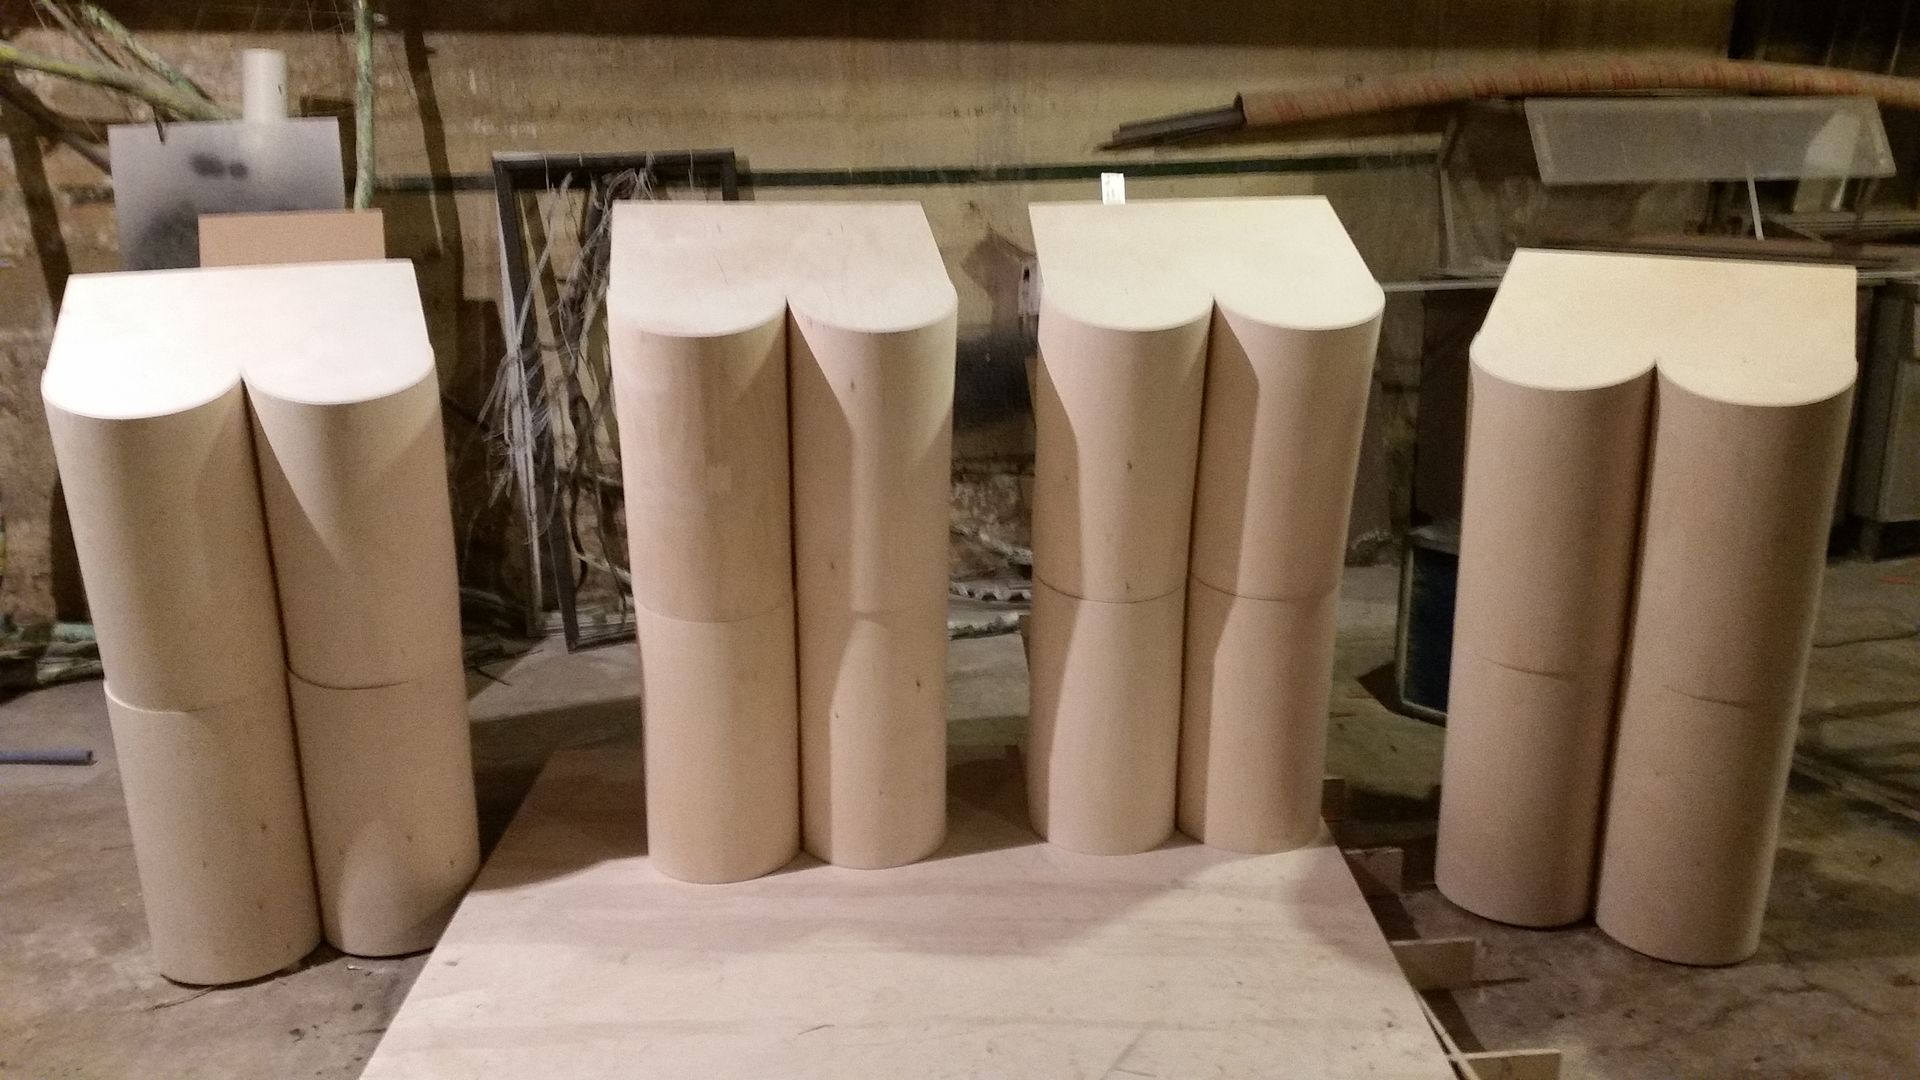
More progress - the butt cheeks!!! (viewer discretion is advised)
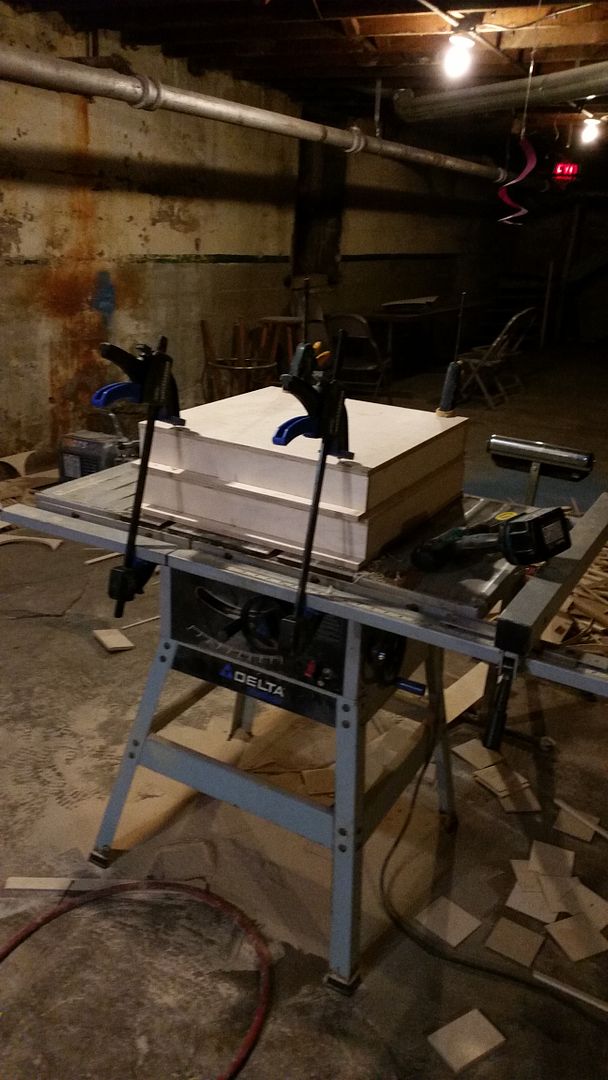
After cutting out the 1/8" baltic birch blanks I had to get them to bend. I did this awhile back right in the middle of heating season so the blanks were bone dry. I bent one about half way to the desired shape and it cracked in half so that didn't work. My new plan was to pick out the best looking side to go on the inside of the horn and then wetted the outside of the blanks with warm water. By the time I finished wetting them the first ones were already dry (told ya they were bone dry) so I wetted them again and then stacked them in a pile and let them sit for 20 minutes. After that they were able to bend quite nicely. I ended up using a 5 gallon pail and a clamp to help me tie some string around them:
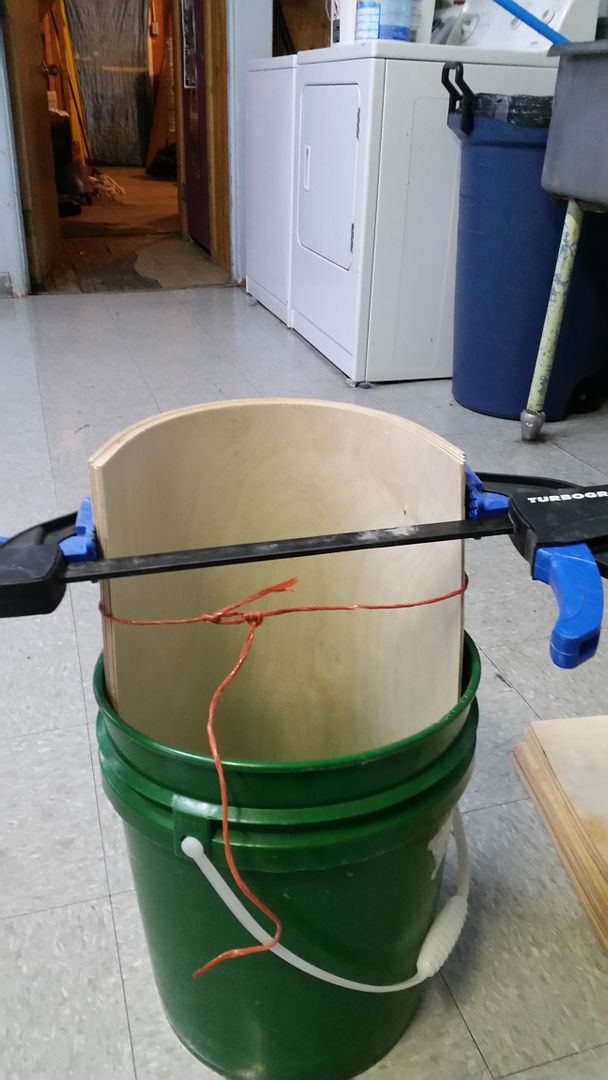
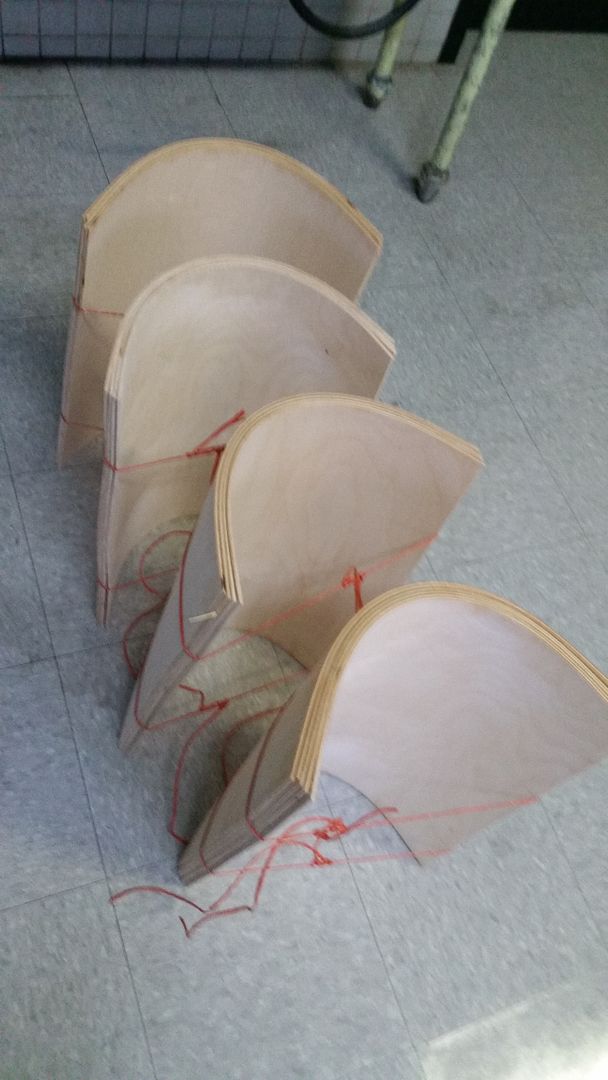
After a couple days I twisted a pencil in the twine to tighten up the curves and every few days I gave it another twist.
I used the ratchet straps to attach them:
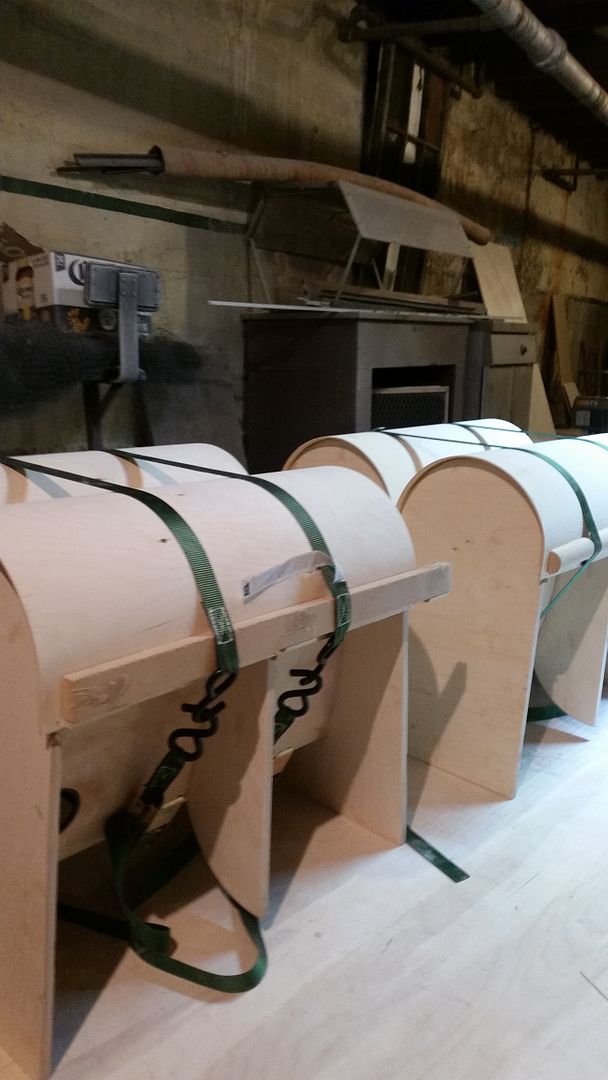
The first 2 didn't go very well. They kept lifting in the middle while I was trying to attach them. I used staples on the ends and they pulled through. 24 hours later I removed the straps and the glue wasn't fully cured and they separated pulling through even more staples. Good grief! I was looking forward to this part of the build from the beginning but this wasn't going well. Time to go home for the day.
The next day I came up with a plan. Instead of staples I cut out a bunch of little blocks and decided to put away the stapler and just use a brad nailer. I used the ratchet straps to hold the panel down, then starting on the inside and working my way to the edge I used the blocks and a single brad to secure the piece:
The good thing about this was that I could immediately remove the straps and go on to the next cab. I got the rest of them done and the 2 that separated I repaired using superglue and the retaining blocks with a brad to hold them in place.
I waited 3 days this time before removing the blocks and after a little bit of trimming ... success!
(you might want to cover your kids eyes for this one)
ta-da!!!!
I thought I'd share a little trick I came up with. There were a few spots where I had to go inside the horn to fill in some gaps with PL but the big caulking gun doesn't fit in there. I made a new smaller caulking gun using a syringe that you can get at the pharmacy for dispensing liquid medicine to kids. Just fill it up with the PL and you are good to go:
Filler up
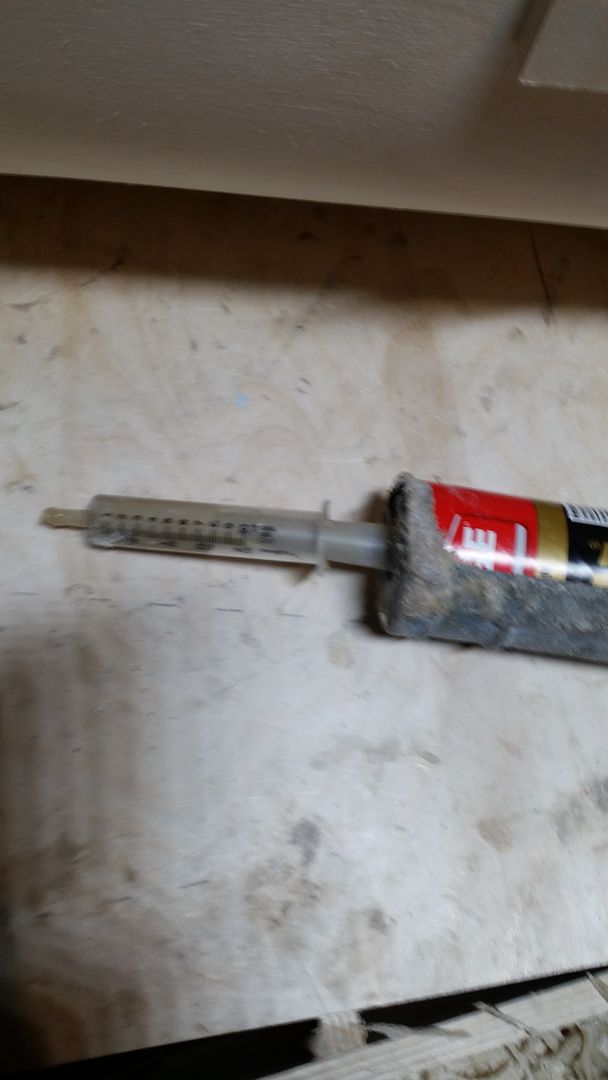
Ready to go:
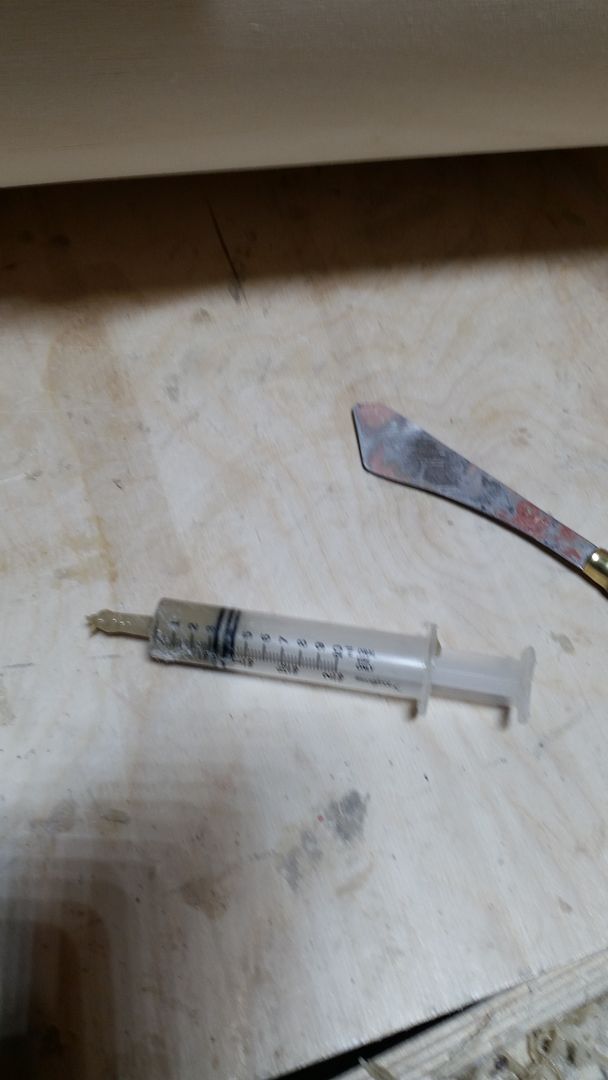
Action shot:

Re: 8 x DR250 build
Posted: Tue Apr 05, 2016 5:20 am
by escapemcp
Very nice CO. Those xovers (sorry, filters

) look awesome.
I'm also kicking myself for not rounding over the horn braces like you did! I can easily imagine that they will look much better than my square ones.
Keep up the good work fella.
Re: 8 x DR250 build
Posted: Tue Apr 05, 2016 2:46 pm
by CoronaOperator
escapemcp wrote:Very nice CO. Those xovers (sorry, filters
) look awesome.
Thanks escapemcp;
xovers/filters ... subsonic/infrasonic ... country/western ... all the same to me in the context of audio.
Re: 8 x DR250 build
Posted: Tue Apr 05, 2016 3:18 pm
by CoronaOperator
Next up is the sides but before I get to them I had to solve a little problem:
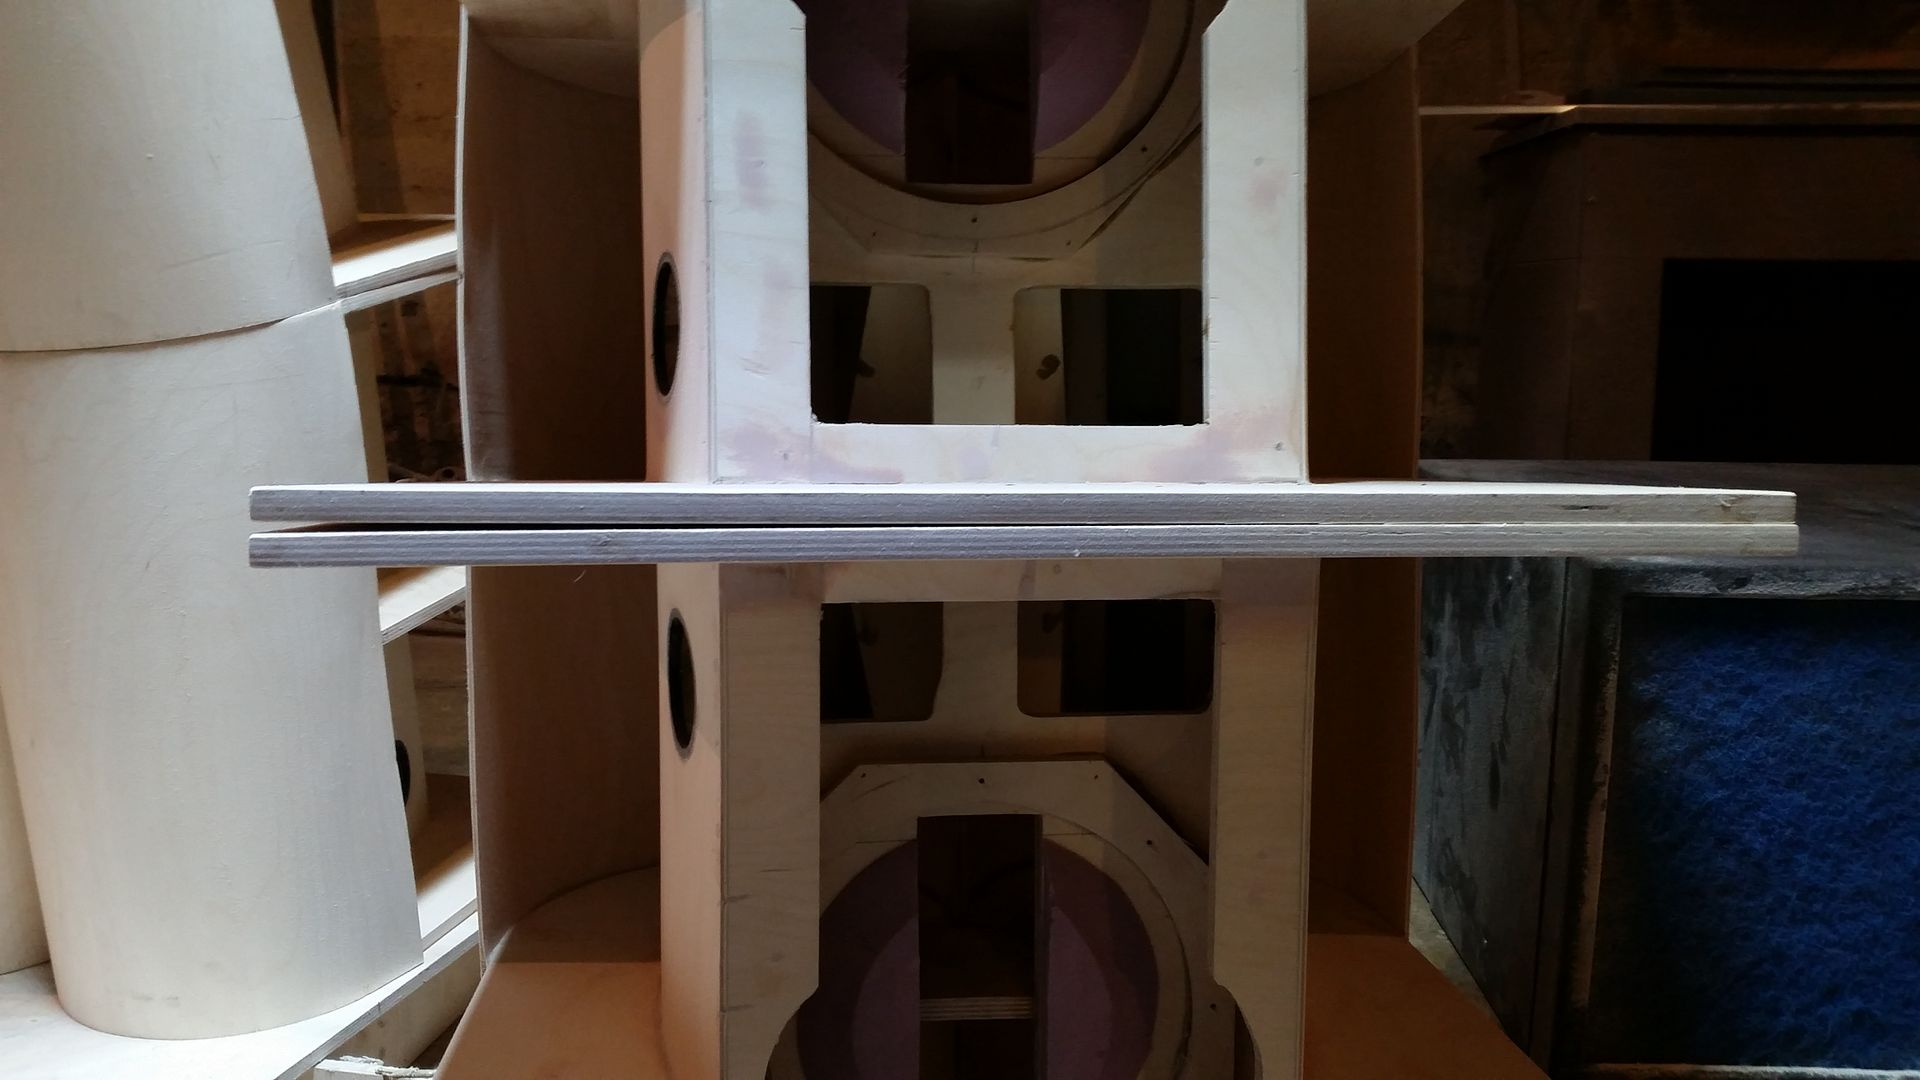
There is a liitle bit of warping in my top and bottom panels and I doubt they are exactly parallel at the front either.
What I did was to build 2
torsion boxes. A torsion box is just 2 skins (top and bottom sheets) separated by stringers both vertically and horizontally. These boxes are designed to resist any twisting or warping and remain as flat as you build them:
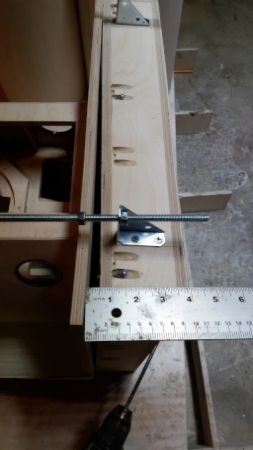
I used 2.5" wide spacers and used 3 vertical and 3 horizontal stringers. I glued them up with PL, brad nailed them together and then clamped them down hard to the flattest surface I could find (my cast iron table saw top). Once dried I used a kreg jig JR to make pocket holes all around them and installed a couple brackets for some threaded rods. These will be my reference ruler flat surfaces that won't twist under stress. I screwed the boxes to the top and bottom panels and that eliminated any warp from those panels:
Once the warp was fixed I can now measure the left and right sides and by adjusting the nuts on the threaded rods I can bring the front edges into parallel:
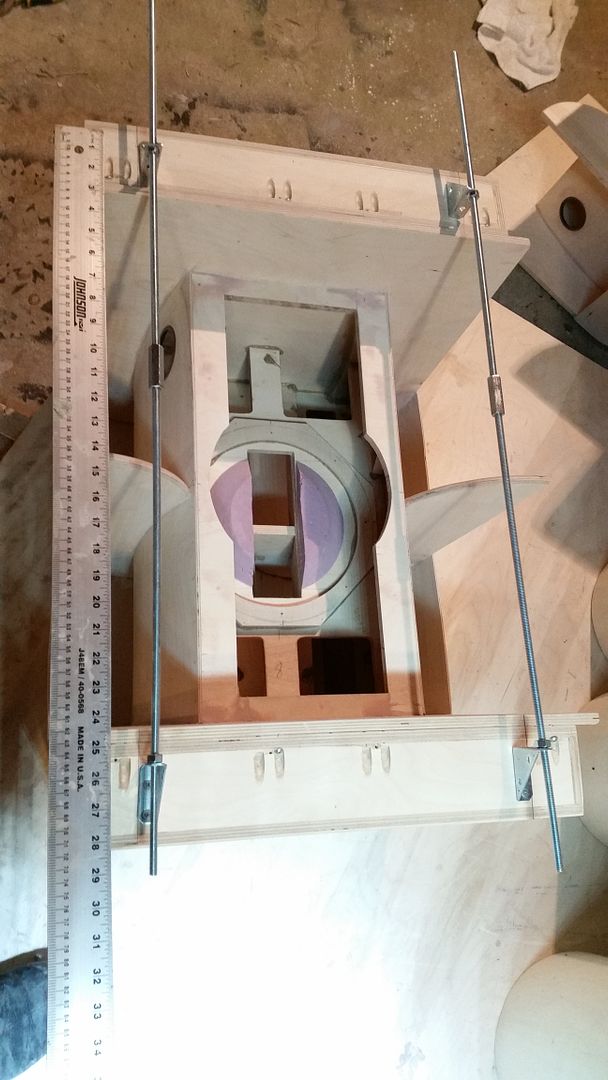
I haven't cut any sides yet but I'm feeling good now that these boxes should at least look square from the audience side of things

.
Re: 8 x DR250 build
Posted: Wed Apr 06, 2016 6:00 am
by LelandCrooks
Okay, that was over the top. Awesome.
Re: 8 x DR250 build
Posted: Thu Apr 07, 2016 9:26 pm
by CoronaOperator
LelandCrooks wrote:Okay, that was over the top. Awesome.
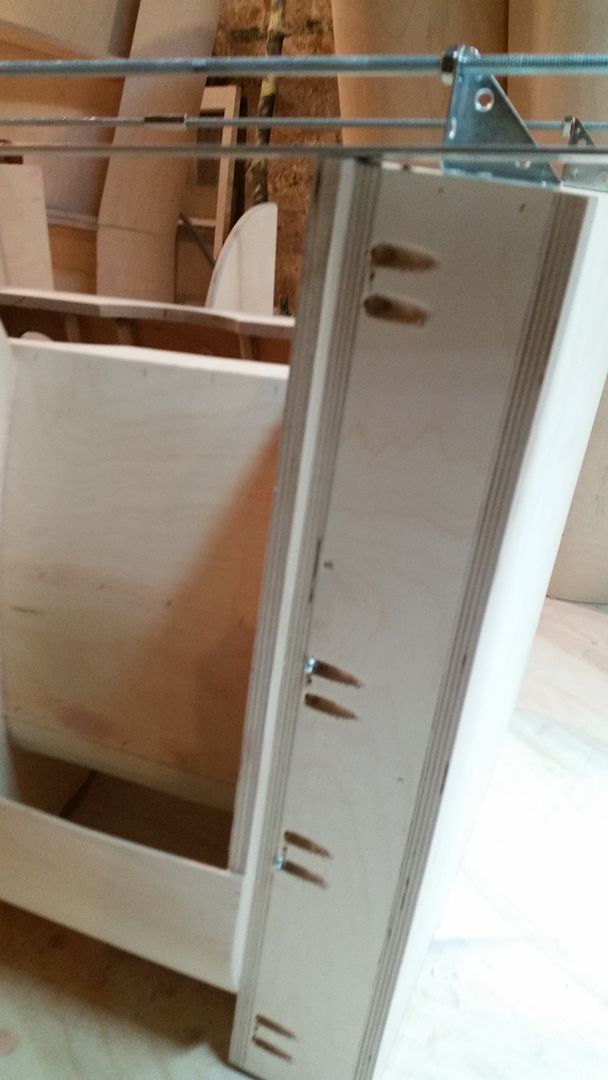
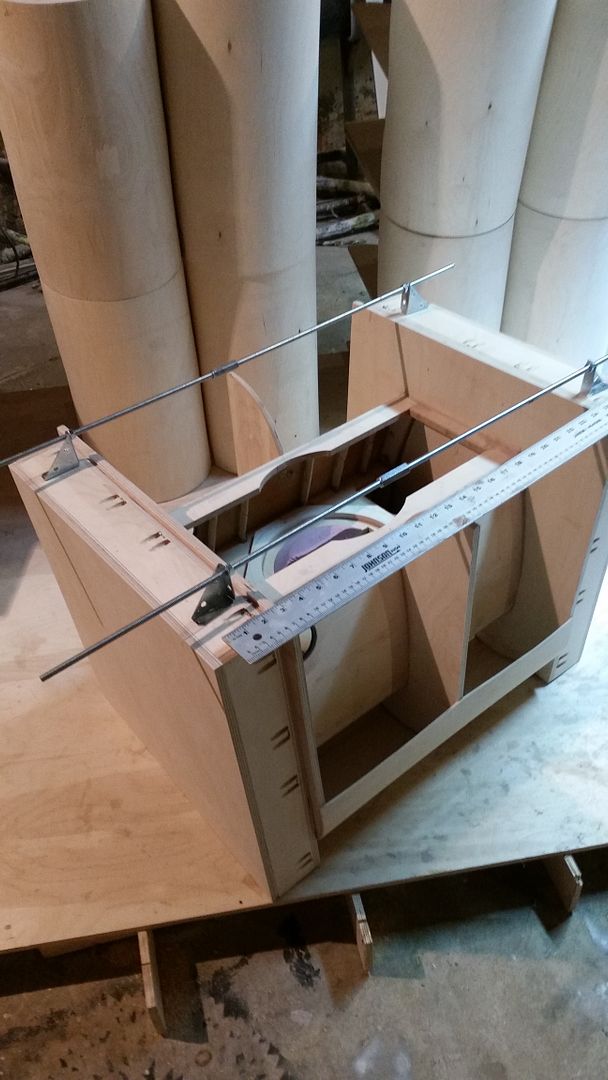
I'll concede that the threaded rods weren't really necessary. I cut out and machined the sides today and 6/8 boxes were within 1mm of parallel, 1 box was about 2mm off, and the last box (which I'll get to) was ~3mm off. The torsion boxes did exactly what I wanted them to do, hold the edges flat and true. Most of the kids were well behaved ... but there is always that one bad apple in the family. Let me introduce to you box #7:

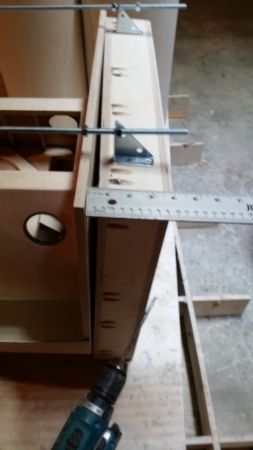
That torsion box is square to the cabinet, the picture doesn't really show the curve but that corner curled up like a curly fry from Arby's. The surface of the wood is also checked so I'm certain it got wet. There are 2 ice machines directly above me on the main floor so someone probably didn't clean up a spill and it melted and leaked onto that cabinet. I clamped it to the torsion box, tightened a screw and everything lined up as it should. That made the torsion boxes well worth the 45 min effort it took to make them. It's just too bad they all had to suffer the torture because of that one brother.

Posted: Fri Apr 08, 2016 1:38 am
by Tom Smit
Sheesh, I just finished looking through my Facebook account, read the last few posts on this thread, and started looking for the "like" button.

Good work with the torsion boxes!
Re: 8 x DR250 build
Posted: Fri Apr 08, 2016 11:40 am
by ctmullins
Very cool. Love the torture boxes!
Re: 8 x DR250 build
Posted: Tue Apr 19, 2016 1:06 am
by CoronaOperator
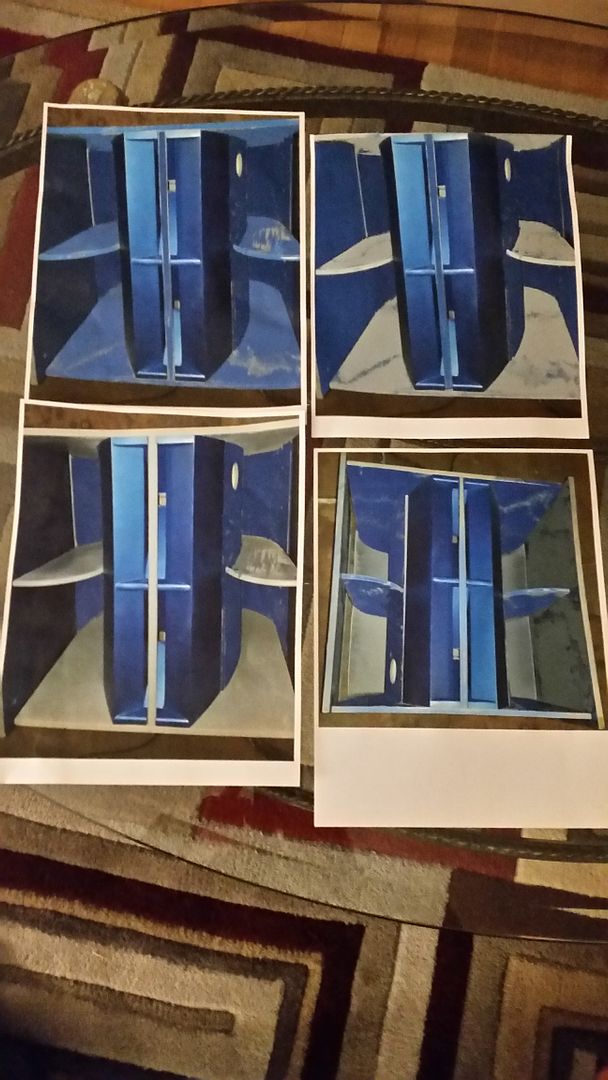
No more torture, now the boxes get some make-up. I'm having trouble deciding a color scheme so maybe you guys can help:
I originally wanted them all blue but after painting a couple pieces and putting then next to the primer, they look kind of cool multicolor. The lighter color brings out some of the rounded features that would probably be buried in a dark room, especially the rounded horn sheaths in the back. So using my worst Photoshopping skills ever, I came up with 4 basic schemes. I'll do the blue metallic, and the primer areas a metallic silver. If the silver is too much contrast with the dark blue I might darken it a bit. Let me know which one grabs your attention the most, right now I'm leaning towards the bottom left but am still undecided. These boxes will be stacked 2 high.
Re: 8 x DR250 build
Posted: Tue Apr 19, 2016 2:00 am
by Chris_Allen
Are you putting a grille on them?
Re: 8 x DR250 build
Posted: Tue Apr 19, 2016 2:30 am
by CoronaOperator
Chris_Allen wrote:Are you putting a grille on them?
No. I would have been done these in January if I was. I spent at least half my time sanding and filling to make them pretty. They will be in a permanent install so no moving around. Check out my sig last page or 2 of my T60 build to see what they will be paired with.
Edit: They will be duratexed on the outside like my T60's. Only the mouths will be colored.
Re: 8 x DR250 build
Posted: Tue Apr 19, 2016 7:30 am
by Chris_Allen
Bottom left, it emphasizes the shape of the cab much better.
Small warning though, you wouldn't believe how dusty those inside sections get and they are a bugger to clean.
It would be interesting if you could do the inside braces in wax oil.
Re: 8 x DR250 build
Posted: Tue Apr 19, 2016 8:37 am
by CoronaOperator
Chris_Allen wrote:Small warning though, you wouldn't believe how dusty those inside sections get and they are a bugger to clean.
I know what you mean, I take a damp rag and wash the mouths of the T60's at least once a month due to dust. I'm OK with that as it is part of my routine once a month to clean the lighting rig as well.
Chris_Allen wrote:
It would be interesting if you could do the inside braces in wax oil.
Too late now, they have 3 coats of 2K urethane automotive primer on them. Really good stuff for filling in the wood grain and any seam lines. I'll make them as shiny as I can though.
Re: 8 x DR250 build
Posted: Tue Apr 19, 2016 8:20 pm
by heavybdrums
bottom left for me also, and I think you may be right to darken the silver a bit. I am with you on this idea of making sure no one can mistake these for consumer grade pa crap. Others like a more restrained/commercial look, but I think people should see and hear that these are something different than they are familiar with, and if that scares them initially, then they will be reassured when they start doing their stuff.