Second BFM Build: 2 x J12 Lites
Re: Second BFM Build: 2 x J12 Lites
Building things always seems to take longer than it should, I know for a fact there's things I should've finished wayyyyyyyyyyyyy before I actually manage to and it's a little frustrating. If you have no deadline though you don't need to rush things so mistakes end up being a learning experience rather than something which kills the project entirely.
4xOT12s, 2xT39s@22", TTLS@18", 2xT60@18"
Re: Second BFM Build: 2 x J12 Lites
OK....So where were we...rushing to get the pair of J12s finished before our March 1st gig.
Well, I didn't make it. I had completed one cab in time for our rehearsal on Tuesday 25th and aimed to get the second cab done in the remaining four days, but I suffered from a day where I had some sort of flu like symptoms; aching joints, thumping headache and feeling shivery and light-headed...I thought it was perhaps not the best day to mess about with power tools so I took a break. After that I just couldn't make the time up so we used the old Chinese speakers for the last time.
But in the interests of completeness, here's how I finished the first cab.
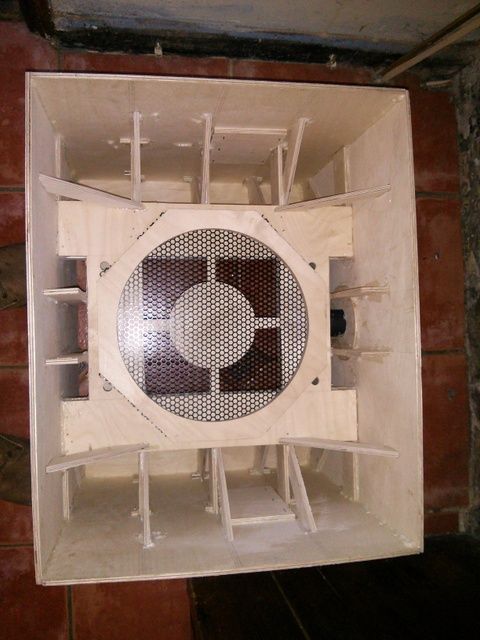
First off, I used some of the hexagon mesh I used for the grills on the W8s as the baffle grill on the J12. I have plenty of mesh left and could've done a full grille, but I'll be honest. As as well as the weight reduction, part of the reason I chose to make Lites was that the flared horn looks so goddam cool and I didn't want to hide it. I made a bit of a screw up cutting the mesh because I just cut around the outline of the woofer spacer, which seemed reasonable enough, except that I cut them with the hole pattern in the mesh, level with the slanted edge of the spacer - so that the row of holes were at an angle with respect to the baffle cut out. This just didn't satisfy my CDO (that's my OCD with the letters in alphabetical order as they should be) so I had a bit of fiddling with the mesh to get it right. Here it is in mid-fiddle with the rows lined up with the baffle and just a bit of trimming round the edges to go.
So then it was time to make a start on my first ever melded array (the W8's have panel mount tweets), starting with the jig...
I don't have a table saw, I wish I did. I may well get one to help with my impending house extension and remodelling, but for the moment I couldn't justify buying one for a cab build so I had to find another way.
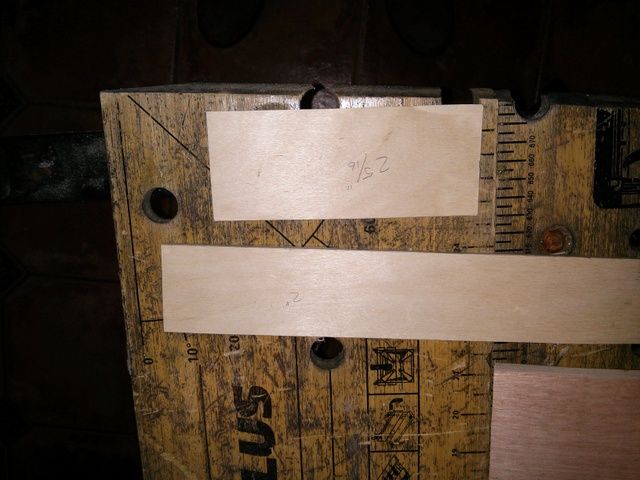
I had reasonable luck using my jigsaw when I made my W8s, so I thought I would give it another try here and...if I screwed up, well, I had a box of 50 tweets from Leland and I needed 32 for the J12s, so I had enough for a second attempt if I botched the first, first up though I cut a couple of pieces of 1/8 ply to width so that I could quickly mark the measurements onto the tweets....in the finish I only used the 2 5/16 one and just flipped it from left to right to scribe the tweet.
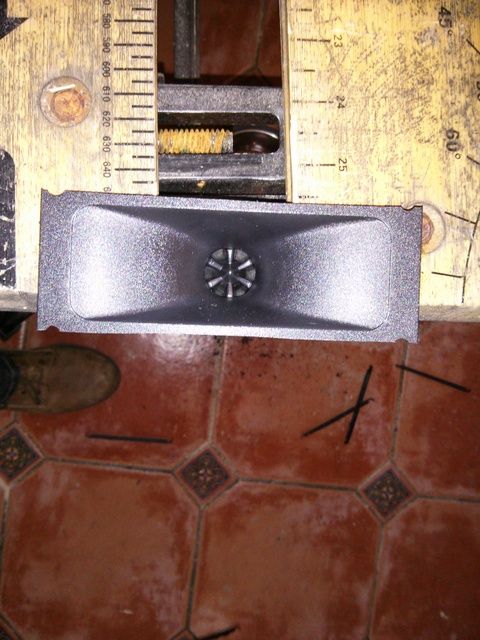
Just using a propelling pencil to scribe a line that you can just see onto the tweeter...
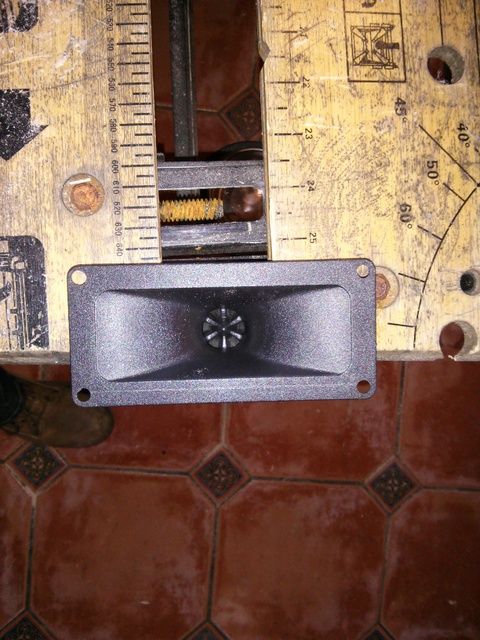
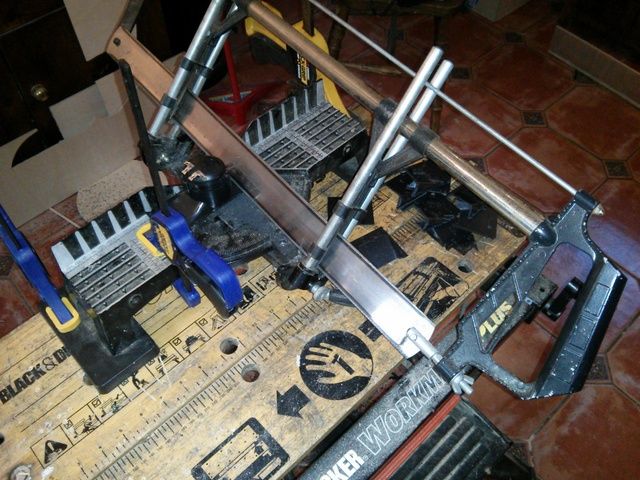
The Workmate bench can clamp just enough pressure on the tweeter barrel to hold it securely enough....then with a steady hand, just cut along the line...and repeat 68 times...you quickly find that 1.) a fine cut wood saw blade cuts a cleaner line than a metal/plastic blade and 2.) You have to cant the jigsaw over by the merest fraction so that the reciprocating blade clears the barrel screws (although I did nip a couple by accident)
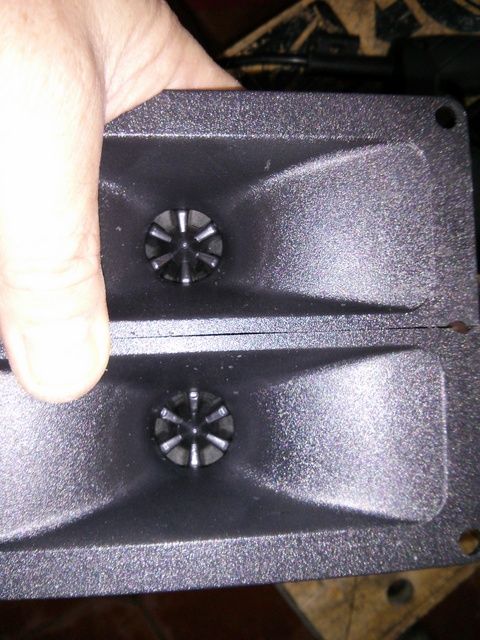
Then, check your straight lines...hmmmm...not bad, could be better
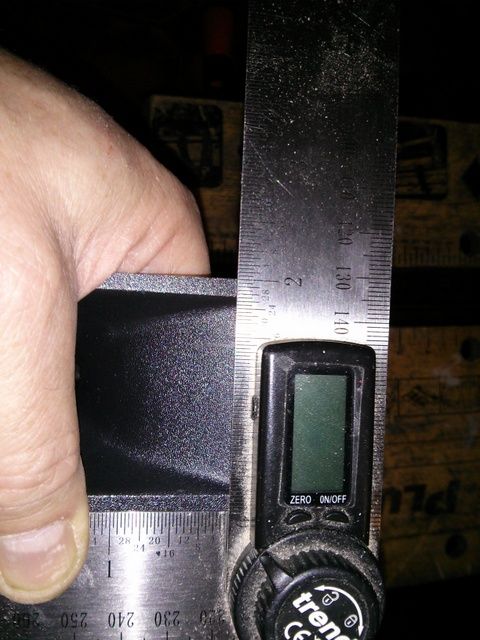
I also did do a check on how cutting to width was working out....can't find much to whine about there...
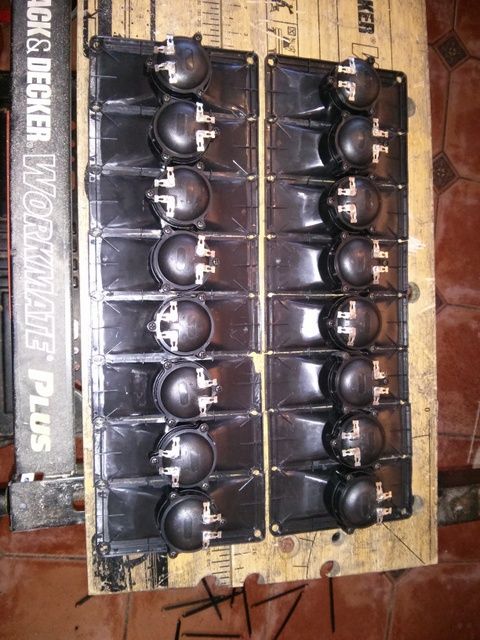
and then laid them all out in order...I went for the alternating orientation of tweets that others on this forum recommend.
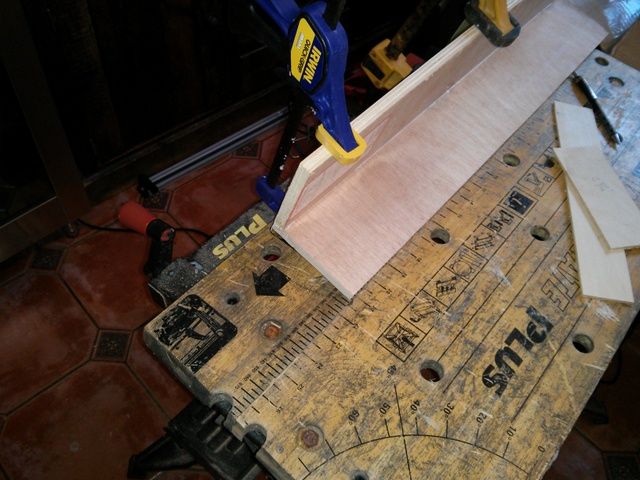
So then it was time to put a mitre on em...so time to break out the previously mentioned compound mitre saw....
I'm not Scottish, but I decided to christen this saw "Aud Clankie", it clangs, it bangs and makes a noise like a braying donkey with each stroke, but it does cut a mitre on the 1016s with surprising efficiency; thanks to a new fine toothed blade just 5-6 strokes are all you need for a nice clean cut. I just clamped it to the workmate, put another clamp to mark off the length needed and it was all remarkably quick and painless
Then onto the jig for glue up...you will also see I've removed the piezo units from the array
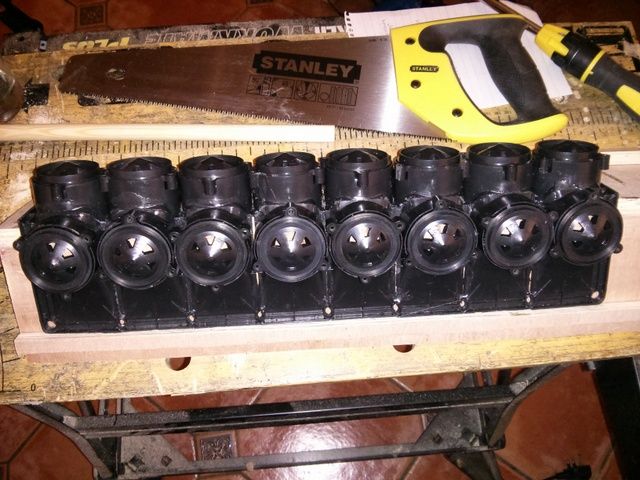
I found that plastic model glue to tack the tweets had no effect, you could put it on, hold the parts together for 5 minutes and as soon as you let go, so did the tweets! So I went straight for the solvent weld. I've used this quite a lot before on building projects but this time I could only get a gel type...which was OK, but a bit more gloopy than I'd like, made it a bit difficult to get a nice even coat of solvent, but it worked well enough.
So then a coat of plastic primer went on...you can see that I've screwed up the alignment of the final pair of tweets on the left and the array develops a bit of a reverse ski jump...I don't know how that happened, I thought I'd got everything nicely pressed onto the jig...but, ho hum...just have to live with it now.
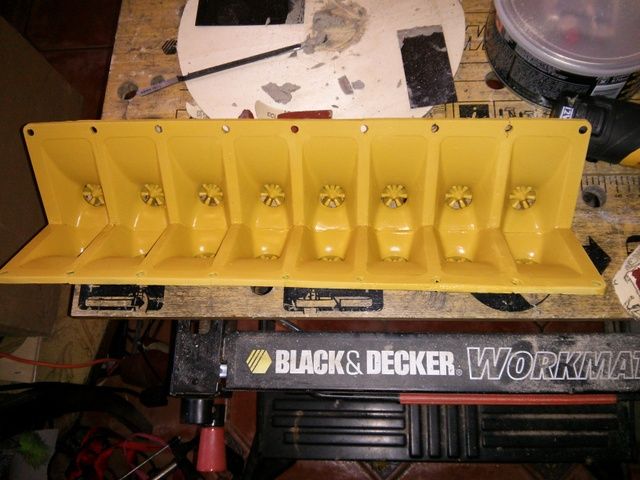
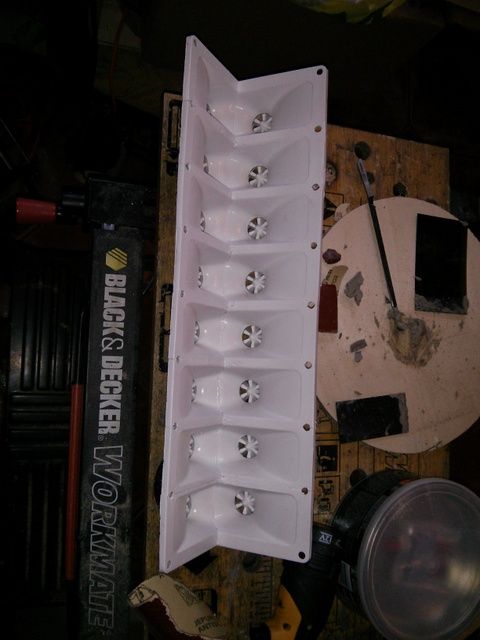
Then a coat of undercoat....
But since this is my bike and one of my other passions...
The tweets could only ever be Ducati Rosso...
Well, I didn't make it. I had completed one cab in time for our rehearsal on Tuesday 25th and aimed to get the second cab done in the remaining four days, but I suffered from a day where I had some sort of flu like symptoms; aching joints, thumping headache and feeling shivery and light-headed...I thought it was perhaps not the best day to mess about with power tools so I took a break. After that I just couldn't make the time up so we used the old Chinese speakers for the last time.
But in the interests of completeness, here's how I finished the first cab.
First off, I used some of the hexagon mesh I used for the grills on the W8s as the baffle grill on the J12. I have plenty of mesh left and could've done a full grille, but I'll be honest. As as well as the weight reduction, part of the reason I chose to make Lites was that the flared horn looks so goddam cool and I didn't want to hide it. I made a bit of a screw up cutting the mesh because I just cut around the outline of the woofer spacer, which seemed reasonable enough, except that I cut them with the hole pattern in the mesh, level with the slanted edge of the spacer - so that the row of holes were at an angle with respect to the baffle cut out. This just didn't satisfy my CDO (that's my OCD with the letters in alphabetical order as they should be) so I had a bit of fiddling with the mesh to get it right. Here it is in mid-fiddle with the rows lined up with the baffle and just a bit of trimming round the edges to go.
So then it was time to make a start on my first ever melded array (the W8's have panel mount tweets), starting with the jig...
I don't have a table saw, I wish I did. I may well get one to help with my impending house extension and remodelling, but for the moment I couldn't justify buying one for a cab build so I had to find another way.
I had reasonable luck using my jigsaw when I made my W8s, so I thought I would give it another try here and...if I screwed up, well, I had a box of 50 tweets from Leland and I needed 32 for the J12s, so I had enough for a second attempt if I botched the first, first up though I cut a couple of pieces of 1/8 ply to width so that I could quickly mark the measurements onto the tweets....in the finish I only used the 2 5/16 one and just flipped it from left to right to scribe the tweet.
Just using a propelling pencil to scribe a line that you can just see onto the tweeter...
The Workmate bench can clamp just enough pressure on the tweeter barrel to hold it securely enough....then with a steady hand, just cut along the line...and repeat 68 times...you quickly find that 1.) a fine cut wood saw blade cuts a cleaner line than a metal/plastic blade and 2.) You have to cant the jigsaw over by the merest fraction so that the reciprocating blade clears the barrel screws (although I did nip a couple by accident)
Then, check your straight lines...hmmmm...not bad, could be better
I also did do a check on how cutting to width was working out....can't find much to whine about there...
and then laid them all out in order...I went for the alternating orientation of tweets that others on this forum recommend.
So then it was time to put a mitre on em...so time to break out the previously mentioned compound mitre saw....
I'm not Scottish, but I decided to christen this saw "Aud Clankie", it clangs, it bangs and makes a noise like a braying donkey with each stroke, but it does cut a mitre on the 1016s with surprising efficiency; thanks to a new fine toothed blade just 5-6 strokes are all you need for a nice clean cut. I just clamped it to the workmate, put another clamp to mark off the length needed and it was all remarkably quick and painless
Then onto the jig for glue up...you will also see I've removed the piezo units from the array
I found that plastic model glue to tack the tweets had no effect, you could put it on, hold the parts together for 5 minutes and as soon as you let go, so did the tweets! So I went straight for the solvent weld. I've used this quite a lot before on building projects but this time I could only get a gel type...which was OK, but a bit more gloopy than I'd like, made it a bit difficult to get a nice even coat of solvent, but it worked well enough.
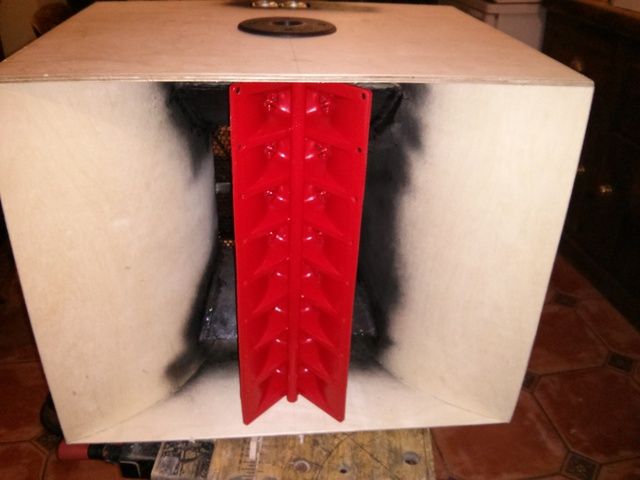
So then a coat of plastic primer went on...you can see that I've screwed up the alignment of the final pair of tweets on the left and the array develops a bit of a reverse ski jump...I don't know how that happened, I thought I'd got everything nicely pressed onto the jig...but, ho hum...just have to live with it now.
Then a coat of undercoat....
But since this is my bike and one of my other passions...
The tweets could only ever be Ducati Rosso...
2 x 3012 HO Jack 12 Lites
2 x Delta Pro 8b Wedgehorn 8 Monitors
Subs? Big question mark!
2 x Delta Pro 8b Wedgehorn 8 Monitors
Subs? Big question mark!
Re: Second BFM Build: 2 x J12 Lites
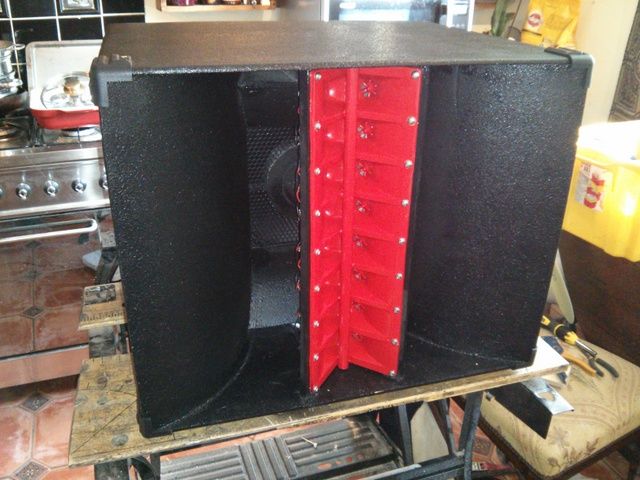
So...the array is nearly ready at this stage (still got to wire it up though) and time to turn back to the woodwork, well...the polystyrene work anyway...and fit the phase plug on the front....
I found the polystyrene ball on Amazon for about £8, thought it was quite pricey but ordered it anyway thinking I could cut it in half for each cab...when the box arrived I found I'd ordered 25 of them so I have a few spare
Any UK builders who need one just PM me and you can have a couple....anyway, I took my time cutting these because you should never Rush Hemispheres....do you see what I did there
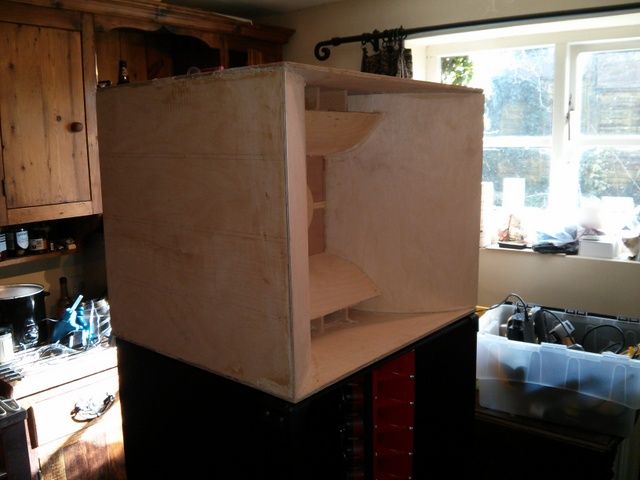
After that it was time to route the recess for the handles, so I made up a template and routed the first one pretty well, here you can see the template being positioned for the second side...held on with double sided carpet tape
A minute or so later and, in the middle of the second route, the pattern following bit (which I had tightened to white knuckle levels some ten minutes previously when doing the first side) dropped out of the router chuck and whirled it's way straight through the side of the cab...ooops...still, could've been worse...it could've spun it's way through my face. Just a salutary lesson that no matter how often you've used power tools, or how carefully you check things, sometimes you make mistakes....be careful, these things ain't toys.
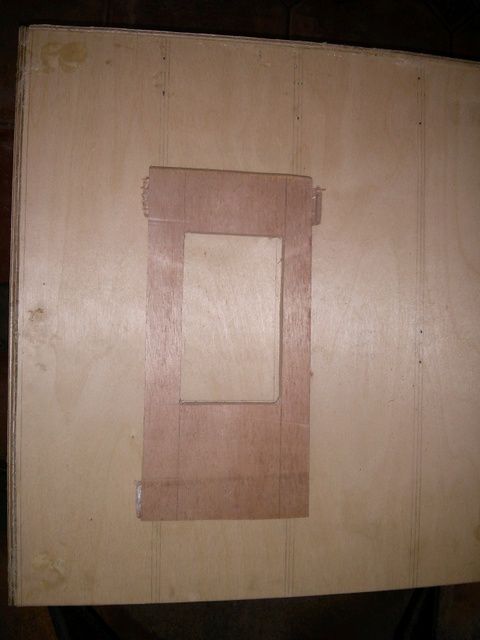
So, no option but to saw out a whole handle cutout...
Then I glued up a patch of 3mm ply on the inside to create a handle recess and make it all airtight again. In hindsight, the handles needed an 8mm recess, so I would've just laminated a rectangle of 3mm ply onto the 6mm ply at the handle position, then cut a handle recess sized hole, then put another 3mm rectangle over that...and I'd have done that before I glued the sides on right at the start of the build...Oh well....experience is what you get just after you need it...
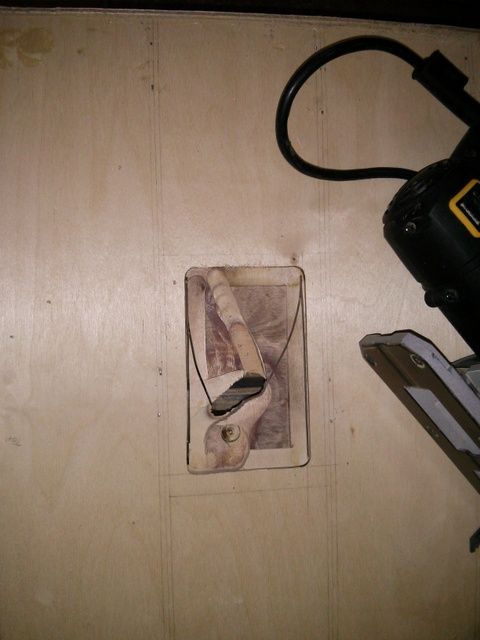
It's the little things that take up the time...here's a sequence of pictures illustrating the cutting and measuring of the cab and a backing piece to make a recess for the speakons, plus gluing and fitting....
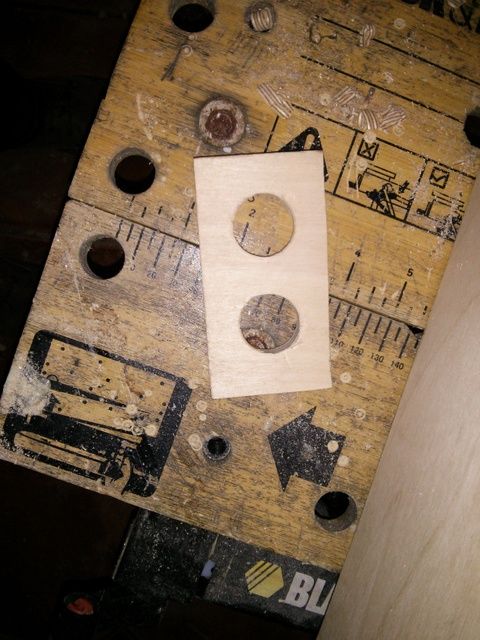
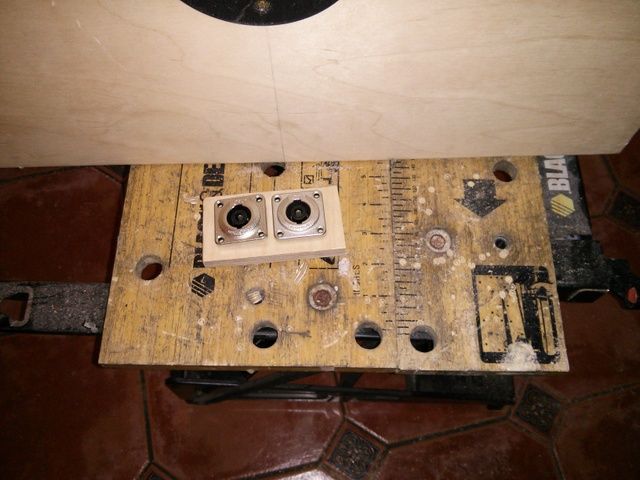
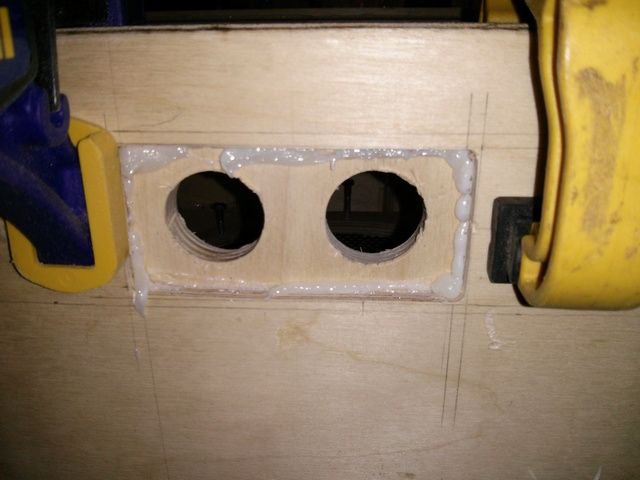
Making sure everything is centred, square and that all the PL squeeze out is chiselled off when it's dry and there is another hour of your life gone...never mind, I would have only spent that hour watching daytime TV and waiting for the grim reaper
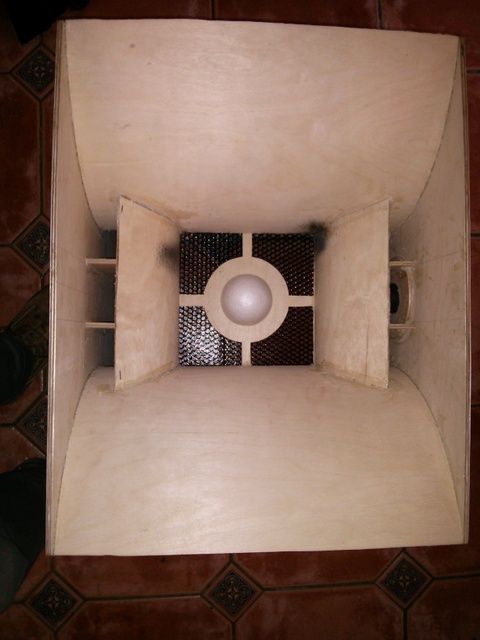
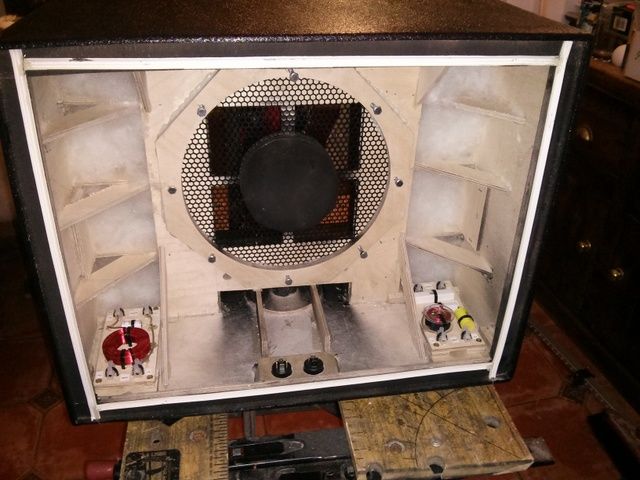
I'd still got some 50mm insulation left over from building a wetroom, so I cut a phase plug circle from that

I used a hand saw to slice it in half like a loaf of bread, and sanded a concave surface onto the disc, then hot glued it into place...it's maybe a tad shy in diameter, but by this time I'd started getting impatient to be done...it really seemed like there were still a mountain of things to do...so that'll have to do

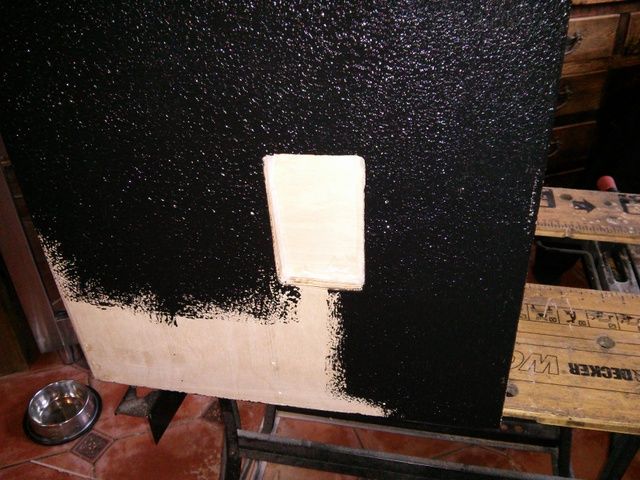
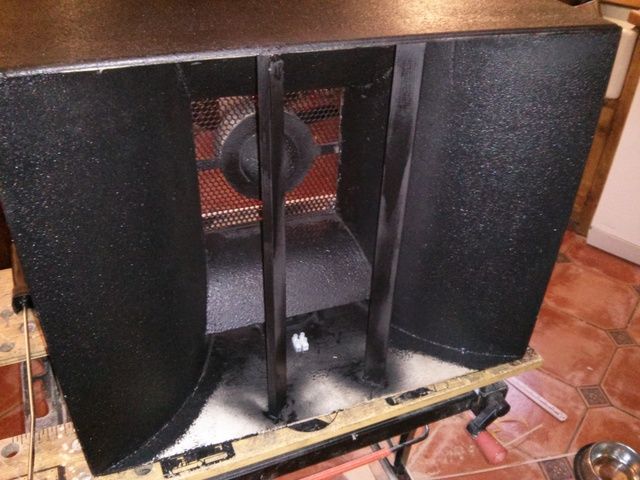
But then things seemed to start coming together...got a bit of duratex onto the horn sheaths before fitting the tweeter brackets.
and duratexed the sides (repaired handle recess turned out OK didn't it?)
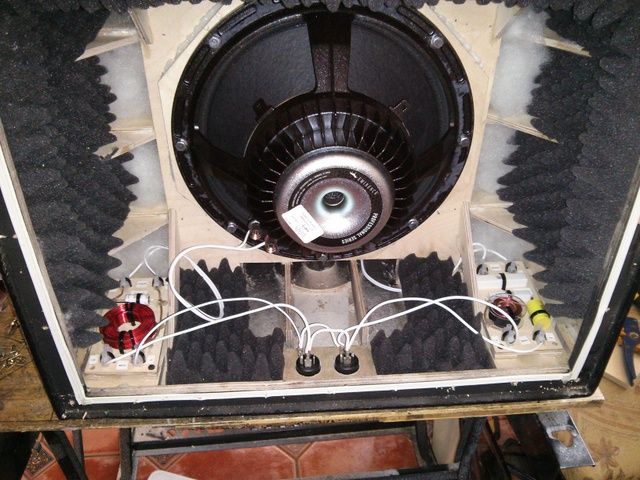
Crossovers were fitted to a couple of strips of 12mm ply that served to stop the crossover mounting screws going through to the outside of the cab, and stop the corner protector screws and the rubber feet screws coming in from the outside...positioning took a while but it works quite well

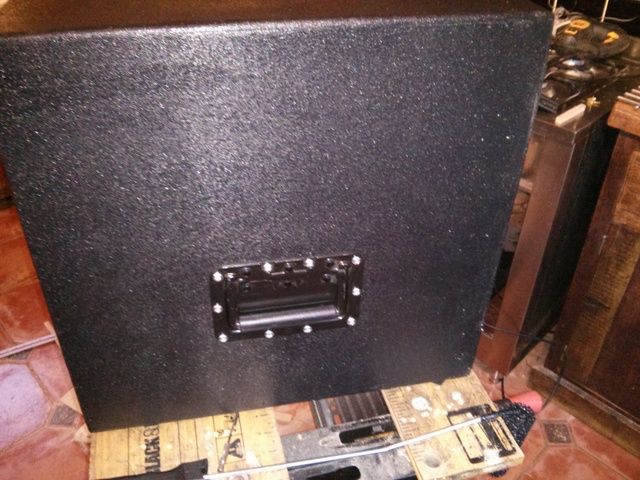
infamous handles were fitted...and we're getting some traction here...
And a connector block for the tweets glued up before a bit of black undercoat gets sprayed around
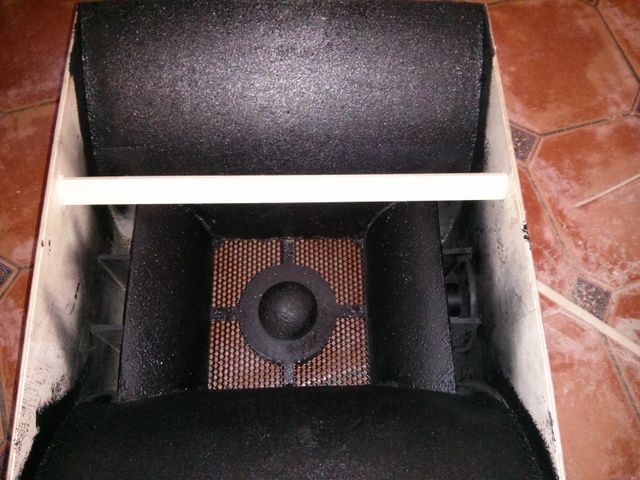
A bit of polyester stuffing gets loose filled into the horn voids
Followed by some acoustic foam padding...
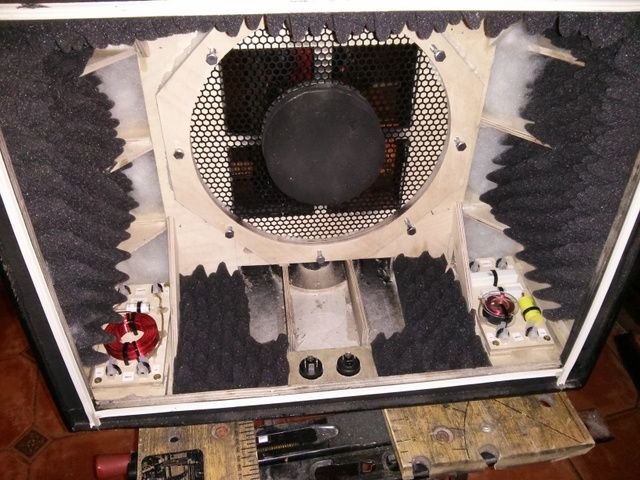
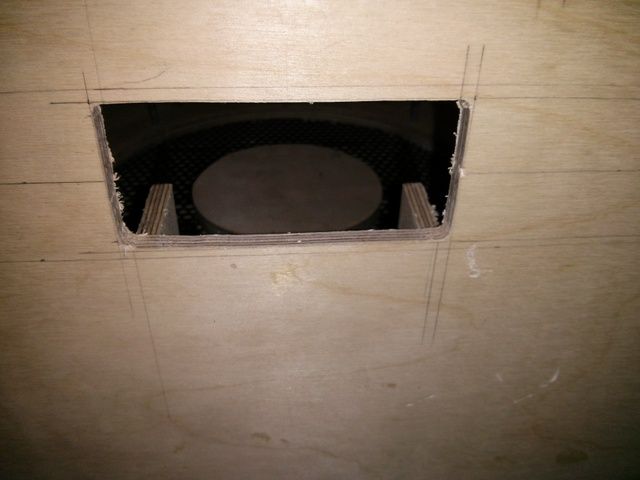
I left a bit around the ducts, not sure how near I should've taken the foam to the duct but didn't want to block it.
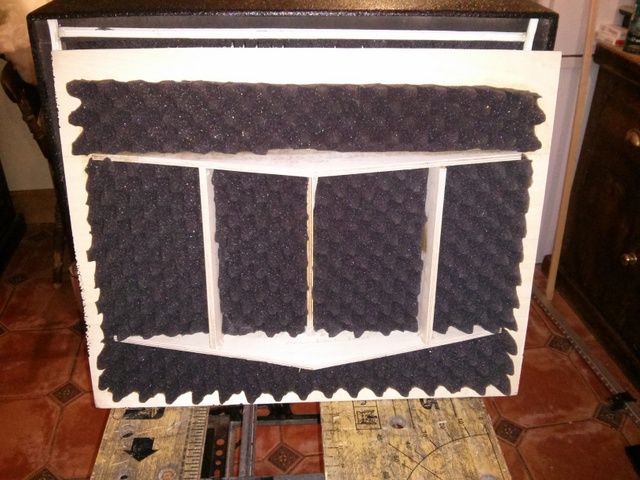
I made the back panels next but, just before I fired my first brad into the back panel, my Stanley electric staple gun went bang and refused to fire any more...I only bought it for this project so it's only lasted a couple of Jacks less back panels...can't take it back because it's the worse for PL squeeze out. So, how to make the back panel braces hold while the PL sets....hmmm..."That's another fine mess you've got me into Stanley". After some chin stroking I remembered that Bill recommended using hot glue to tack pieces into place while the PL set up, so that's what I did....a couple of dabs of hot glue before pressing the brace onto a PL bead on the back and it worked a treat...
Finally, mounted the drivers and tweets and wired it up
and buttoned the back up...managing to put my first skerch on the back panel in the process...thanks to a stray screw on the workbench
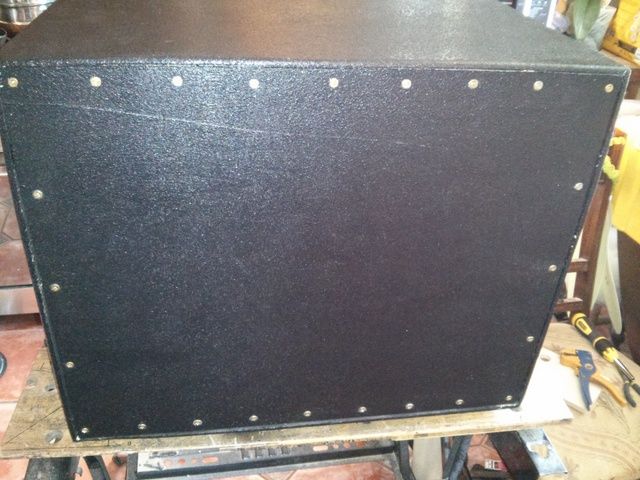
And there we have it...one kitchen built J12 Lite. I've already taken it to rehearsal were it was very clear and VERY loud. Despite only having time for some very rudimentary RTA'ing, it sounded great....
All I have to do now is, get the next one to the same stage
Which is where we came in on the last couple of posts.
I will post a review and a YouTube video when I've built the second cab, but in the meantime, that's it for this build thread. Thanks to everyone who gave me advice and encouragement along the way.
I found the polystyrene ball on Amazon for about £8, thought it was quite pricey but ordered it anyway thinking I could cut it in half for each cab...when the box arrived I found I'd ordered 25 of them so I have a few spare
Any UK builders who need one just PM me and you can have a couple....anyway, I took my time cutting these because you should never Rush Hemispheres....do you see what I did there
After that it was time to route the recess for the handles, so I made up a template and routed the first one pretty well, here you can see the template being positioned for the second side...held on with double sided carpet tape
A minute or so later and, in the middle of the second route, the pattern following bit (which I had tightened to white knuckle levels some ten minutes previously when doing the first side) dropped out of the router chuck and whirled it's way straight through the side of the cab...ooops...still, could've been worse...it could've spun it's way through my face. Just a salutary lesson that no matter how often you've used power tools, or how carefully you check things, sometimes you make mistakes....be careful, these things ain't toys.
So, no option but to saw out a whole handle cutout...
Then I glued up a patch of 3mm ply on the inside to create a handle recess and make it all airtight again. In hindsight, the handles needed an 8mm recess, so I would've just laminated a rectangle of 3mm ply onto the 6mm ply at the handle position, then cut a handle recess sized hole, then put another 3mm rectangle over that...and I'd have done that before I glued the sides on right at the start of the build...Oh well....experience is what you get just after you need it...
It's the little things that take up the time...here's a sequence of pictures illustrating the cutting and measuring of the cab and a backing piece to make a recess for the speakons, plus gluing and fitting....
Making sure everything is centred, square and that all the PL squeeze out is chiselled off when it's dry and there is another hour of your life gone...never mind, I would have only spent that hour watching daytime TV and waiting for the grim reaper
I'd still got some 50mm insulation left over from building a wetroom, so I cut a phase plug circle from that
I used a hand saw to slice it in half like a loaf of bread, and sanded a concave surface onto the disc, then hot glued it into place...it's maybe a tad shy in diameter, but by this time I'd started getting impatient to be done...it really seemed like there were still a mountain of things to do...so that'll have to do
But then things seemed to start coming together...got a bit of duratex onto the horn sheaths before fitting the tweeter brackets.
and duratexed the sides (repaired handle recess turned out OK didn't it?)
Crossovers were fitted to a couple of strips of 12mm ply that served to stop the crossover mounting screws going through to the outside of the cab, and stop the corner protector screws and the rubber feet screws coming in from the outside...positioning took a while but it works quite well
infamous handles were fitted...and we're getting some traction here...
And a connector block for the tweets glued up before a bit of black undercoat gets sprayed around
A bit of polyester stuffing gets loose filled into the horn voids
Followed by some acoustic foam padding...
I left a bit around the ducts, not sure how near I should've taken the foam to the duct but didn't want to block it.
I made the back panels next but, just before I fired my first brad into the back panel, my Stanley electric staple gun went bang and refused to fire any more...I only bought it for this project so it's only lasted a couple of Jacks less back panels...can't take it back because it's the worse for PL squeeze out. So, how to make the back panel braces hold while the PL sets....hmmm..."That's another fine mess you've got me into Stanley". After some chin stroking I remembered that Bill recommended using hot glue to tack pieces into place while the PL set up, so that's what I did....a couple of dabs of hot glue before pressing the brace onto a PL bead on the back and it worked a treat...
Finally, mounted the drivers and tweets and wired it up
and buttoned the back up...managing to put my first skerch on the back panel in the process...thanks to a stray screw on the workbench
And there we have it...one kitchen built J12 Lite. I've already taken it to rehearsal were it was very clear and VERY loud. Despite only having time for some very rudimentary RTA'ing, it sounded great....
All I have to do now is, get the next one to the same stage
Which is where we came in on the last couple of posts.
I will post a review and a YouTube video when I've built the second cab, but in the meantime, that's it for this build thread. Thanks to everyone who gave me advice and encouragement along the way.
2 x 3012 HO Jack 12 Lites
2 x Delta Pro 8b Wedgehorn 8 Monitors
Subs? Big question mark!
2 x Delta Pro 8b Wedgehorn 8 Monitors
Subs? Big question mark!
-
Grant Bunter
- Posts: 6912
- Joined: Mon Nov 28, 2011 11:12 am
- Location: Ilfracombe Queensland Australia
- Contact:
Re: Second BFM Build: 2 x J12 Lites
Looking great Jools 

One more piece of advice: On your access panel, remove any foam behind the vent of the driver.
Other than that, you've shown patience, ingenuity and the right stuff.
Enjoyed your Rush reference, rather clever.
One last question: Dog or Cat?
One more piece of advice: On your access panel, remove any foam behind the vent of the driver.
Other than that, you've shown patience, ingenuity and the right stuff.
Enjoyed your Rush reference, rather clever.
One last question: Dog or Cat?
Built:
DR 250: x 2 melded array, 2x CD horn, March 2012 plans.
T39's: 4 x 20" KL3010LF , 2 x 28" 3012LF.
WH8: x 6 with melded array wired series/parallel.
Bunter's Audio and Lighting "like"s would be most appreciated...
DR 250: x 2 melded array, 2x CD horn, March 2012 plans.
T39's: 4 x 20" KL3010LF , 2 x 28" 3012LF.
WH8: x 6 with melded array wired series/parallel.
Bunter's Audio and Lighting "like"s would be most appreciated...
-
morticiaskeeper
- Posts: 67
- Joined: Thu Dec 28, 2006 11:43 am
Re: Second BFM Build: 2 x J12 Lites
Looking good. I'm using your build post as my guide for my J10L. I may even be after one of your balls!
-
Hackomatic

- Posts: 400
- Joined: Thu Jun 25, 2009 8:11 am
- Location: West TN
Re: Second BFM Build: 2 x J12 Lites
This build thread exemplifies how all build threads should be structured. Attention to detail, lots and lots of beautiful pics, ingenuity, and a plethora of clever commentary. . .
Dave H
-
LelandCrooks

- Posts: 7242
- Joined: Thu May 04, 2006 9:36 am
- Location: Midwest/Kansas/Speaker Nirvana
- Contact:
Re: Second BFM Build: 2 x J12 Lites
Nicely done. I am especially impressed at the piezo work with a jigsaw no less.
If it's too loud, you're even older than me! Like me.
http://www.speakerhardware.com
http://www.speakerhardware.com

Re: Second BFM Build: 2 x J12 Lites
I concur, could not have done such neat cuts with a jig saw. Well done and congrats on a pair of great cabs. You make me want to build some Jack 12Lite cabs too.LelandCrooks wrote:Nicely done. I am especially impressed at the piezo work with a jigsaw no less.
-
Charles Jenkinson

- Posts: 1127
- Joined: Sat Aug 06, 2011 3:25 pm
- Location: Manchester, UK
Re: Second BFM Build: 2 x J12 Lites
Nice work Jools. Love the red. You will relish them.
Am playing a church conference gig this weekend - I don't play much these days, so was kind of hoping for a half decent PA experience. I was informed they had a new PA., which was why we are at this venue. When we turn up last night, it's just regular 12" full rangers on wall mounts, nothing below 80hz (if that low even - they've got the kick mic'd, but there's nothing of it coming through), EQ all over the place. I offered the sound guy I could bring a sub - he just ignored me and said "we'll get a good sound". Oh, then the mains amp proceeded to cut in and out during the set. ....we've got it all again today, ...hallelujah
Am playing a church conference gig this weekend - I don't play much these days, so was kind of hoping for a half decent PA experience. I was informed they had a new PA., which was why we are at this venue. When we turn up last night, it's just regular 12" full rangers on wall mounts, nothing below 80hz (if that low even - they've got the kick mic'd, but there's nothing of it coming through), EQ all over the place. I offered the sound guy I could bring a sub - he just ignored me and said "we'll get a good sound". Oh, then the mains amp proceeded to cut in and out during the set. ....we've got it all again today, ...hallelujah
2xJ12L (3012HO) switchable/melded
2xT30
Words&graphics - Audio&Acoustics - Hardware&DSP; 3 different paradigms.
2xT30
Words&graphics - Audio&Acoustics - Hardware&DSP; 3 different paradigms.
Re: Second BFM Build: 2 x J12 Lites
Phew! Where did the last few days go? So busy.
I'm sure I replied to everybody last week, but obviously no post. I think I must've previewed my post, then forgot to post it....I blame stupidity. Anyway....

Jaco and...

Maisie.
Sometimes, you see people post pics of pets with something like "my little helpers" captioned. I'd like to have done that, but in actual fact these two were absolutely bugger all use building Jacks, even though they're Jacks.
Tom: Thanks, appreciate it.
Morticiaskeeper: You're welcome to a couple of my balls, but I wouldn't trust following me on anything....and I am me!
Hackomatic: Awwwwww, I'm blushing now!
Leland, Anton: Thanks, I've done it once, because I couldn't think of an alternative, but wouldn't care to use a jigsaw again. I was a bit apprehensive about using "Aud Crankie" the manual mitre saw to do the 45 degree cuts but it actually did a relatively painless job on them, so for the second melded array I'll be making a jig so that "Aud Crankie" can do the straight cuts as well.
Charles, thanks...your build thread was one of the things I used for motivation when it seemed like I had a mountain to climb, and to rip off ideas. I'm looking forward to getting the second cab completed, but I've given myself a week off while I turn my hand to a bit of amateur luthery, dressing the fingerboard on my fretless and reinstalling the original humbuckers instead of the EMG's it's been sporting for the last few years (along with an ACG filter preamp). I'll try and get some live video at our next gig.
I'm sure I replied to everybody last week, but obviously no post. I think I must've previewed my post, then forgot to post it....I blame stupidity. Anyway....
Thanks Grant. Consider it done!Grant Bunter wrote:Looking great Jools
One more piece of advice: On your access panel, remove any foam behind the vent of the driver.
This pair of Jack Russells...Grant Bunter wrote: One last question: Dog or Cat?
Jaco and...
Maisie.
Sometimes, you see people post pics of pets with something like "my little helpers" captioned. I'd like to have done that, but in actual fact these two were absolutely bugger all use building Jacks, even though they're Jacks.
Tom: Thanks, appreciate it.
Morticiaskeeper: You're welcome to a couple of my balls, but I wouldn't trust following me on anything....and I am me!
Hackomatic: Awwwwww, I'm blushing now!
Leland, Anton: Thanks, I've done it once, because I couldn't think of an alternative, but wouldn't care to use a jigsaw again. I was a bit apprehensive about using "Aud Crankie" the manual mitre saw to do the 45 degree cuts but it actually did a relatively painless job on them, so for the second melded array I'll be making a jig so that "Aud Crankie" can do the straight cuts as well.
Charles, thanks...your build thread was one of the things I used for motivation when it seemed like I had a mountain to climb, and to rip off ideas. I'm looking forward to getting the second cab completed, but I've given myself a week off while I turn my hand to a bit of amateur luthery, dressing the fingerboard on my fretless and reinstalling the original humbuckers instead of the EMG's it's been sporting for the last few years (along with an ACG filter preamp). I'll try and get some live video at our next gig.
2 x 3012 HO Jack 12 Lites
2 x Delta Pro 8b Wedgehorn 8 Monitors
Subs? Big question mark!
2 x Delta Pro 8b Wedgehorn 8 Monitors
Subs? Big question mark!
-
Grant Bunter
- Posts: 6912
- Joined: Mon Nov 28, 2011 11:12 am
- Location: Ilfracombe Queensland Australia
- Contact:
Re: Second BFM Build: 2 x J12 Lites
Thanks for sharing!Jools4001 wrote:This pair of Jack Russells...Grant Bunter wrote: One last question: Dog or Cat?
Jaco and...
Maisie.
Good idea having a break and doing other stuff, keeps you fresh lol
What I'm starting to look forward to now is when you begin to use them live...
Built:
DR 250: x 2 melded array, 2x CD horn, March 2012 plans.
T39's: 4 x 20" KL3010LF , 2 x 28" 3012LF.
WH8: x 6 with melded array wired series/parallel.
Bunter's Audio and Lighting "like"s would be most appreciated...
DR 250: x 2 melded array, 2x CD horn, March 2012 plans.
T39's: 4 x 20" KL3010LF , 2 x 28" 3012LF.
WH8: x 6 with melded array wired series/parallel.
Bunter's Audio and Lighting "like"s would be most appreciated...