Page 4 of 8
Re: SLA Pro driver question
Posted: Tue Jul 21, 2015 11:10 pm
by kenkenni
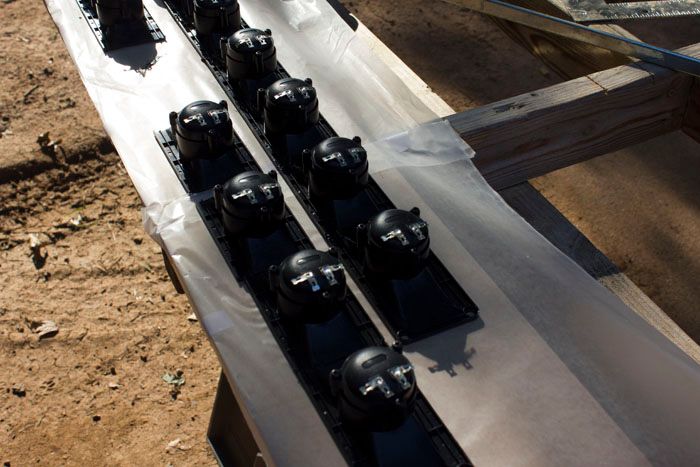
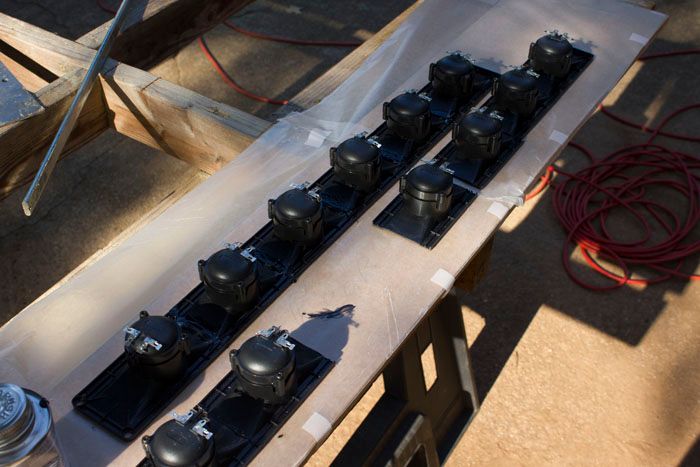
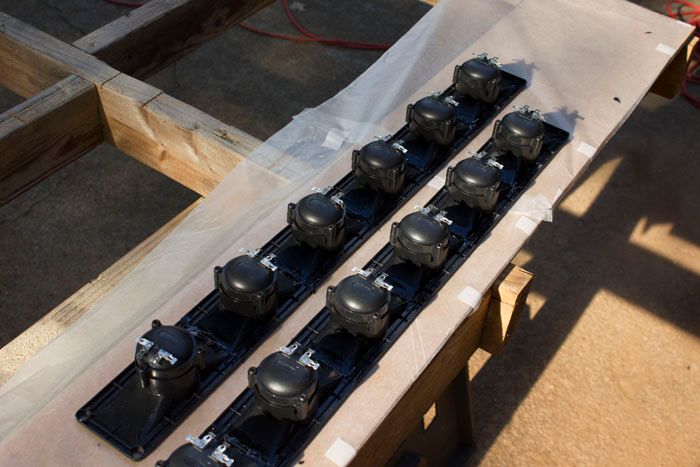
Rain wouldn't let me work outside the last couple of days so I made due by assembling the cross-overs.
Here is a group photo. I ran out of terminal barrier before I could finish the last one.
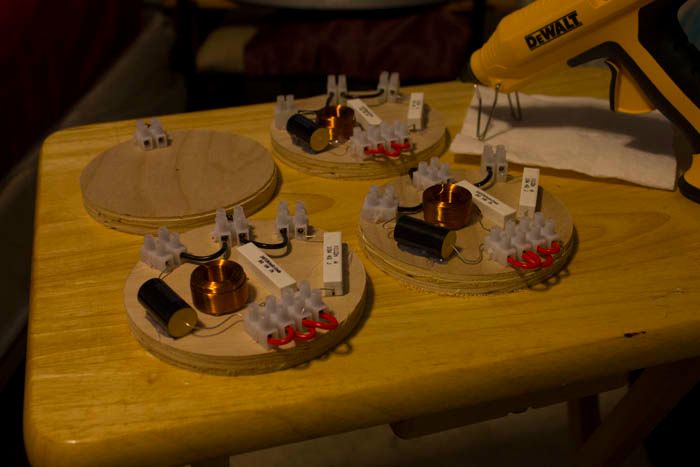
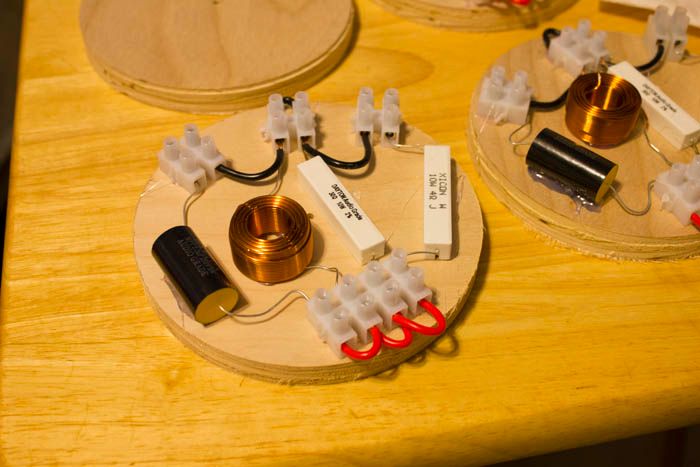
Here is a better shot. Does everything look in order?
Re: SLA Pro driver question
Posted: Tue Jul 21, 2015 11:47 pm
by Tom Smit
Good reuse of wood!

Re: SLA Pro driver question
Posted: Wed Jul 22, 2015 4:21 pm
by kenkenni
Yeah, Thanks! I get plenty more from all the mis-cuts I made so far. I am still learning as I go. Anyone got any good tips for cutting
the tweeter array for those of us without a saw table, that will make the task easy. I will figure it out as usual but any good advice helps.
Re: SLA Pro driver question
Posted: Wed Jul 22, 2015 6:23 pm
by 67baja
kenkenni wrote: Anyone got any good tips for cutting
the tweeter array for those of us without a saw table, that will make the task easy. I will figure it out as usual but any good advice helps.
Do you have a miter saw? I have cut all my piezo with a miter saw.
Re: SLA Pro driver question
Posted: Wed Jul 22, 2015 6:24 pm
by 67baja
Or maybe a grinder with a cutoff wheel? That would work too.
Re: SLA Pro driver question
Posted: Wed Jul 22, 2015 7:43 pm
by kenkenni
No Mitre Saw yet either, I,m afraid. I have been looking at them in Lowes though. Waiting for some kind of sale
on them. So I'm building with only my circular saw, jig saw, and router at the moment.
Re: SLA Pro driver question
Posted: Wed Jul 22, 2015 10:19 pm
by Tom Smit
One could make a jig for the tweet cutting, place the circular saw upside down on a board and flip the board around so that it becomes a table saw.
https://www.google.ca/search?client=ubu ... 8QfA6auwBg
Re: SLA Pro driver question
Posted: Wed Jul 22, 2015 11:28 pm
by DJPhatman
Over-width saw sled. Clamp the piezo body, with no element mounted, to the underside of the saw sled, then flip the sled right side up and clamp it to a stable work surface. Time consuming, but easy to do.
Re: SLA Pro driver question
Posted: Wed Jul 22, 2015 11:35 pm
by kenkenni
I never thought of that before. That just may be the answer. I'll come up with something and then share it you.
Re: SLA Pro driver question
Posted: Thu Jul 23, 2015 6:44 am
by Bill Fitzmaurice
DJPhatman wrote:Over-width saw sled. Clamp the piezo body, with no element mounted, to the underside of the saw sled
+1, but not with a clamp. Make the sled with a 45 degree cutting edge. Screw a stop board to the underside of the sled to set the distance from the outer edge of the piezos to the cut line, screw all of the piezo horns to the bottom of the sled against the stop board, and cut them all with one pass. Make sure you use a fine tooth plywood blade or an abrasive blade.
Re: SLA Pro driver question
Posted: Thu Jul 23, 2015 11:49 am
by ripNdeb
and carefully sand off the excess - can't think of the word - that doesn't belong there. So they're all the same length/width as each other.
Flashing, that's the word

Re: SLA Pro driver question
Posted: Thu Jul 23, 2015 4:51 pm
by kenkenni
Some good ideas there guys. I'm looking into them as we speak.
Re: SLA Pro driver question
Posted: Fri Jul 24, 2015 12:18 pm
by Tom Smit
[quote="kenkenni"
Here is a better shot. Does everything look in order?
[/quote]
Everything looks to be in order.
Re: SLA Pro driver question
Posted: Sat Jul 25, 2015 7:13 pm
by kenkenni
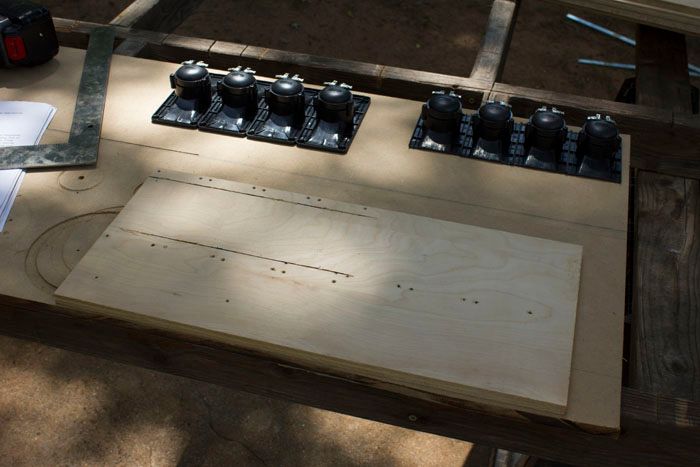
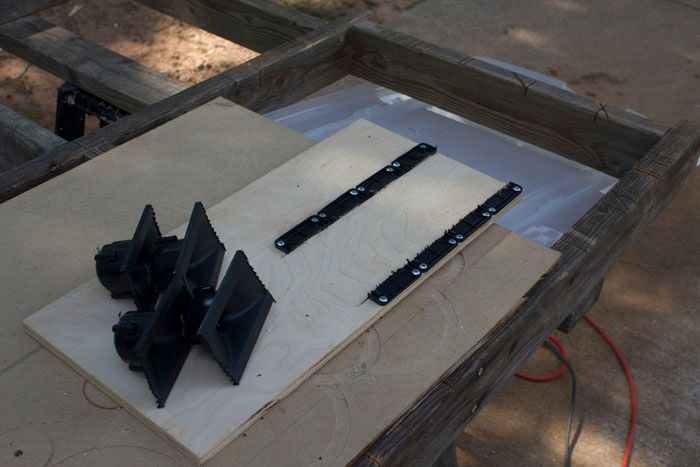
Using some of you guys ideas, this is how my brain translated them to this odd little rig here.
Using a square piece of scrap board I laid 4 tweeters on top and measured the required distance
on each end. The first four have been cut using a plunge blade on my oscillating tool. The cut lines
that are left is now the template for cutting the next four.
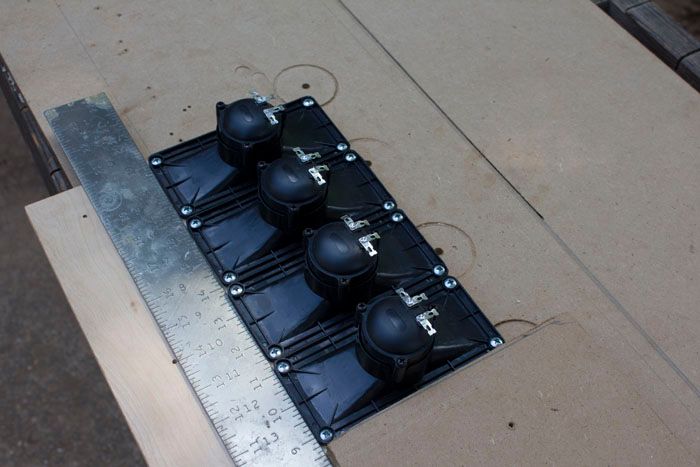
Here is just a better angle of the four already cut.
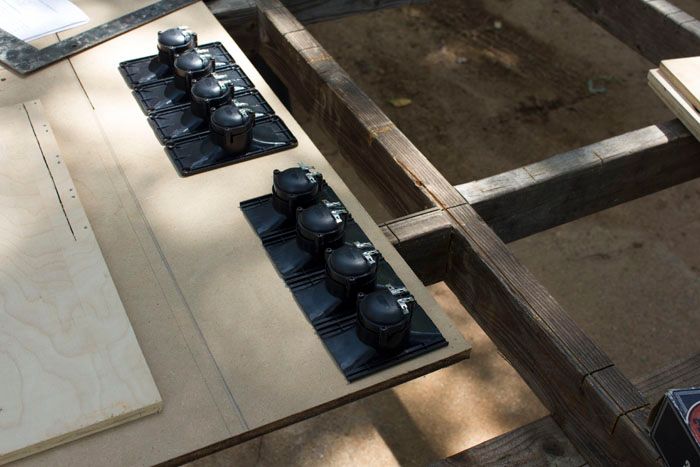
Here I am lining the tweeters up square and even.
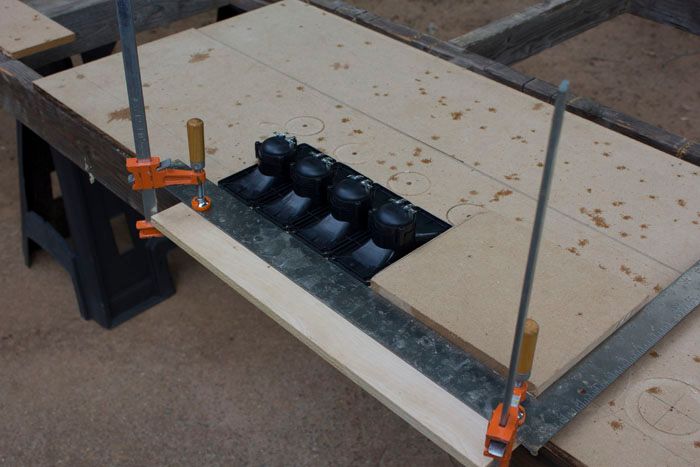
I then secured them with screws so they would not move during the plunge cut.
I then flip over the board and secure it.
With my plunge blade up agaisnt the botttom lines of the cut I proceed to carefully plunge through.
After the plunge cuts have been made.
Now time to switch the plunge blade for the sander and clean up the edges of the tweeters.
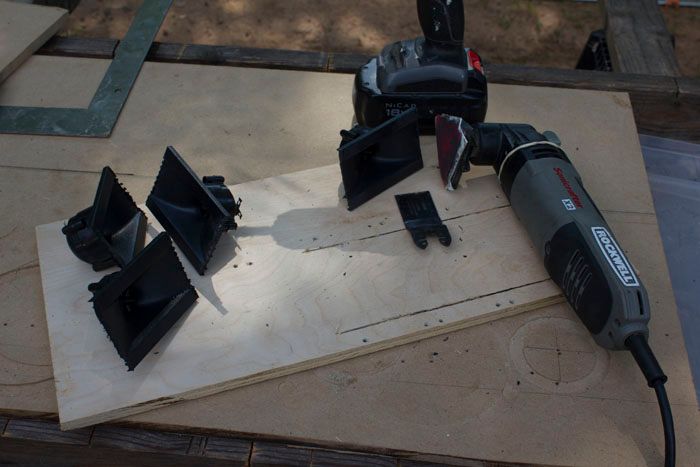
The cut tweeters are now clean and smoothed up for the next process.
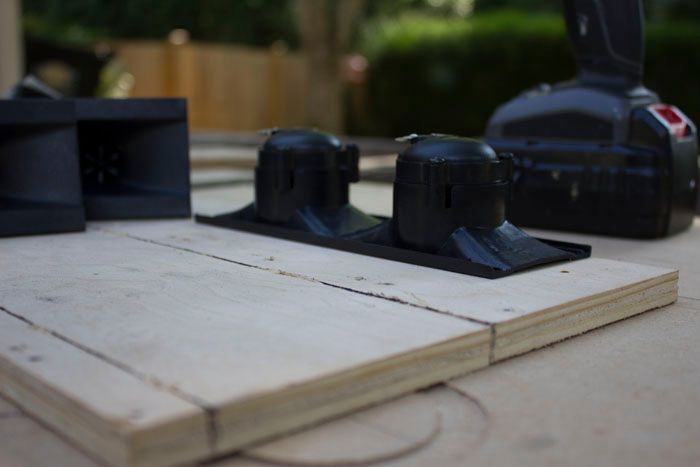
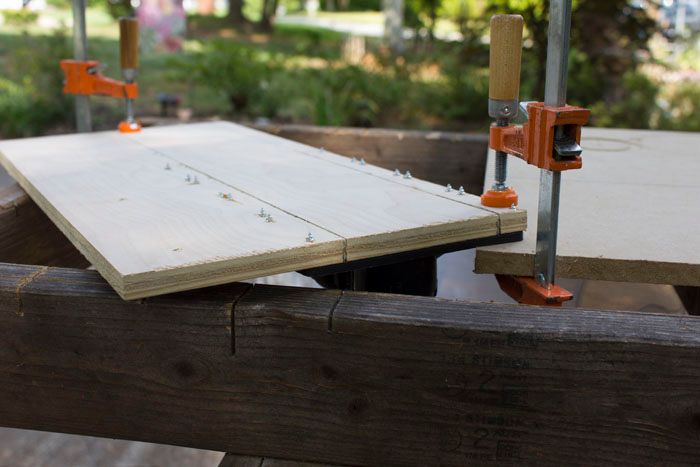
Here I'm using the same concept to do the four ends of the tweeter array.
Laying the tweets out here in preparation for joining.
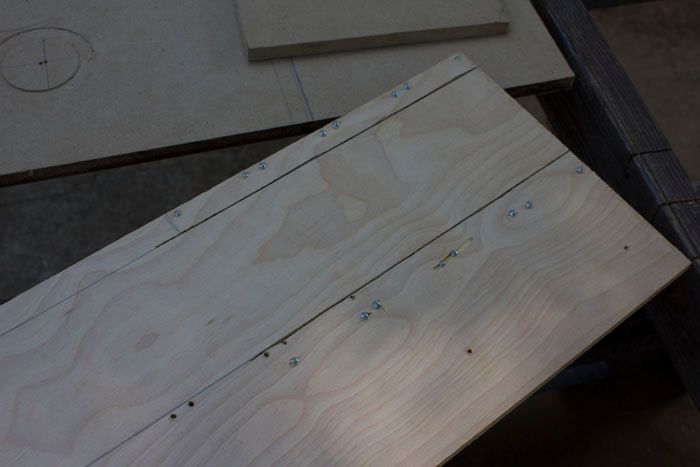
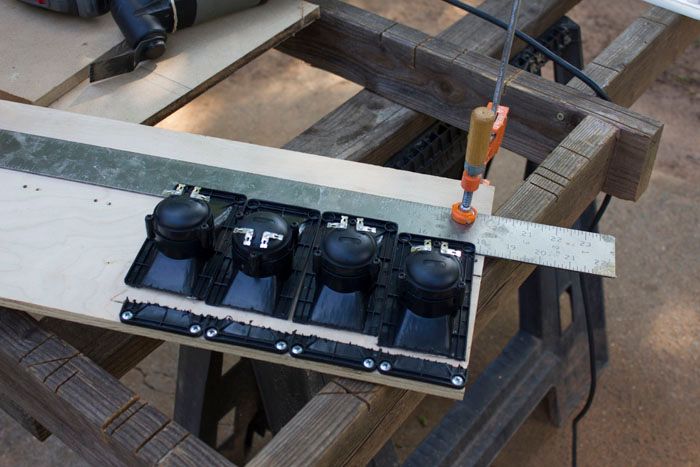
Joining the tweeter array up with Black ABS Cement.
And here is the completed array. Done in about three hours.
I do have another question. The pipe cement I used was called Oatey Medium Black ABS Cement. Bought at Home Depot is this the correct type of pipe cement?
There were so many kinds, till I just bought what sounded close to what I needed. It appears to be holding up so far, though there is a little flex in the whole array,
but not enough where it can break. I am going to let it sit at least a day and then see If it is strong enough.
Re: SLA Pro driver question
Posted: Sun Jul 26, 2015 12:06 am
by Tom Smit
Good work! You accomplished it!
That glue will work fine. The array will be flimsy, just handle with care.


