And here's your Friday night update!

I put a thick coat of cement on the front of the melded arrays. They both pretty much look like this as this point.


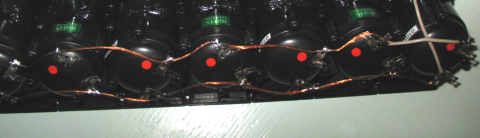
After they dried, i held them up to the light and could see light peeking through in some very small spots. Maybe 2-3 spots on each array and the openings were very small. The cement dries fast, so I'll put another coat on the front tonight and call it good. BTW. I discovered something a bit disconcerting. When I tried to do a test-fit of the melded arrays, they wouldn't go through the array braces. No matter how I tilted it, it wouldn't go through. I double-checked and my braces are exactly 5-1/2" apart. The problem was the soldering/connection tabs on the tweets, they all have to not be facing outwards towards the sides of the cab. So I guess I'm going to have to rotate the elements afterall. I could get it in there by forcibly bending a few tabs, which I did, just to ensure the array sat correctly on the braces (they do), but once the array is wired up, there can be no bending of the tabs. Never seen this noted before, so thought it worth mentioning.
So last night I got all carried away and thought I should spray the mouths of the cabs black. Sprayed one cab and stood there for a sec...something was not right. Wait...where are my grill braces?

So I spent this afternoon cutting the grill braces. Here's an interesting lesson in "picture composition." Note the interesting juxtaposition between the black cab and the white braces.


And that, boys and girls is what "A mistake" looks like. Oh well, problem fixed.
I went on cutting grill braces and came to an opportunity to excel. AKA, a problem. I tried cutting the grill braces for the horn panels at the per the plans 35 degrees, but all my cabs have different angles for the horn panels, unfortunately. They're not off by too much (save for one cab I've nicknamed "Ugly") but the differences are there. How to measure what angle to cut them at? An hour later I realized that if I simply held the brace like so, I could mark the angle.

Thankfully, I have a tilting tablesaw which made matching the angle easy.

Angled grill brace (3L stands for "Cab #3, left side)

Anothher pictures of the braces.

So the time has come to start the finish work! Finally. I thought it best to spackle/sand/roundover the cabs before putting the damping material in, since there will be spackle dust everywhere when I sand. I bought this little ditty at HF the other day, along with 80 and 120-grit paper. Should make short work of sanding.

Spackled cabs everywhere! I enjoyed the spackling part...the end is drawing nearer.


The spackle instructions say 3-5 hours drying time before sanding...I'll just let it sit overnight. I'm pretty sure I'll only need this one coat of Spackle on 90% of the cab. I have 3 pretty deep recessed screwholes on the top of the cab that might need a second fill/sand of spackle. We'll see tomorrow.
So tomorrow:
Drill mounting holes in rear panels and predrill rear panel braces while I'm at it
Sand cabs
Respackle if necessary
Finish with flush trim bits
Roundover edges
Install damping material
Possibly start on soldering up crossovers if there's time. I've decided against tophats in the cabs. The standard "through the reflector" position is too unbalanced, and trying to put it anywhere else has a high probability (for me) of totall screwing up the cab, so I'm not doing it. I'll either be constructing a "tray" of sorts that will go on the speaker stand(s) or possibly getting some metal stands built, ala Pulseman's most excellent stands. (And if you're reading this, Pulseman, how's the weather down there? *hint-hint*)
Thanks for looking.