Page 2 of 4
Re: Another OT12 build
Posted: Sun Mar 13, 2016 7:45 pm
by Bruce Weldy
Chris_Allen wrote:Bruce Weldy wrote:Looks like the newest plans don't show a different baffle for the 3012HO and the other drivers as far as the slots.
Yep, they disappeared in the 2011 set of the plans and aren't present in the JArray version either.
I got my first set plans in 2011, but before the change. Oh well......
Re: Another OT12 build
Posted: Sun Mar 13, 2016 9:24 pm
by ctmullins
Ok, then, that explains my confusion. Thanks for the clarification Bruce and Chris!

Re: Another OT12 build
Posted: Sun Mar 13, 2016 9:50 pm
by commander_dan
ctmullins wrote:So why exactly does it need to be sealed off?
I'd thought about this also when I built my otops, and sealed them with PL anyways. I figured since they're high power cabs, you want all the strength and rigidity you can get... not sealing the top hats could also be a potential rattle zone.
Re: Another OT12 build
Posted: Sun Mar 13, 2016 11:12 pm
by ripNdeb
ctmullins wrote:
So why exactly does it need to be sealed off?
Because it's a horn. Can't have air leaks just like the subs can't have air leaks. Folks even plug the 1/4" jacks if they're not using them.
Re: Another OT12 build
Posted: Wed Mar 30, 2016 10:36 pm
by ctmullins
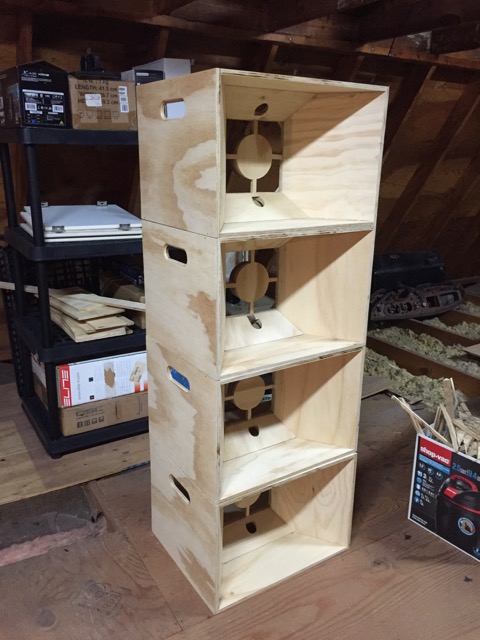
Made tiny bits of progress now and again over the last weeks. Got the horn panels trimmed flush - so glad I made the table saw sled!
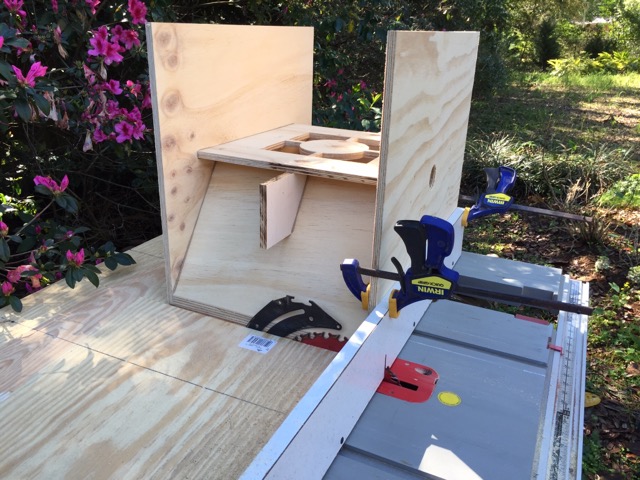
Cut out my phase plug pancakes from scrap, using a hole saw:
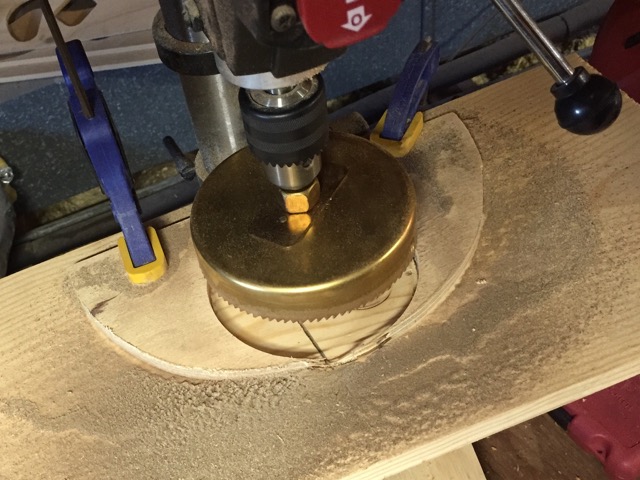
Cut out my driver anchors using my state-of-the-art compass:
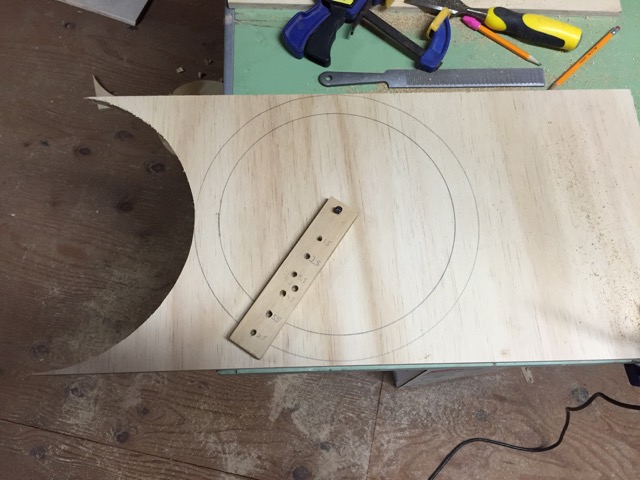
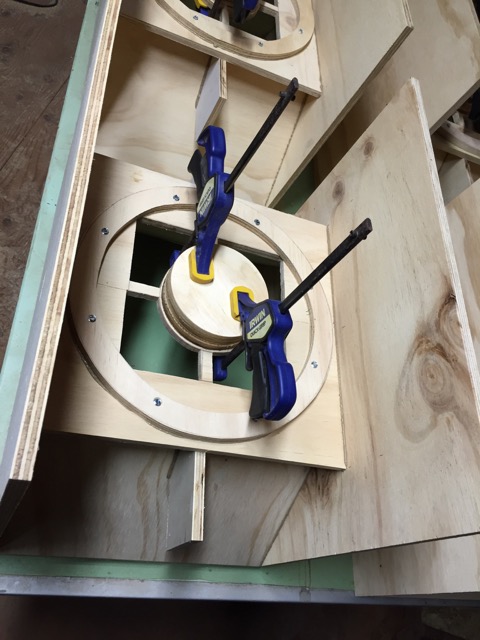
Finally installed them tonight!
Re: Another OT12 build
Posted: Tue Apr 05, 2016 8:35 pm
by ctmullins
Eight side panels with port handles cut and routed, and installed. I even got all of the handles pointing the right way round!
At this point I was curious about weight. I had been guessing that each finished cab would come in at between 40 and 50 pounds. So I grabbed one of the completed (well, almost completed; I still have to do the access panel flanges) shells and put it on my digital bathroom scale. It didn't even light up. So I weighed myself with and without the cab, and the difference is 19 pounds. Add a couple for flanges and piezos, and no more than eight for the 2512 and filters, and that's under 30. Wow! Oh, I forgot the nice beefy steel top hats. Okay, so maybe 32. That's fantastic!

Re: Another OT12 build
Posted: Sun Apr 17, 2016 12:40 pm
by ctmullins
Been doing the fiddly bits - handle half-rounds, access panel flanges. It's tedious, and takes up all my clamps.

Also putting together my piezo cutting jig. It's nearly time!
Re: Another OT12 build
Posted: Sun May 01, 2016 9:59 pm
by ctmullins
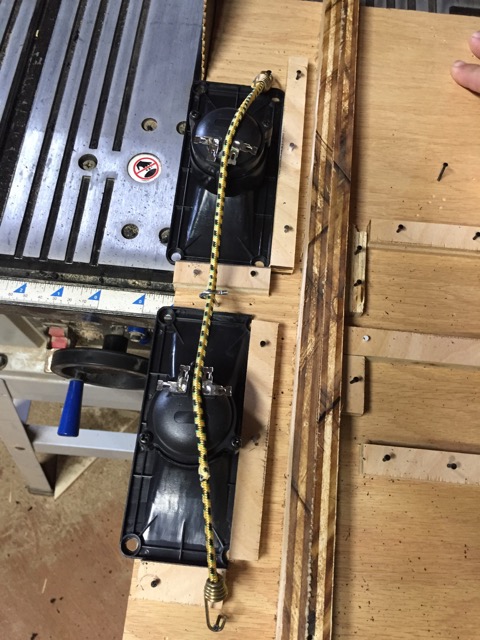
Alright, so here's the piezo cutting jig I threw together. It runs in the T-track, and one side is for the 90-degree cuts and the other is for the 45-degree cuts. A bungee cord holds the tweeters in position so that my fingers don't have to be so close to the blade. It didn't take me too long to figure out that I can cut two tweeters in a single pass on the 90-degree side!
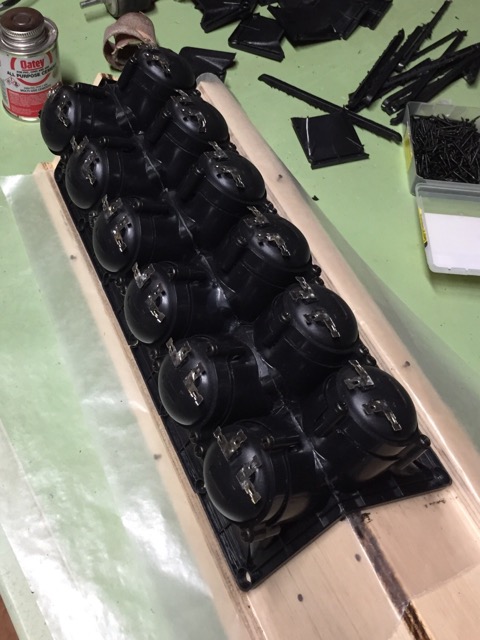
And here's my very first melded array all glued up. Looks great in the pic, but I assure you, there are hideous gaps all in it. I'm trying to dissolve some of the offcut with the glue to fill in those gaps. It'll be mostly hidden behind a grill anyway.
Re: Another OT12 build
Posted: Mon May 02, 2016 8:39 pm
by ctmullins
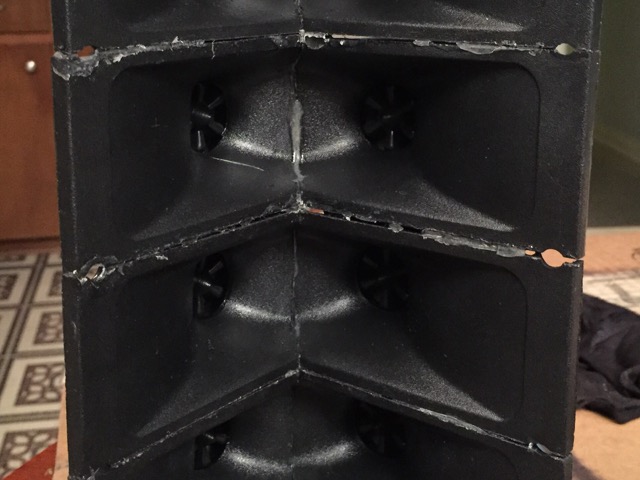
Oh my - does everybody's first melded array come out looking this hideous?
Re: Another OT12 build
Posted: Mon May 02, 2016 9:18 pm
by Bill Fitzmaurice
ctmullins wrote:Oh my - does everybody's first melded array come out looking this hideous?
Pretty much. Put masking tape over the joints, add cutoffs from the piezos to thinned cement to tint it black, fill the joints from the back. After it sets pull the tape, smooth the joints wet sanding with 240 grit paper.
Re: Another OT12 build
Posted: Mon May 02, 2016 9:47 pm
by ctmullins
Haha, thanks Bill, thought it was just me! I'll follow your advice and report back.
Re: Another OT12 build
Posted: Sun May 22, 2016 6:22 pm
by ctmullins
Worked great! Doesn't look perfect from the front, but that's okay, since I'm going to use grills. But the array is structurally very sound now. Got it wired up too.
Also got four crossovers wired up. I put the woofer section on the left and the tweeter section on the right. The inductors are spaced five inches edge-to-edge, seven center-to-center, which should be plenty, right?
And thanks to whoever it was that suggested using terminal strips - that made the whole thing go a lot faster, and neater too! Only one solder point on each one, where all those thingies tie in on the tweeter side...

Re: Another OT12 build
Posted: Sun Jun 26, 2016 4:10 pm
by ctmullins
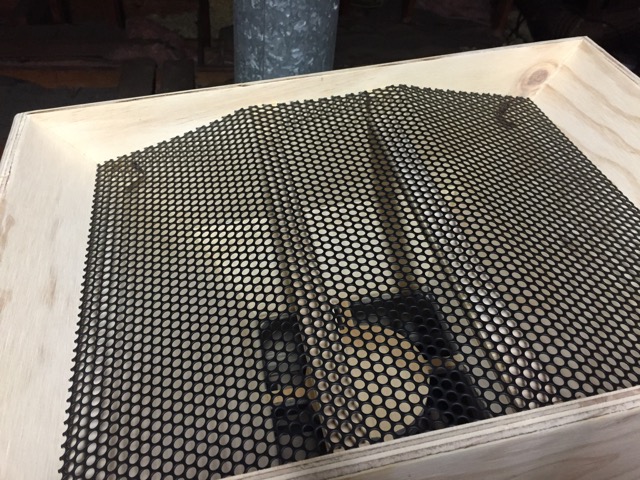
Not had a lot of time for these lately, but I am making slow progress. I got the piezo array brackets installed, and I got my grills cut out. I'm going for something slightly more stylish than flat grills along the front edge:
Now that the grills are cut out I can glue in little cleats at each corner to screw them to, at the proper angle (it's not perpendicular).

Re: Another OT12 build
Posted: Tue Feb 14, 2017 10:43 pm
by ctmullins
Back at these again after a bit of a hiatus. I have a bad habit of getting 90% done with something and then getting sidetracked...

Got all four sanded with 80 grit, nice and smooth and even now. Drilled the access panels for jacks. Cut up some cleats for grill mounting.
Glued 'em in (love my big spreader clamps!).
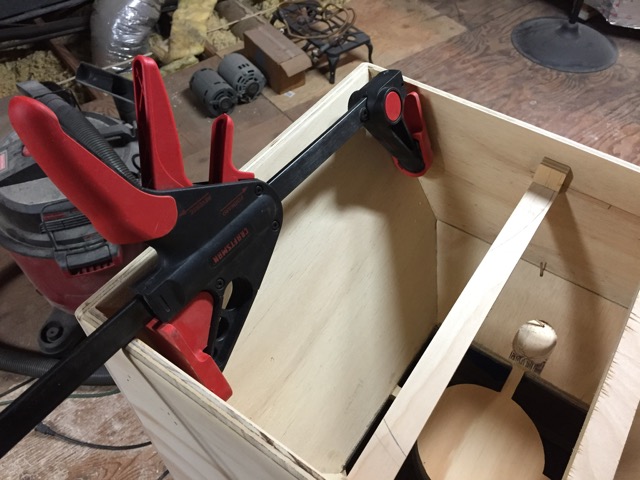
One in each corner, and two in the center for the straight array cabs.
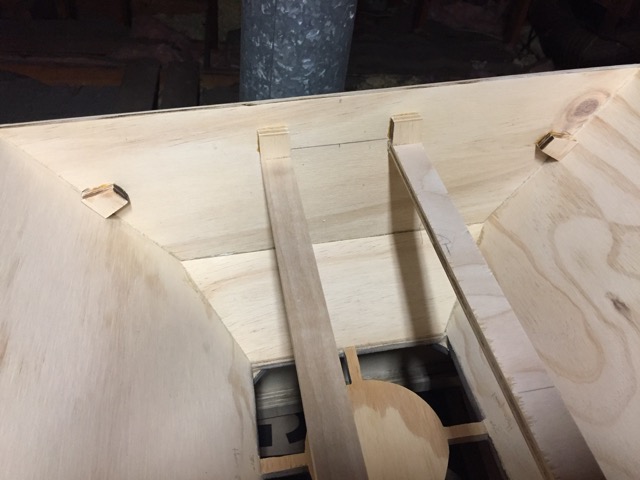
I eyeballed the angle; came out pretty good!
Ready for Duratex!
Re: Another OT12 build
Posted: Wed Feb 15, 2017 8:51 am
by LelandCrooks
I really like the grilles. Nicely done.