Page 2 of 17

Re: OTop12 Build Thread

Posted: Mon Feb 18, 2013 5:12 pm
by miked
Thanks for the tips. My Skil jigsaw is old and though I used a fine-tooth blade, I think it's pretty old too. Out of all my tools, the jigsaw is the one that needs replacing but I haven't because "it still works." Though not that great, obviously. The one tool I love is my Dremel. Have a mentioned I love my Dremel? A few minutes with the Dremel with a small sanding drum got me some fairly consistent baffles. This is all four of them, stacked and trued. Not perfect, but better.

Image

Now, onto rings and plug extensions. Onward, through the fog!! :fingers:

Re: OTop12 Build Thread

Posted: Mon Feb 18, 2013 5:33 pm
by AntonZ
These baffles look great to me Mike. Remember you are the only one that will know what your cabs look like on the inside. You are the only one that will know about all the f-ups in there. No such thing as a beauty contest for cab interiors. Well glued and airtight is all that matters. You are doing fine.

Re: OTop12 Build Thread

Posted: Mon Feb 18, 2013 5:47 pm
by Jon Barnhardt
AntonZ wrote:These baffles look great to me Mike. Remember you are the only one that will know what your cabs look like on the inside. You are the only one that will know about all the f-ups in there. No such thing as a beauty contest for cab interiors. Well glued and airtight is all that matters. You are doing fine.
+1

Re: OTop12 Build Thread

Posted: Mon Feb 18, 2013 7:06 pm
by miked
Plug extensions cut out. Will clean up on spindle sander later.

Image

Re: OTop12 Build Thread

Posted: Mon Feb 18, 2013 7:09 pm
by miked
Thanks, AntonZ and Jon B. I was just worried that the slight variance b/t baffles could lead to freq response problems and things like that. They are MUCH better since I cleaned them up with the Dremel. Baffles = No Joke Difficult.

Just finished cutting out the phase plug extensions. About two gallons of sawdust generated from those 12 little plugs. It's all good though! Sawdust = progress. :hyper:

Re: OTop12 Build Thread

Posted: Tue Feb 19, 2013 12:31 pm
by Zack Brock
Bruce Weldy wrote:
iamlowsound wrote:If you score (ie cut) the line before you try cutting with the jig saw, or any saw for that matter, you will greatly reduce the chip out. You don't have to cut deep either.

lowsound
That works as does just putting down masking tape first then drawing the design. Cut right through the tape. Also, there really is a difference in jigsaws - cheap ones don't cut worth a crap. I finally got a Bosch and it cuts like butter. The other thing you can do it use a fine tooth blade and go slow.
+1 - I use the masking tape method. I also use a fine tooth blade on my Bosch jigsaw.

The only difference between my Bosch and my Skilsaw brand jigsaw is that the Bosch has a button you press that helps stop blade shudder, which makes for cleaner cuts. But you can get the same results with masking tape on the bottom side.

Re: OTop12 Build Thread

Posted: Tue Feb 19, 2013 1:13 pm
by Bruce Weldy
miked wrote:Plug extensions cut out. Will clean up on spindle sander later.

Image
Here's how I sanded 'em perfectly round....
IMG_0148 (Medium) (Small).jpg

Re: OTop12 Build Thread

Posted: Tue Feb 19, 2013 9:59 pm
by miked
That's a great idea, Bruce. Especially since my circles already have a hole in the middle. I'd imagine you rotate the disc against the belt slowly, by hand, correct? You don't just let it "freewheel" right? Thanks for the tip!

Re: OTop12 Build Thread

Posted: Tue Feb 19, 2013 11:44 pm
by Bruce Weldy
miked wrote:That's a great idea, Bruce. Especially since my circles already have a hole in the middle. I'd imagine you rotate the disc against the belt slowly, by hand, correct? You don't just let it "freewheel" right? Thanks for the tip!
Yep, just move the disc into the belt, clamp it and start rotating. Works like a champ.

Re: OTop12 Build Thread

Posted: Wed Feb 20, 2013 1:52 pm
by miked
Duly noted. Thanks, Bruce. Will get them sanded tonight and probably cut the angles on the horn panels. I did not cut the angles when I cut the boards out, but it will be simple enough to do so on the TS tonight. I wish I had full days to just bang these out but my work days are long and evenings very short and "full of family." So, I gotta piecemeal them.

Re: OTop12 Build Thread

Posted: Thu Feb 21, 2013 1:38 pm
by miked
Well, I guess I jinxed myself by making it sound easy. I screwed up horn panels b/c I cut them at exactly 11 3/4" but at 90 degrees, thinking I'd "just slap the angles on there later". Nope, you can't do that AFTER you've already cut it to length. I tried with scrap last night and could not get a proper 34-degree angle cut on a 6-inch or 3-inch piece while still keeping it 6 or 3 inches wide.

So, those 8 horn panels provided fodder for my NEW 12 discs for the phase plug extensions, which I also screwed up by trying to PL them together. PL expands. I kinda forgot about that. Glued/nailed together. 8 hours later I wound up with crooked pancake stacks. :owned:

As Harley so appropriately put it: "Bet you won't do that again." So right.


I cut 12 new discs last night and will wood glue them together tonight...right before I cut 8 new horn panels with the proper 34-degree angle on them. Pics to follow later. And here I was all proud of myself for getting everything I needed for 4 OTops out of 3, 5x5 sheets of BB. More like 4 sheets now. :wall:
miked wrote:Duly noted. Thanks, Bruce. Will get them sanded tonight and probably cut the angles on the horn panels. I did not cut the angles when I cut the boards out, but it will be simple enough to do so on the TS tonight. I wish I had full days to just bang these out but my work days are long and evenings very short and "full of family." So, I gotta piecemeal them.

Good progress tonight

Posted: Thu Feb 21, 2013 9:35 pm
by miked
I made some good progress tonight. Wish I could keep going but I get up very early for work. This weekend will be a different story, however, and I'm looking forward to that.
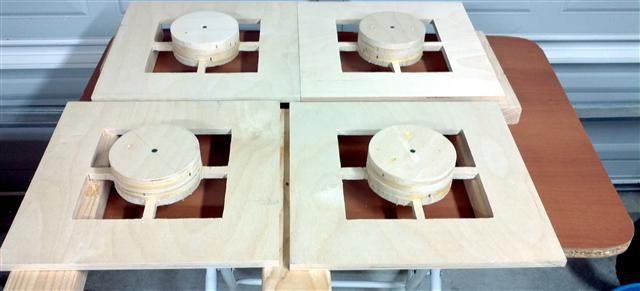
First things first. I got my phase plug extensions glued up and the worst stack is out of round by maybe 1/16th on one side. They'll clean up easily on the sander. Thanks again for the tip, Bruce.

Image
Image

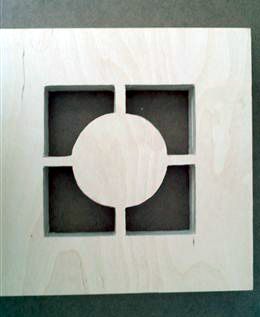
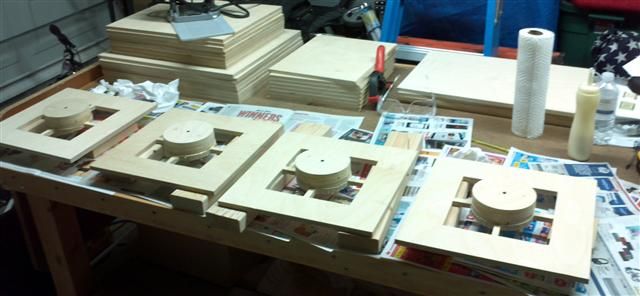
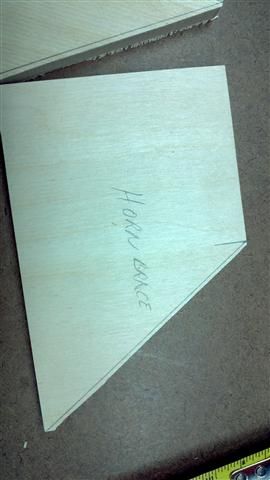
I finally got the darn horn panels cut. These were almost as difficult as the baffles for me! I'm sure there's a more efficient way to cut them, but I had to:

1. Cut the pieces to 14 x 12
2. Cut the short end to 11 3/4 with a 34-degree angle
3. But that still left the "long edge" of the angle at 12" :?
4. Flip the panel so that the angle cut is now against the fence
5. Cut the overall length of the panel down to 11 3/4"

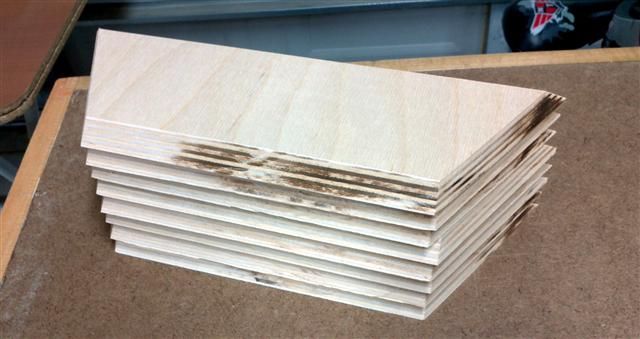
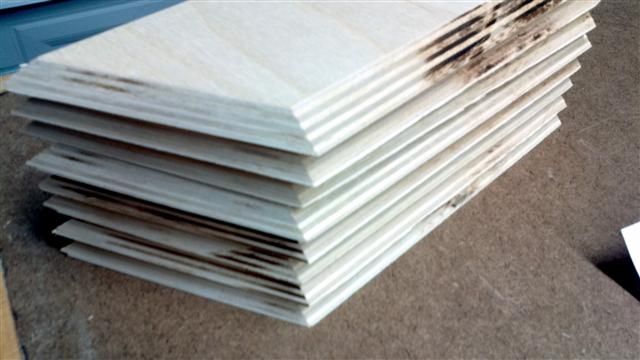
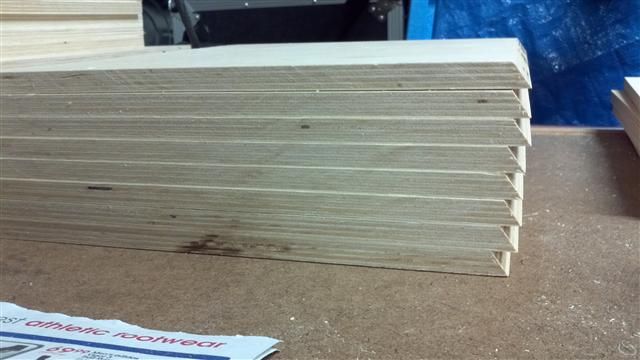
The panels are perfect, if I do say so myself. Too bad I used up 1.5 SHEETS of 5'x5' BB to get them. It took me THREE tries...cutting out 24 panels before I got here. Hey, it's my first time. Seriously, this part sucked. Hopefully another noob will read this and avoid wasting wood and time. Anyway, end result is what matters.

Image

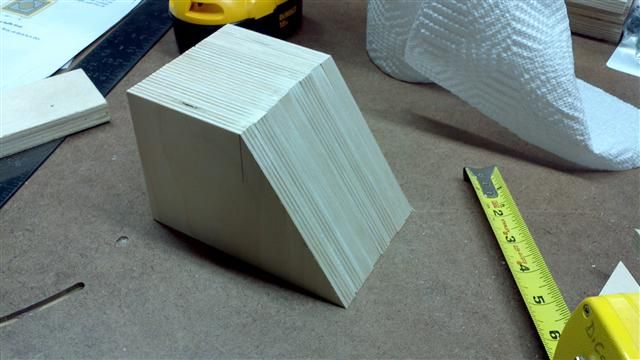
Got the horn braces cut. I ripped a 14 x 5 piece of BB down to 4" wide, then cut the 4 x 5 5/16" blanks. I used my TS sled to cut these small parts. Note the clamped stop block.
Image

Then, I measured off 3 3/16" off one side, marked it and rough cut it on the bandsaw.

Image

Then, using Mister Sander here...
Image

I sanded down to the line and wound up with a matching stack. They are all within 1/32" of each other on the angle cut.
Image
Image

That's all for tonight. I realize I'm playing catchup; I was expecting to be halfway through glueup by now, but hey, at least I'm redoing the pieces I feel are substandard. If you can't find the time to do it correctly the first time, how will you find time to do it again to fix your mistakes? Being an IT guy by trade, I tell this to my bosses all the time. They want it up "right now" and most times, that's just not possible. :horse:

Tomorrow I'll true up the phase plugs on the sander. I was going to patch the screw holes with wood putty, but Bruce reminded me that once they're glued to the baffle there AREN'T any holes. (Why didn't I think of that?). Thank you, Bruce. I will also cut the spacer rings for the drivers and mount it to the baffles before mounting the baffle to the bottom panel (if I get that far). FWIW, I don't understand why it's not in the plans that way (mount ring to baffle before mouting baffle to bottom). Trying to attach the spacer ring to the baffle once the baffle is mounted, then hold the woofer in place to drill the mounting holes would be a royal PITA and wouldn't come out right half the time. IMO.

More tomorrow...if life doesn't get in the way, that is.

Re: OTop12 Build Thread

Posted: Thu Feb 21, 2013 11:12 pm
by 67baja
Now that I think of how I did my phase plugs, I just PL'ed the first disc in and hit it with the brad nailer, then PL'ed and nailed the 2nd, etc. It went real quick. Were they perfect? I doubt it. Were they good enough and do the OT's sound good? Yup.

More progress

Posted: Sun Feb 24, 2013 12:14 am
by miked
Some more progress tonight and I'm feeling pretty happy; I got the reflectors cut! I've never done compound miter cuts on the TS before. This was difficult for me and they turned out pretty good.

Image
Image

There was some burning on a few of them. They were a bit difficult to push through the blade; no idea why as I cut everyone of them the exact same way. But, it's done and I'm happy to be past that nerve-buster.

Also got the phase plug extensions glued to the baffles.

Image

Plenty of sqeezeout. With the baffle being flat and the extension being flat, one 2" sheetrock screw in the middle was all that was needed to secure it while the glue dries. I'll be leaving the screw in there too. Note that the screw is countersunk.
Image

All four baffles drying.
Image

Tomorrow I will:

Sand the glue squeezeout off the baffles.
Cut the handle holes into the sides and round them over.
Cut the spacer rings for the drivers.

Will start assembly if time allows. Thanks for looking.

Re: OTop12 Build Thread

Posted: Sun Feb 24, 2013 12:40 am
by Bruce Weldy
Mighty nice!