Page 10 of 44
Re: The journey begins.. 16 T60's and 12 DR280's!!
Posted: Wed Jun 12, 2013 1:57 pm
by Chris_Allen
Harley wrote:Yeah, but ours had that polychromatic stabilised quadratic doofer cunningly positioned planar to the hyperbolic co-ordinates of the theoretical transducer position along with the modified double overhead locking cam holder and I believe that really set us apart in jig technology Leland.
Yours must be four times as expensive and unmeasurably more accurate.
Re: The journey begins.. 16 T60's and 12 DR280's!!
Posted: Wed Jun 12, 2013 3:49 pm
by Grant Bunter
Harley wrote:LelandCrooks wrote:That jig is very familiar. Almost the same as what Harley and I came up with.

Yeah, but ours had that polychromatic stabilised quadratic doofer cunningly positioned planar to the hyperbolic co-ordinates of the theoretical transducer position along with the modified double overhead locking cam holder and I believe that really set us apart in jig technology Leland.
Your forgot the twin fox tails and that fact that it's red, therefore goes faster...
Re: The journey begins.. 16 T60's and 12 DR280's!!
Posted: Wed Jun 12, 2013 5:48 pm
by hifibob
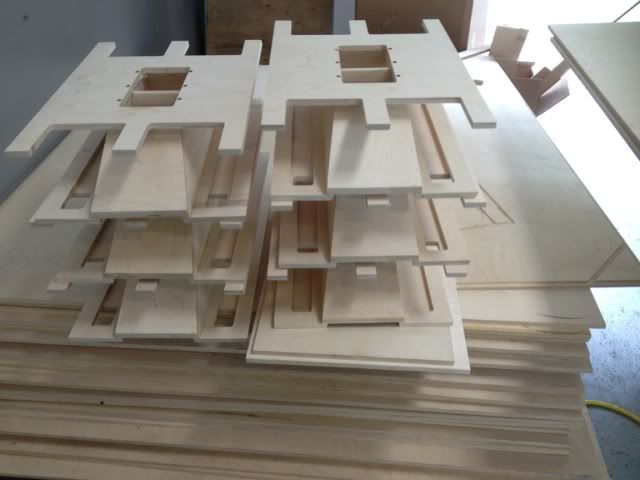
So today I realized that I probably should have built one first before doing 6 at a time.. When I make a mistake its x6

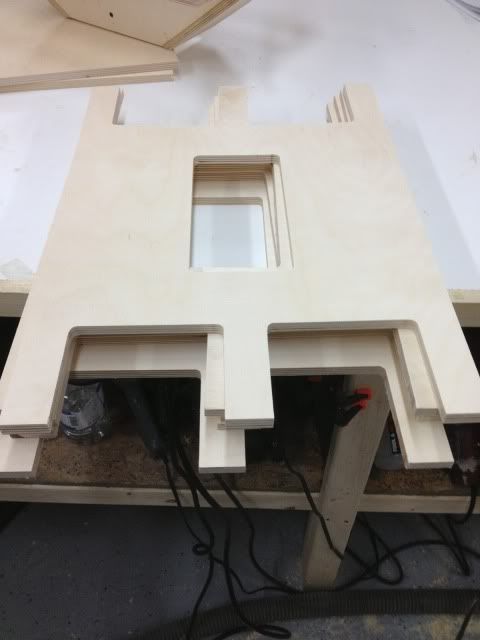
Any way made this jig to simplify the woofer baffle..
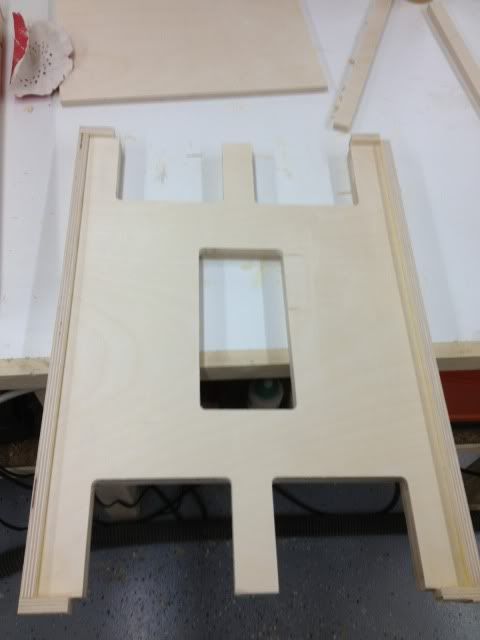
and here's all six of them, well 12 of them if you count the ones i screwed up on..
Re: The journey begins.. 16 T60's and 12 DR280's!!
Posted: Wed Jun 12, 2013 10:05 pm
by Grant Bunter
errr human error often intervenes huh.
The "wasted" ply is probably not a frustrating as the wasted time.
Sorry, can't offer a template...
Re: The journey begins.. 16 T60's and 12 DR280's!!
Posted: Thu Jun 13, 2013 6:25 am
by LelandCrooks
Chris_Allen wrote:Harley wrote:Yeah, but ours had that polychromatic stabilised quadratic doofer cunningly positioned planar to the hyperbolic co-ordinates of the theoretical transducer position along with the modified double overhead locking cam holder and I believe that really set us apart in jig technology Leland.
Yours must be four times as expensive and unmeasurably more accurate.
Wait, yours has a stabilised doofer? Mine fluctuates in and out of a quantum state. Every time I look at it.
Re: The journey begins.. 16 T60's and 12 DR280's!!
Posted: Thu Jun 13, 2013 8:31 pm
by hifibob
Hey guys I'm going to construct a wire cutter for the urethane throat filler or possibly just make a jig to cut them on my band saw.. Anybody got any tips? Also can I use the expanded polystyrene stuff from HD? And what are you guys using to glue it in place. Thanks
Re: The journey begins.. 16 T60's and 12 DR280's!!
Posted: Thu Jun 13, 2013 9:21 pm
by Rick Lee
Just did some earlier today... I use a router setup to cut the circle. Band saw would work well. I used to use a scroll saw. Then I mark the inner circle, cut out the middle (less to sand) and use a belt sander to form the angle. Goes quick. Hot glue to attach.
Re: The journey begins.. 16 T60's and 12 DR280's!!
Posted: Thu Jun 13, 2013 9:28 pm
by hifibob
Rick Lee wrote:Just did some earlier today... I use a router setup to cut the circle. Band saw would work well. I used to use a scroll saw. Then I mark the inner circle, cut out the middle (less to sand) and use a belt sander to form the angle. Goes quick. Hot glue to attach.
Thanks Rick! Can I use the foam insulation board from Home Depot? Its called expanded polystyrene.
Re: The journey begins.. 16 T60's and 12 DR280's!!
Posted: Thu Jun 13, 2013 11:50 pm
by Rick Lee
Sorry, forgot about that question- that's the stuff! Rigid closed cell. Some on here have experimented with expanding foam but it wasn't worth the trouble. If you end up gluing layers together to get the right thickness try to keep the hot melt away from the angled areas that you're gonna sand. It will melt and clog up the sanding belt... even brand new sanding belts... and hot melt doesn't like to clean off brand new sanding belts...
Like to hear if Leland has a better way to do this- but it's probably a trade secret

Re: The journey begins.. 16 T60's and 12 DR280's!!
Posted: Fri Jun 14, 2013 12:12 am
by sine143
i'm sure you could use a bench sander, plus some type of jig....
Re: The journey begins.. 16 T60's and 12 DR280's!!
Posted: Fri Jun 14, 2013 6:50 am
by LelandCrooks
Rick Lee wrote:Sorry, forgot about that question- that's the stuff! Rigid closed cell. Some on here have experimented with expanding foam but it wasn't worth the trouble. If you end up gluing layers together to get the right thickness try to keep the hot melt away from the angled areas that you're gonna sand. It will melt and clog up the sanding belt... even brand new sanding belts... and hot melt doesn't like to clean off brand new sanding belts...
Like to hear if Leland has a better way to do this- but it's probably a trade secret
Not any more. Tim Ard designed forms and found release agents to use the expanding foam. Worked a treat to quote my favorite Kiwi. He's no longer doing them. I now have them CNC cut, but it takes a while to get them.
Re: The journey begins.. 16 T60's and 12 DR280's!!
Posted: Fri Jun 14, 2013 7:47 pm
by hifibob
Rick Lee wrote:Sorry, forgot about that question- that's the stuff! Rigid closed cell. Some on here have experimented with expanding foam but it wasn't worth the trouble. If you end up gluing layers together to get the right thickness try to keep the hot melt away from the angled areas that you're gonna sand. It will melt and clog up the sanding belt... even brand new sanding belts... and hot melt doesn't like to clean off brand new sanding belts...
Like to hear if Leland has a better way to do this- but it's probably a trade secret
Thanks Rick! Great tip about the hot glue, I'm willing to bet i would of wasted a sanding belt lol.. Luckily I found 1 3/4" thick foam, it has aluminum foil on it but it peals right off.. The only thing is it comes in 4x8 sheets, but then again I need to build so many of these things..
Re: The journey begins.. 16 T60's and 12 DR280's!!
Posted: Fri Jun 14, 2013 7:53 pm
by hifibob
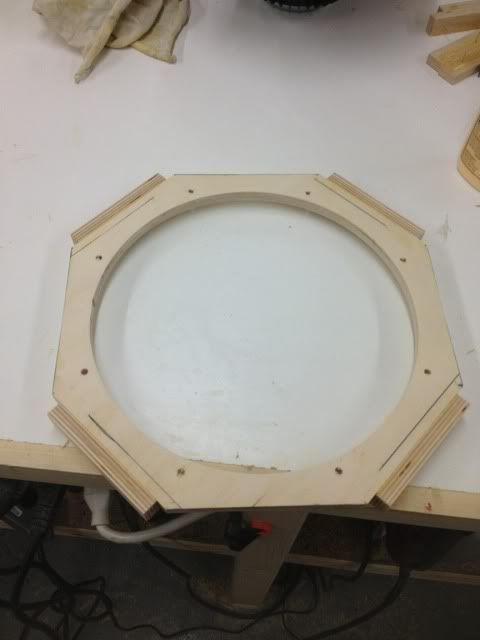
Well not much goin on but I had a few hours today to get some stuff done,,
Made this jig up to speed up attaching speaker baffle to horn/throat, worked like a charm and made for quick assembly.
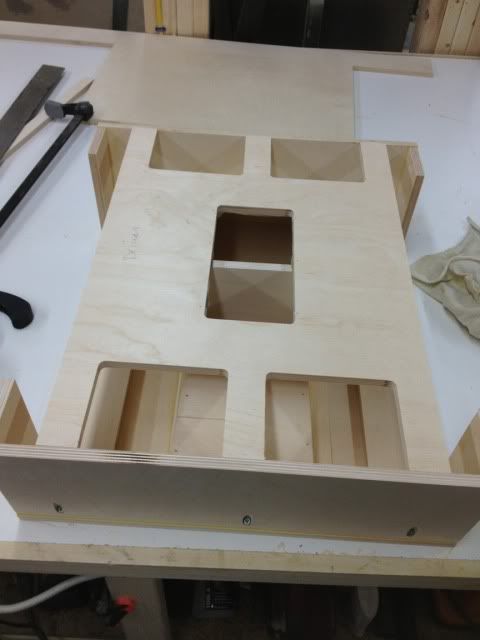
10 minutes later..
oh and this guy to whip up woofer spacers..
Re: The journey begins.. 16 T60's and 12 DR280's!!
Posted: Sun Jun 16, 2013 7:39 am
by Disco-inferno
That's some mighty nice,craftsmanship

you make building these things look easy. I really like the jigs you're constructing for assembly!
Re: The journey begins.. 16 T60's and 12 DR280's!!
Posted: Mon Jun 17, 2013 5:56 pm
by hifibob
Disco-inferno wrote:That's some mighty nice,craftsmanship
you make building these things look easy. I really like the jigs you're constructing for assembly!
Thanks Disco! The time is definitely well spent building them.. I can really bang these things out now...
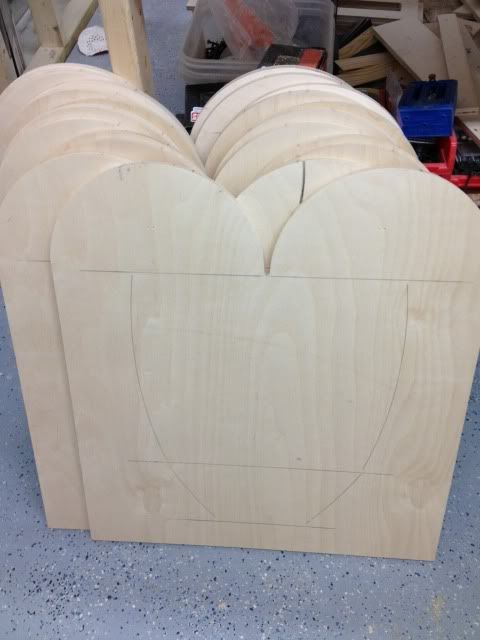
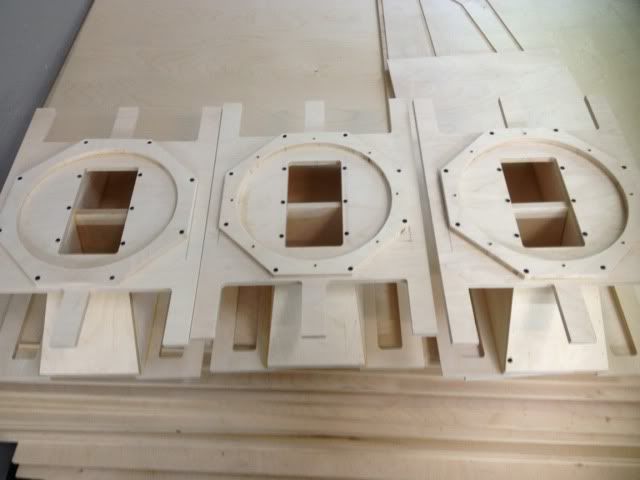
This one seems to be the most helpful so far.. Cuts the top and bottom panels but also makes drawing the layout lines without all that measuring and compass work.

Took me about 20 minutes to do all 12 of these once jig was finished.