Page 9 of 31
Re: myn's Tuba HT Build Thread
Posted: Wed Jul 22, 2009 1:24 am
by maxmercy
Myn,
I'd do it in two steps, PL first and caulk afterwards, just to be sure. I know I'd feel like crap if I discovered an air leak that was impossible to get to (unless you take a side off). If you are worried about wire vibration, run and glue the wires along the inside surfaces instead of 'stringing' them in the air.
All these possible headaches are why I put the terminal posts on the access cover. Easy to get to and fix.
JSS
Re: myn's Tuba HT Build Thread
Posted: Wed Jul 22, 2009 8:42 pm
by Rickisan
All these possible headaches are why I put the terminal posts on the access cover. Easy to get to and fix.
+1 !
Re: myn's Tuba HT Build Thread
Posted: Thu Jul 23, 2009 8:57 am
by myn
Yeah, I agree. I am convinced just putting the terminal plate on the access cover is the way to go. Way less to worry about and really easy to fix if there are issues.
Thanks guys

Re: myn's Tuba HT Build Thread
Posted: Fri Jul 24, 2009 9:38 pm
by myn
[== 7/24/2009 ==]
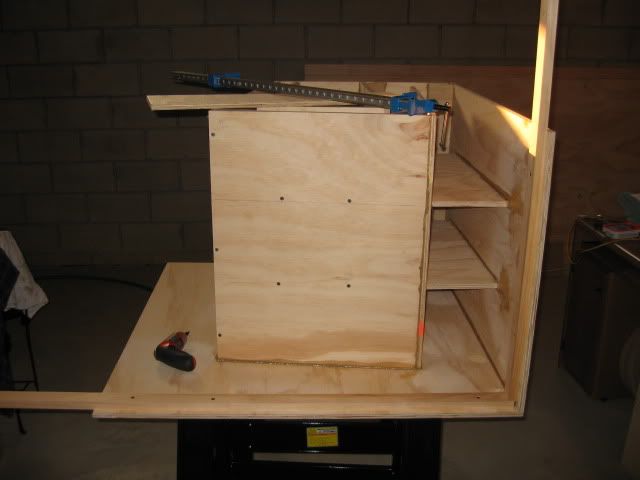
So yesterday I glued panel 9 to the THT. Since it's apparently going to rain all weekend, tonight I cut out:
- Panel 8/9 reflector
- Panel 9/10 reflector
- Panel 10
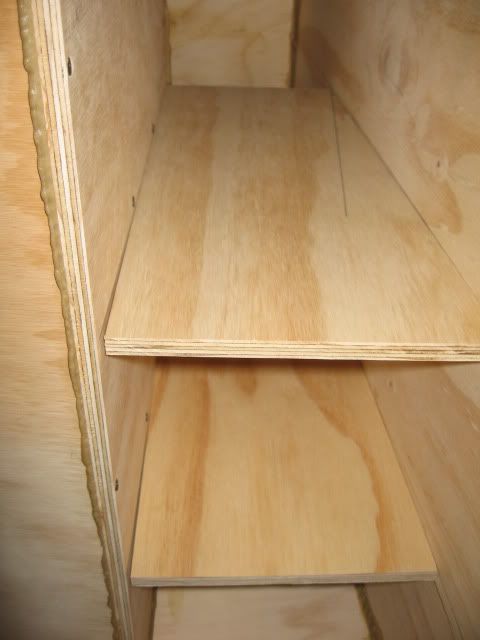
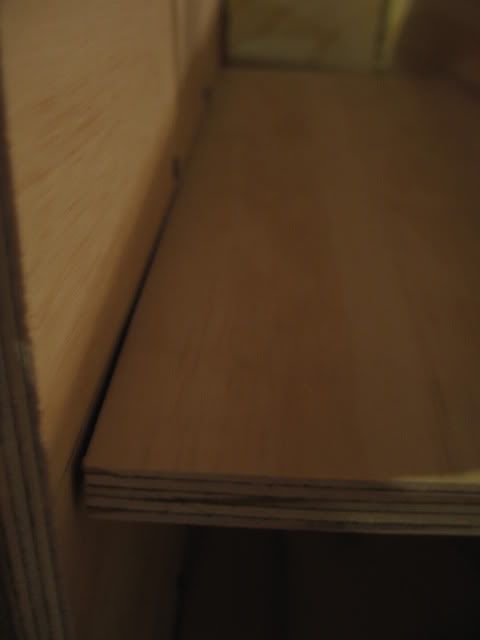
- Panel 6/9 braces
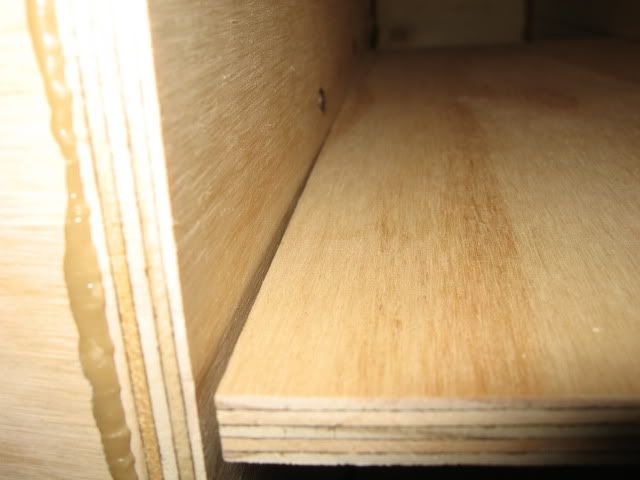
I test fit the 6/9 braces and discovered that panel 6 is pretty warped. I tried taking a bit off the brace to make it fit better but it still it didn't fit perfectly, having an 1/8" gap towards the wider side of the brace that gradually gets smaller towards the middle of the brace. The rest of the brace fits perfect. Unfortunately I think the only way to get this perfect would be to trace it which is going to be pretty hard if not impossible.
With that said, Do you think I should just add some extra PL and let it do it's work? Will this cause any issues structurally or vibration wise?
Here's some pics:
Getting Panel 9 ready:
 Panel 6/9 Braces prefit:
Re: myn's Tuba HT Build Thread
Posted: Fri Jul 24, 2009 10:46 pm
by Tom Smit
Let PL do it's work

Re: myn's Tuba HT Build Thread
Posted: Sat Jul 25, 2009 12:13 am
by gdougherty
That's why I use the braces to square up the panels as I build. The installation and bracing on the other side of 6 should have straightened 6 out unless you had to bow 6 in to meet that corner.
PL will hold it as is.
Re: myn's Tuba HT Build Thread
Posted: Sat Jul 25, 2009 1:24 am
by DJPhatman
Read my signature line!
Re: myn's Tuba HT Build Thread
Posted: Sat Jul 25, 2009 11:29 am
by myn
DJPhatman wrote:Read my signature line!
Nice. So does this mean get messy with the PL and fill the gap or does it mean get the braces perfect by tracing and recutting?
Re: myn's Tuba HT Build Thread
Posted: Sat Jul 25, 2009 11:50 am
by DJPhatman
it means don't worry about making a mess on the inside. No one will see it. Fill the gap with PL and move on.
Re: myn's Tuba HT Build Thread
Posted: Sat Jul 25, 2009 3:00 pm
by bgavin
Another solution is using a cleat on the inside.
The brace mounts to the cleat, which will give you considerable room for error.
As long as there is 1/2" glue area on the cleat, it is every bit as strong as the normal butt joint.
Re: myn's Tuba HT Build Thread
Posted: Sat Jul 25, 2009 3:54 pm
by myn
Sorry for sounding ignorant but what is a cleat? Got any examples or pics?
Re: myn's Tuba HT Build Thread
Posted: Sat Jul 25, 2009 7:54 pm
by Tom Smit
I just finished googling "cleat" w/wood and ......if you have a strip of wood, even 1/4 round, put PL on the cleat and screw the cleat to bad joint. When pPL has set, remove screw(s). The cleat only needs to be as long as the joint (gap) that needs the cleat. In your case, that might be 4-6", or as in your pic, from the end to the screw(?) that is at the end of the pencil line.
Re: myn's Tuba HT Build Thread
Posted: Sun Jul 26, 2009 11:06 am
by bgavin
I use scrap 1/2" ply for my cleats.
The flat surfaces allows use of clamps to secure the cleat to the brace.
Only one piece has to be firm... the cleat is clamped to this piece, then forced against the side wall until the PL cures.
As noted above, the dimension is not at all critical.
If a guy was going to slam these out at production speeds, the cleats could be pre-installed in the panels.
The braces can be cut close-enough-for-gummint-work and clamped into place on the cleats.
I had to cleat one side of one of my OT212 for this reason.
Somehow I dorked up a measurement on the brace, and wound up with a gap. Awwshit.
Cleating cured that problem entirely. OT212 is strong like Godzilla with these cleated braces.
Re: myn's Tuba HT Build Thread
Posted: Sun Jul 26, 2009 12:22 pm
by myn
Thanks guys.
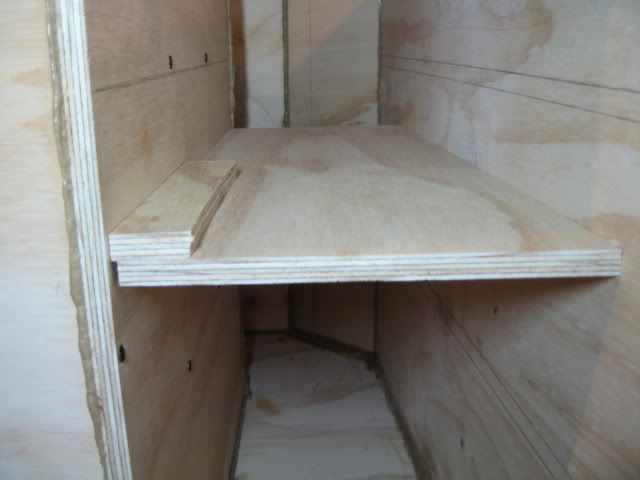
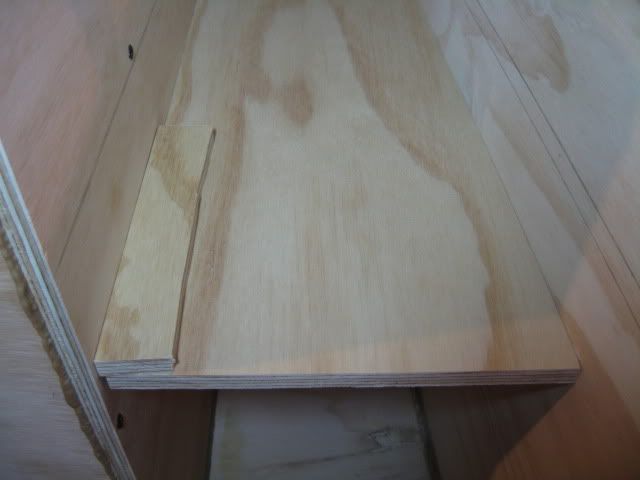
So if my interpretation is correct, it should look something like this (below)
Should I glue/secure the scrap piece to the brace first while test fitting and than proceed to secure the entire brace + cleat/scrap piece to the sides of the panels like normal?
I'm also assuming this extra bump in the bracing won't cause disturbance or extra turbulence in the mouth path?
Re: myn's Tuba HT Build Thread
Posted: Sun Jul 26, 2009 12:54 pm
by Bill Fitzmaurice
myn wrote:Thanks guys.
So if my interpretation is correct, it should look something like this (below)
Should I glue/secure the scrap piece to the brace first while test fitting and than proceed to secure the entire brace + cleat/scrap piece to the sides of the panels like normal?
I'm also assuming this extra bump in the bracing won't cause disturbance or extra turbulence in the mouth path?
More trouble than it's worth. PL and forget it.