I am into my j12 lite build and working on the woofer spacer. I got the flat pack and assembly bits from speakerhardware.com. I have installed threaded studs into the spacer and then glued the spacer to the baffle. This relies on PL as the only fastener of the woofer and spacer to the baffle. Seems like it might need some wood screws to hold in most securely. Am I just paranoid the woofer will fall out after it starts getting played?
Secondly, the J12L flat pack came with a wooden circle for the plug. I have sourced a 5 inch diameter foam circle that is 1" thick and plan on using that. Bill's instructions say to glue down the spacers... plural, not singular. So do I glue the 5 inch wooden spacer first, then add the 1 inch foam extension on top of that? Or do I just glue the foam to the baffle?
Last question relates to driver break in. I am planning on running the signal out of my laptop through the earphone jack straight to the speaker terminals. Would this provide enough voltage to do the job? Does it matter if it's sine wave? Square wave? Sawtooth?
The program I downloaded seems to generate continuos sound under square wave, but no continuous sound under the sine wave option.
Thanks in advance for your insight.
Joe
Couple J12L questions on flatpack, assembly and driver breakin.
Couple J12L questions on flatpack, assembly and driver breakin.
Last edited by Joeytiii on Mon Apr 26, 2021 3:32 pm, edited 1 time in total.
-
himhimself
- Posts: 599
- Joined: Fri Nov 13, 2015 9:34 pm
- Location: Vancouver BC & Bloomington IN
Re: Couple J12L questions on flatpack, assembly and driver breajin.
Glue is stronger than fasterers. Fasteners are only there to keep everything snug while the adhesive cures. You can alternately use clamps. Type of adhesive is important. For Bill's plans, PL is the recommendation because it will expand slightly to fill any small gaps between pieces, and it cures solid (not foamy like gorilla glue expansion). It also retains a little flex. Other glues can be used on various parts, but if in doubt, PL will work everywhere on a BFM build.
I don't recall how I did my foam spacers on my otops, so someone else will have to comment, but I think it was just a 1" thick circle of foam glued directly to the baffle. I know I didn't put any mesh in there, and didn't put a wooden disk of any sort.
You definitely will need more voltage than a headphone out to break in a driver, enough to get some decent extension going close to xmax.
2xT30 (20", 3012LF)
2xT30 (21", 3012LF)
4xOtop J-array (Beta12, melded/straight piezos)
Truck Tuba (MCM)
Next up: 2xJack12 or family of table tubas
2xT30 (21", 3012LF)
4xOtop J-array (Beta12, melded/straight piezos)
Truck Tuba (MCM)
Next up: 2xJack12 or family of table tubas
-
Bill Fitzmaurice

- Site Admin
- Posts: 28646
- Joined: Tue May 02, 2006 5:59 pm
Re: Couple J12L questions on flatpack, assembly and driver breajin.
The driver attachment screws should go through the spacer and into the baffle. I don't know what the threaded stud is. The plug may be one thick or a number of thin pieces. All must be glued.

Re: Couple J12L questions on flatpack, assembly and driver breajin.
Hey Joe, congrats on the new project. Have you looked at the SketchUp files? I find it usually makes things like this really clear.
Build in process - 2 WH6, one Alpha 6a loaded, one PRV Audio 6MB250-NDY loaded
Two 2x6 shorty SLA Pro's
One T39, 16", 3012LF loaded
Tall AutoTuba, 20" wide, 2x 8" MCM 55-2421
TruckTuba, 8½" wide, 2x 8" MCM 55-2421
Two 2x6 shorty SLA Pro's
One T39, 16", 3012LF loaded
Tall AutoTuba, 20" wide, 2x 8" MCM 55-2421
TruckTuba, 8½" wide, 2x 8" MCM 55-2421
Re: Couple J12L questions on flatpack, assembly and driver breakin.
Bill, the attachment screws that Leland sent are machine threads and there is a female end (not a stud) thath pulls into the back side of the spacer to lie flat when torqued all the way down. Naturally, the screw will extend into the baffle, but there are pilot holes the screws go into, and with machine threads, they really don't grab the baffle.
-
Bill Fitzmaurice
- Site Admin
- Posts: 28646
- Joined: Tue May 02, 2006 5:59 pm
Re: Couple J12L questions on flatpack, assembly and driver breakin.
That's news to me. It's not how it's done in the plans.
Re: Couple J12L questions on flatpack, assembly and driver breakin.
Can you post a picture of the pieces you're talking about?Joeytiii wrote: ↑Mon Apr 26, 2021 3:41 pm Bill, the attachment screws that Leland sent are machine threads and there is a female end (not a stud) thath pulls into the back side of the spacer to lie flat when torqued all the way down. Naturally, the screw will extend into the baffle, but there are pilot holes the screws go into, and with machine threads, they really don't grab the baffle.
Build in process - 2 WH6, one Alpha 6a loaded, one PRV Audio 6MB250-NDY loaded
Two 2x6 shorty SLA Pro's
One T39, 16", 3012LF loaded
Tall AutoTuba, 20" wide, 2x 8" MCM 55-2421
TruckTuba, 8½" wide, 2x 8" MCM 55-2421
Two 2x6 shorty SLA Pro's
One T39, 16", 3012LF loaded
Tall AutoTuba, 20" wide, 2x 8" MCM 55-2421
TruckTuba, 8½" wide, 2x 8" MCM 55-2421
-
Bruce Weldy
- Posts: 8322
- Joined: Fri Nov 27, 2009 11:37 am
- Location: New Braunfels, TX
Re: Couple J12L questions on flatpack, assembly and driver breakin.
It's most likely T-nuts or Hurricane nuts. If it's T-nuts, you should drive them into the wood, not try to pull them in. If it's hurricane nuts, then you should pound them in and drill a little hole in each one to put a little screw through to keep 'em from spinning.Seth wrote: ↑Mon Apr 26, 2021 4:19 pmCan you post a picture of the pieces you're talking about?Joeytiii wrote: ↑Mon Apr 26, 2021 3:41 pm Bill, the attachment screws that Leland sent are machine threads and there is a female end (not a stud) thath pulls into the back side of the spacer to lie flat when torqued all the way down. Naturally, the screw will extend into the baffle, but there are pilot holes the screws go into, and with machine threads, they really don't grab the baffle.
Personally, I'd forget the nuts and just use wood screws or lag bolts to hold the driver in place.
6 - T39 3012LF
4 - OT12 2512
1 - T24
1 - SLA Pro
2 - XF210
"A system with a few knobs set up by someone who knows what they are doing is always better than one with a lot of knobs set up by someone who doesn't."
-
himhimself
- Posts: 599
- Joined: Fri Nov 13, 2015 9:34 pm
- Location: Vancouver BC & Bloomington IN
Re: Couple J12L questions on flatpack, assembly and driver breakin.
+1. I used GRK #8 x 1 1/2” star drive washer head cabinet screws. Perfect!Bruce Weldy wrote: ↑Mon Apr 26, 2021 6:05 pm Personally, I'd forget the nuts and just use wood screws or lag bolts to hold the driver in place.
2xT30 (20", 3012LF)
2xT30 (21", 3012LF)
4xOtop J-array (Beta12, melded/straight piezos)
Truck Tuba (MCM)
Next up: 2xJack12 or family of table tubas
2xT30 (21", 3012LF)
4xOtop J-array (Beta12, melded/straight piezos)
Truck Tuba (MCM)
Next up: 2xJack12 or family of table tubas
-
Bruce Weldy
- Posts: 8322
- Joined: Fri Nov 27, 2009 11:37 am
- Location: New Braunfels, TX
Re: Couple J12L questions on flatpack, assembly and driver breakin.
I've been using 3/16" or 1/4" lag screws. I like the hex heads because you can use a socket and ratchet - much less chance of having a screwdriver pop out and poke a hole in the cone.....of course, I always lay one of the speaker cutouts from the baffle on the cone before I start installing the driver.himhimself wrote: ↑Tue Apr 27, 2021 4:29 pm+1. I used GRK #8 x 1 1/2” star drive washer head cabinet screws. Perfect!Bruce Weldy wrote: ↑Mon Apr 26, 2021 6:05 pm Personally, I'd forget the nuts and just use wood screws or lag bolts to hold the driver in place.
6 - T39 3012LF
4 - OT12 2512
1 - T24
1 - SLA Pro
2 - XF210
"A system with a few knobs set up by someone who knows what they are doing is always better than one with a lot of knobs set up by someone who doesn't."
-
himhimself
- Posts: 599
- Joined: Fri Nov 13, 2015 9:34 pm
- Location: Vancouver BC & Bloomington IN
Re: Couple J12L questions on flatpack, assembly and driver breakin.
You know, I remember you posting that tip before and I thought what a great idea. Then realized you must be referring to your T39s, cuz my otops and T30s and the OP's jack all have the screws driven in from the back. Lags with a ratchet is a solid way to go. The Torx I used are at least more secure than phillips.Bruce Weldy wrote: ↑Tue Apr 27, 2021 6:25 pm .....of course, I always lay one of the speaker cutouts from the baffle on the cone before I start installing the driver.
2xT30 (20", 3012LF)
2xT30 (21", 3012LF)
4xOtop J-array (Beta12, melded/straight piezos)
Truck Tuba (MCM)
Next up: 2xJack12 or family of table tubas
2xT30 (21", 3012LF)
4xOtop J-array (Beta12, melded/straight piezos)
Truck Tuba (MCM)
Next up: 2xJack12 or family of table tubas
Re: Couple J12L questions on flatpack, assembly and driver breakin.
I agree, but it seems the kit may already have been drilled out for the T-nuts. If we could see the parts (that were predrilled) we'd be able to assess whether or not foregoing them in favor of screws is a fair recommendation. I suppose, drilling them out and filling the holes with dowel is an option.Bruce Weldy wrote: ↑Mon Apr 26, 2021 6:05 pmIt's most likely T-nuts or Hurricane nuts. If it's T-nuts, you should drive them into the wood, not try to pull them in. If it's hurricane nuts, then you should pound them in and drill a little hole in each one to put a little screw through to keep 'em from spinning.Seth wrote: ↑Mon Apr 26, 2021 4:19 pmCan you post a picture of the pieces you're talking about?Joeytiii wrote: ↑Mon Apr 26, 2021 3:41 pm Bill, the attachment screws that Leland sent are machine threads and there is a female end (not a stud) thath pulls into the back side of the spacer to lie flat when torqued all the way down. Naturally, the screw will extend into the baffle, but there are pilot holes the screws go into, and with machine threads, they really don't grab the baffle.
Personally, I'd forget the nuts and just use wood screws or lag bolts to hold the driver in place.
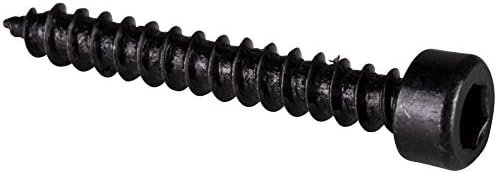
I personally switched over to using socket head screws.
Build in process - 2 WH6, one Alpha 6a loaded, one PRV Audio 6MB250-NDY loaded
Two 2x6 shorty SLA Pro's
One T39, 16", 3012LF loaded
Tall AutoTuba, 20" wide, 2x 8" MCM 55-2421
TruckTuba, 8½" wide, 2x 8" MCM 55-2421
Two 2x6 shorty SLA Pro's
One T39, 16", 3012LF loaded
Tall AutoTuba, 20" wide, 2x 8" MCM 55-2421
TruckTuba, 8½" wide, 2x 8" MCM 55-2421
-
Bruce Weldy
- Posts: 8322
- Joined: Fri Nov 27, 2009 11:37 am
- Location: New Braunfels, TX
Re: Couple J12L questions on flatpack, assembly and driver breakin.
I've used the cutouts on the SLAs and other guitar cabs I've built. But, you are correct that most of the BFM designs attach from the back.himhimself wrote: ↑Tue Apr 27, 2021 7:39 pmYou know, I remember you posting that tip before and I thought what a great idea. Then realized you must be referring to your T39s, cuz my otops and T30s and the OP's jack all have the screws driven in from the back. Lags with a ratchet is a solid way to go. The Torx I used are at least more secure than phillips.Bruce Weldy wrote: ↑Tue Apr 27, 2021 6:25 pm .....of course, I always lay one of the speaker cutouts from the baffle on the cone before I start installing the driver.
6 - T39 3012LF
4 - OT12 2512
1 - T24
1 - SLA Pro
2 - XF210
"A system with a few knobs set up by someone who knows what they are doing is always better than one with a lot of knobs set up by someone who doesn't."
Re: Couple J12L questions on flatpack, assembly and driver breakin.
I believe they are T nuts. Too late to show pictures since I tightened them all down and glued it in place. I appreciate all the responses folks.Bruce Weldy wrote: ↑Mon Apr 26, 2021 6:05 pmIt's most likely T-nuts or Hurricane nuts. If it's T-nuts, you should drive them into the wood, not try to pull them in. If it's hurricane nuts, then you should pound them in and drill a little hole in each one to put a little screw through to keep 'em from spinning.Seth wrote: ↑Mon Apr 26, 2021 4:19 pmCan you post a picture of the pieces you're talking about?Joeytiii wrote: ↑Mon Apr 26, 2021 3:41 pm Bill, the attachment screws that Leland sent are machine threads and there is a female end (not a stud) thath pulls into the back side of the spacer to lie flat when torqued all the way down. Naturally, the screw will extend into the baffle, but there are pilot holes the screws go into, and with machine threads, they really don't grab the baffle.
Personally, I'd forget the nuts and just use wood screws or lag bolts to hold the driver in place.
I start building the crossover on Monday when my solder iron arrives.
Re: Couple J12L questions on flatpack, assembly and driver breakin.
Oh yeah..... just figured out a new way to breaking the driver by running a android tone generator app through my wireless stereo. I am trying to figure out how high to turn up volume to match the output recommendations of 8 to 10 volts?
Do I just eyeball it the woofer for 1/4 inch movement?
Do I just eyeball it the woofer for 1/4 inch movement?