Hmm... Last spring when I built my tuba 60's I seriously was contemplating painting the mouths a faux suede finish in brown and calling the system "Brown Chicken Brown Cow". The subs would be the cows and the tops the chickens. They ended up metallic blue (see link in sig) instead because that matched the dance floor and decor of the bar better. Maybe this is a sign? Anyone have any recognizable porn sayings in blue?escapemcp wrote: Porno Star? Boom-chikka-wahhh
8 x DR250 build
-
CoronaOperator
- Posts: 1648
- Joined: Wed Mar 25, 2009 7:07 pm
- Location: Medicine Hat, Alberta, Canada
Re: 8 x DR250 build
Built:
17" width 10" driver Autotuba
2 x 29" width dual Lab12 Tuba60
6 x DR250 2510/asd1001
In progress:
2 x DR250 2510/asd1001
For best results, point the loud end of the array towards the audience
17" width 10" driver Autotuba
2 x 29" width dual Lab12 Tuba60
6 x DR250 2510/asd1001
In progress:
2 x DR250 2510/asd1001
For best results, point the loud end of the array towards the audience

Re: 8 x DR250 build
Is that a trick question? Blue movie (or Blue MOOvie if you want to keep the cow bit of the original idea)CoronaOperator wrote:Anyone have any recognizable porn sayings in blue?
OR
At first it wouldn't fit, so I gave it a waggle and indigo.
Coat?
Re: 8 x DR250 build
More like Condom!escapemcp wrote:Coat?
Um, not on here brother. Some people let their children read these forums. But, by PM is fine! Bwahahaha!CoronaOperator wrote:Anyone have any recognizable porn sayings in blue?
I know money often seals the deal, but seriously, quality is an investment, not an expense... Grant Bunter
Accept the fact that airtight and well-braced are more important than pretty on the inside. Bill Fitzmaurice
Accept the fact that airtight and well-braced are more important than pretty on the inside. Bill Fitzmaurice
Re: 8 x DR250 build
Seriously, people let their kids read this filth?DJPhatman wrote:Some people let their children read these forums.
Just read a build thread of two - you can quickly see everyone on here is getting wood (and taking photos!).
Some parents.... tssk.
Re: 8 x DR250 build
Oh, mate! Some day, I shall return to the island, and you and me...escapemcp wrote:Seriously, people let their kids read this filth?DJPhatman wrote:Some people let their children read these forums.
Just read a build thread of two - you can quickly see everyone on here is getting wood (and taking photos!).
Some parents.... tssk.
I know money often seals the deal, but seriously, quality is an investment, not an expense... Grant Bunter
Accept the fact that airtight and well-braced are more important than pretty on the inside. Bill Fitzmaurice
Accept the fact that airtight and well-braced are more important than pretty on the inside. Bill Fitzmaurice
-
CoronaOperator
- Posts: 1648
- Joined: Wed Mar 25, 2009 7:07 pm
- Location: Medicine Hat, Alberta, Canada
Re: 8 x DR250 build
After a little Christmas break I finally got some more work done on the HF modules:
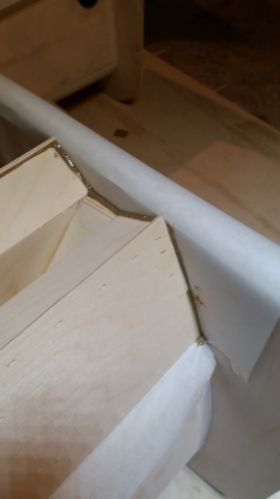
I cutout some 1/8" hardboard spacers to raise the module up a bit. That will allow the sheaths to overhang a bit for trimming and to simulate the weatherstripping gap so I can sand the joint of the module and the cabinet flush:
Then I measured out the location for some screws to hold the module in place:
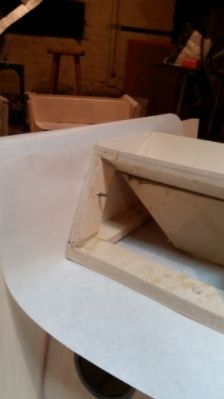
I attached the sheathing, here is a bit of the overhang before being flush sanded:
I wanted a really tight fit to the cabinet so I used lots of PL on the inside of the edges and then went around the outside with PL as well:
Here is a pic of the underside after the PL cured:
I used an orbital sander with 60 grit to sand everything smooth and sand the joint smooth to the cabinet as well.
I am really happy with the way the module fits. Putting the extra PL around the edges and then sanding smooth gave me a very tight fit to the cabinet.
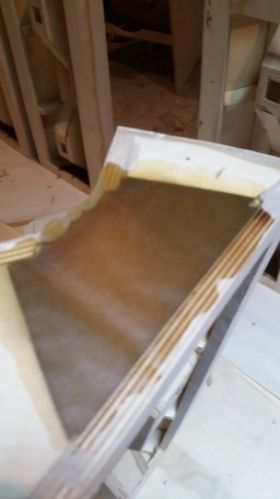
Next up was to seal off the ends to make it airtight. I laid the module on some wax paper then I mixed up some polyester fiberglass resin (from Canadian Tire) and just poured it in the cavity:

I did 2 pours of about 1/8" each for a total thickness of about 1/4". I tried to do it in one go and that one cracked as the polyester shrinks when it cures. They turned out really good and only took an hour to do all of them:
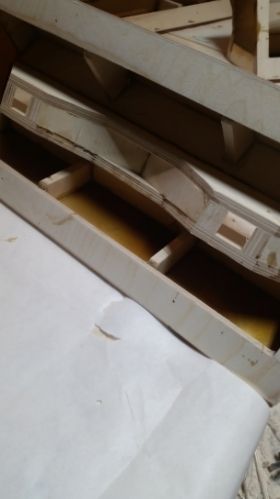
I also poured some in the sides to stiffen up the sheaths:
Slowly but surely I'm plugging away on these things...
I cutout some 1/8" hardboard spacers to raise the module up a bit. That will allow the sheaths to overhang a bit for trimming and to simulate the weatherstripping gap so I can sand the joint of the module and the cabinet flush:
Then I measured out the location for some screws to hold the module in place:
I attached the sheathing, here is a bit of the overhang before being flush sanded:
I wanted a really tight fit to the cabinet so I used lots of PL on the inside of the edges and then went around the outside with PL as well:
Here is a pic of the underside after the PL cured:
I used an orbital sander with 60 grit to sand everything smooth and sand the joint smooth to the cabinet as well.
I am really happy with the way the module fits. Putting the extra PL around the edges and then sanding smooth gave me a very tight fit to the cabinet.
Next up was to seal off the ends to make it airtight. I laid the module on some wax paper then I mixed up some polyester fiberglass resin (from Canadian Tire) and just poured it in the cavity:
I did 2 pours of about 1/8" each for a total thickness of about 1/4". I tried to do it in one go and that one cracked as the polyester shrinks when it cures. They turned out really good and only took an hour to do all of them:
I also poured some in the sides to stiffen up the sheaths:
Slowly but surely I'm plugging away on these things...
Built:
17" width 10" driver Autotuba
2 x 29" width dual Lab12 Tuba60
6 x DR250 2510/asd1001
In progress:
2 x DR250 2510/asd1001
For best results, point the loud end of the array towards the audience
17" width 10" driver Autotuba
2 x 29" width dual Lab12 Tuba60
6 x DR250 2510/asd1001
In progress:
2 x DR250 2510/asd1001
For best results, point the loud end of the array towards the audience
-
CoronaOperator
- Posts: 1648
- Joined: Wed Mar 25, 2009 7:07 pm
- Location: Medicine Hat, Alberta, Canada
Re: 8 x DR250 build
A little more progress:
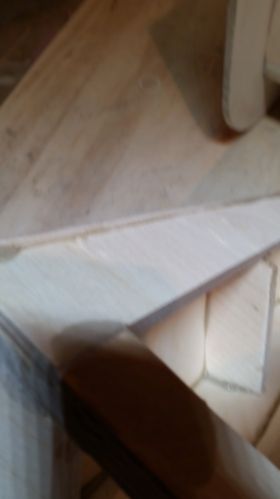
I picked up these tools at Michaels (arts and craft store) for $5. They were by the painting brushes. They have a nice flex to them and are very thin so they cut through semi-cured PL very easy:
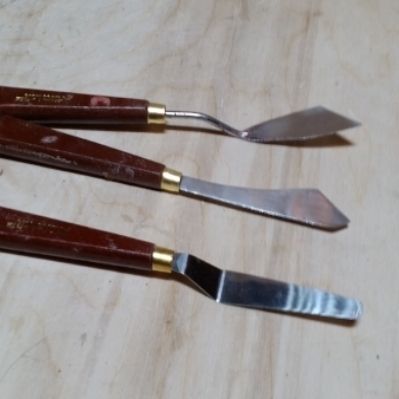
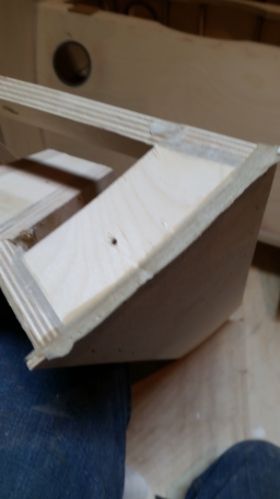
They make the tight spots on the compression horns easy to get to:
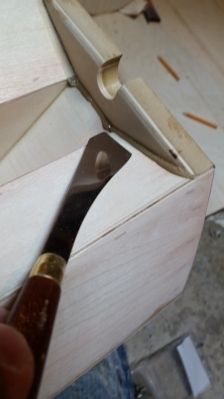
A little clean up with those tools and the joint looks good:

Oh ya, why the MDF? I thought there was going to be a lot of sanding of the end pieces to make them flush with the top/bottom and sanding through layers of baltic birch is a pain so I laminated some 1/8" baltic birch to some MDF scrap I had. As it turned out there wasn't much sanding to do so that was a lesson learned.
Then I attached the high frequency mounts and braces. Here I used 1/4" hardboard for the mount. It was much stiffer than 1/4" ply and it has a very smooth surface for the screw on adapters to mate to. Cheaper too!
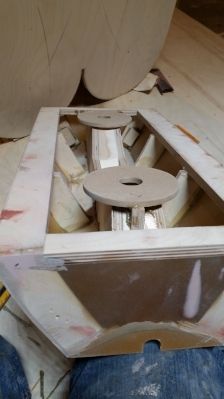
You can see the top end here too. There is some baltic birch there, some polyester resin, some bondo, some PL, some MDF, some glazing putty, ....
... and here is what everything looks like all put together:
I believe on my first post of this thread I mentioned that building 8 of these shouldn't take much longer than building one of them. I think I'll eat those words now...
I picked up these tools at Michaels (arts and craft store) for $5. They were by the painting brushes. They have a nice flex to them and are very thin so they cut through semi-cured PL very easy:
They make the tight spots on the compression horns easy to get to:
A little clean up with those tools and the joint looks good:
Oh ya, why the MDF? I thought there was going to be a lot of sanding of the end pieces to make them flush with the top/bottom and sanding through layers of baltic birch is a pain so I laminated some 1/8" baltic birch to some MDF scrap I had. As it turned out there wasn't much sanding to do so that was a lesson learned.
Then I attached the high frequency mounts and braces. Here I used 1/4" hardboard for the mount. It was much stiffer than 1/4" ply and it has a very smooth surface for the screw on adapters to mate to. Cheaper too!
You can see the top end here too. There is some baltic birch there, some polyester resin, some bondo, some PL, some MDF, some glazing putty, ....
... and here is what everything looks like all put together:
I believe on my first post of this thread I mentioned that building 8 of these shouldn't take much longer than building one of them. I think I'll eat those words now...
Built:
17" width 10" driver Autotuba
2 x 29" width dual Lab12 Tuba60
6 x DR250 2510/asd1001
In progress:
2 x DR250 2510/asd1001
For best results, point the loud end of the array towards the audience
17" width 10" driver Autotuba
2 x 29" width dual Lab12 Tuba60
6 x DR250 2510/asd1001
In progress:
2 x DR250 2510/asd1001
For best results, point the loud end of the array towards the audience
-
CoronaOperator
- Posts: 1648
- Joined: Wed Mar 25, 2009 7:07 pm
- Location: Medicine Hat, Alberta, Canada
Re: 8 x DR250 build
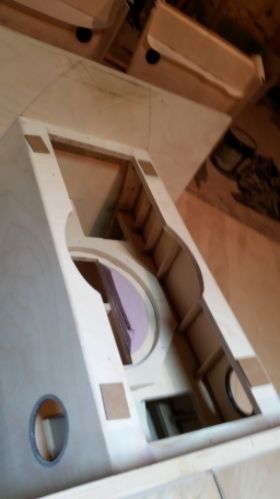
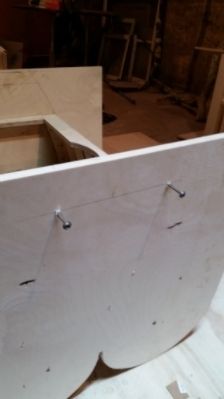
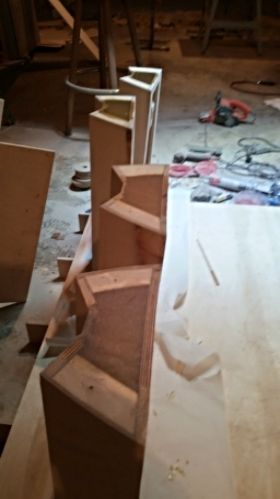
I cut out all the side braces:
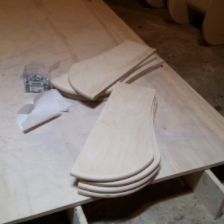
What I did was to cut one out and then when I was happy with it I used it as a pattern and used the router and a pattern following bit to cut out all 16 of them. For the quarter circle I used a bucket as a pattern and traced it to the part, cut it out with a jigsaw, then held the part to the bucket while I smoothed it with a random orbital sander. The bucket was the guide for the sander, no circle cutting jig required! I also rounded over the visible edge with a 1/4" roundover bit.
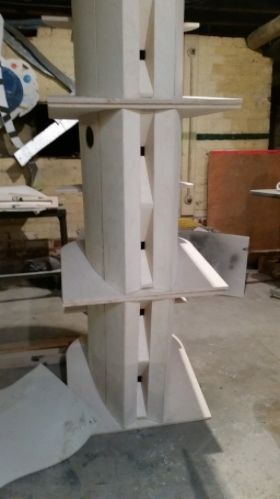
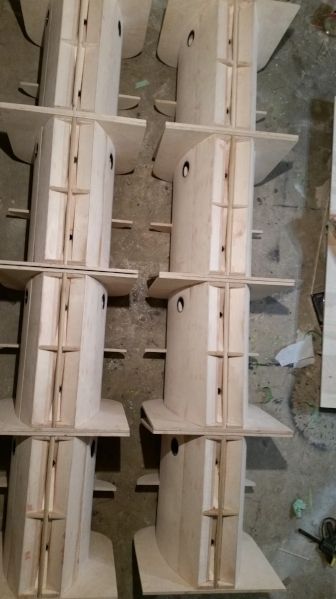
Then I mounted them all with the help of a few clamps, a scrap piece of wood to keep them aligned straight, and a screw from the inside of the box:
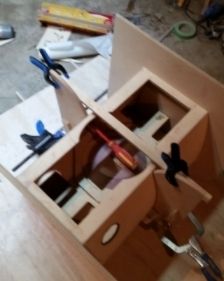
I also managed to get a coat of primer on the high frequency modules, a little bit of filling and sanding as well:
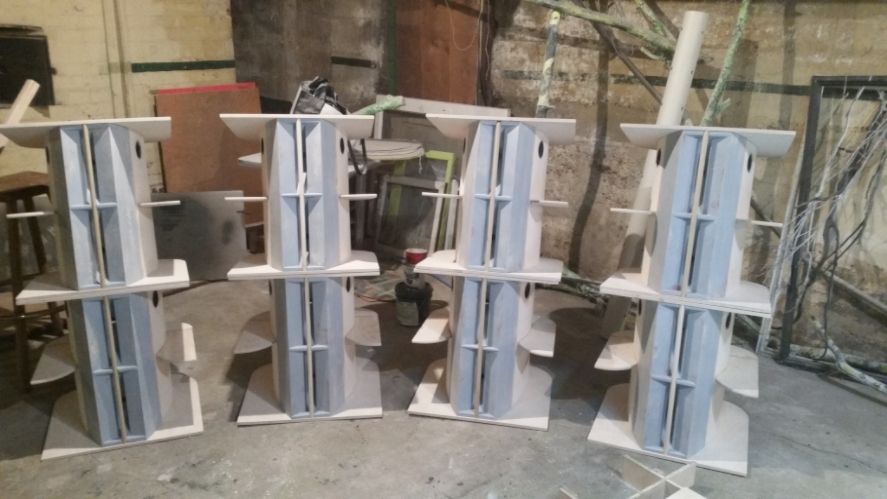
One of our EDM DJ's said they look like they could launch themselves into outer space! Another called them Funktion II!
What I did was to cut one out and then when I was happy with it I used it as a pattern and used the router and a pattern following bit to cut out all 16 of them. For the quarter circle I used a bucket as a pattern and traced it to the part, cut it out with a jigsaw, then held the part to the bucket while I smoothed it with a random orbital sander. The bucket was the guide for the sander, no circle cutting jig required! I also rounded over the visible edge with a 1/4" roundover bit.
Then I mounted them all with the help of a few clamps, a scrap piece of wood to keep them aligned straight, and a screw from the inside of the box:
I also managed to get a coat of primer on the high frequency modules, a little bit of filling and sanding as well:
One of our EDM DJ's said they look like they could launch themselves into outer space! Another called them Funktion II!
Built:
17" width 10" driver Autotuba
2 x 29" width dual Lab12 Tuba60
6 x DR250 2510/asd1001
In progress:
2 x DR250 2510/asd1001
For best results, point the loud end of the array towards the audience
17" width 10" driver Autotuba
2 x 29" width dual Lab12 Tuba60
6 x DR250 2510/asd1001
In progress:
2 x DR250 2510/asd1001
For best results, point the loud end of the array towards the audience
-
CoronaOperator
- Posts: 1648
- Joined: Wed Mar 25, 2009 7:07 pm
- Location: Medicine Hat, Alberta, Canada
Re: 8 x DR250 build
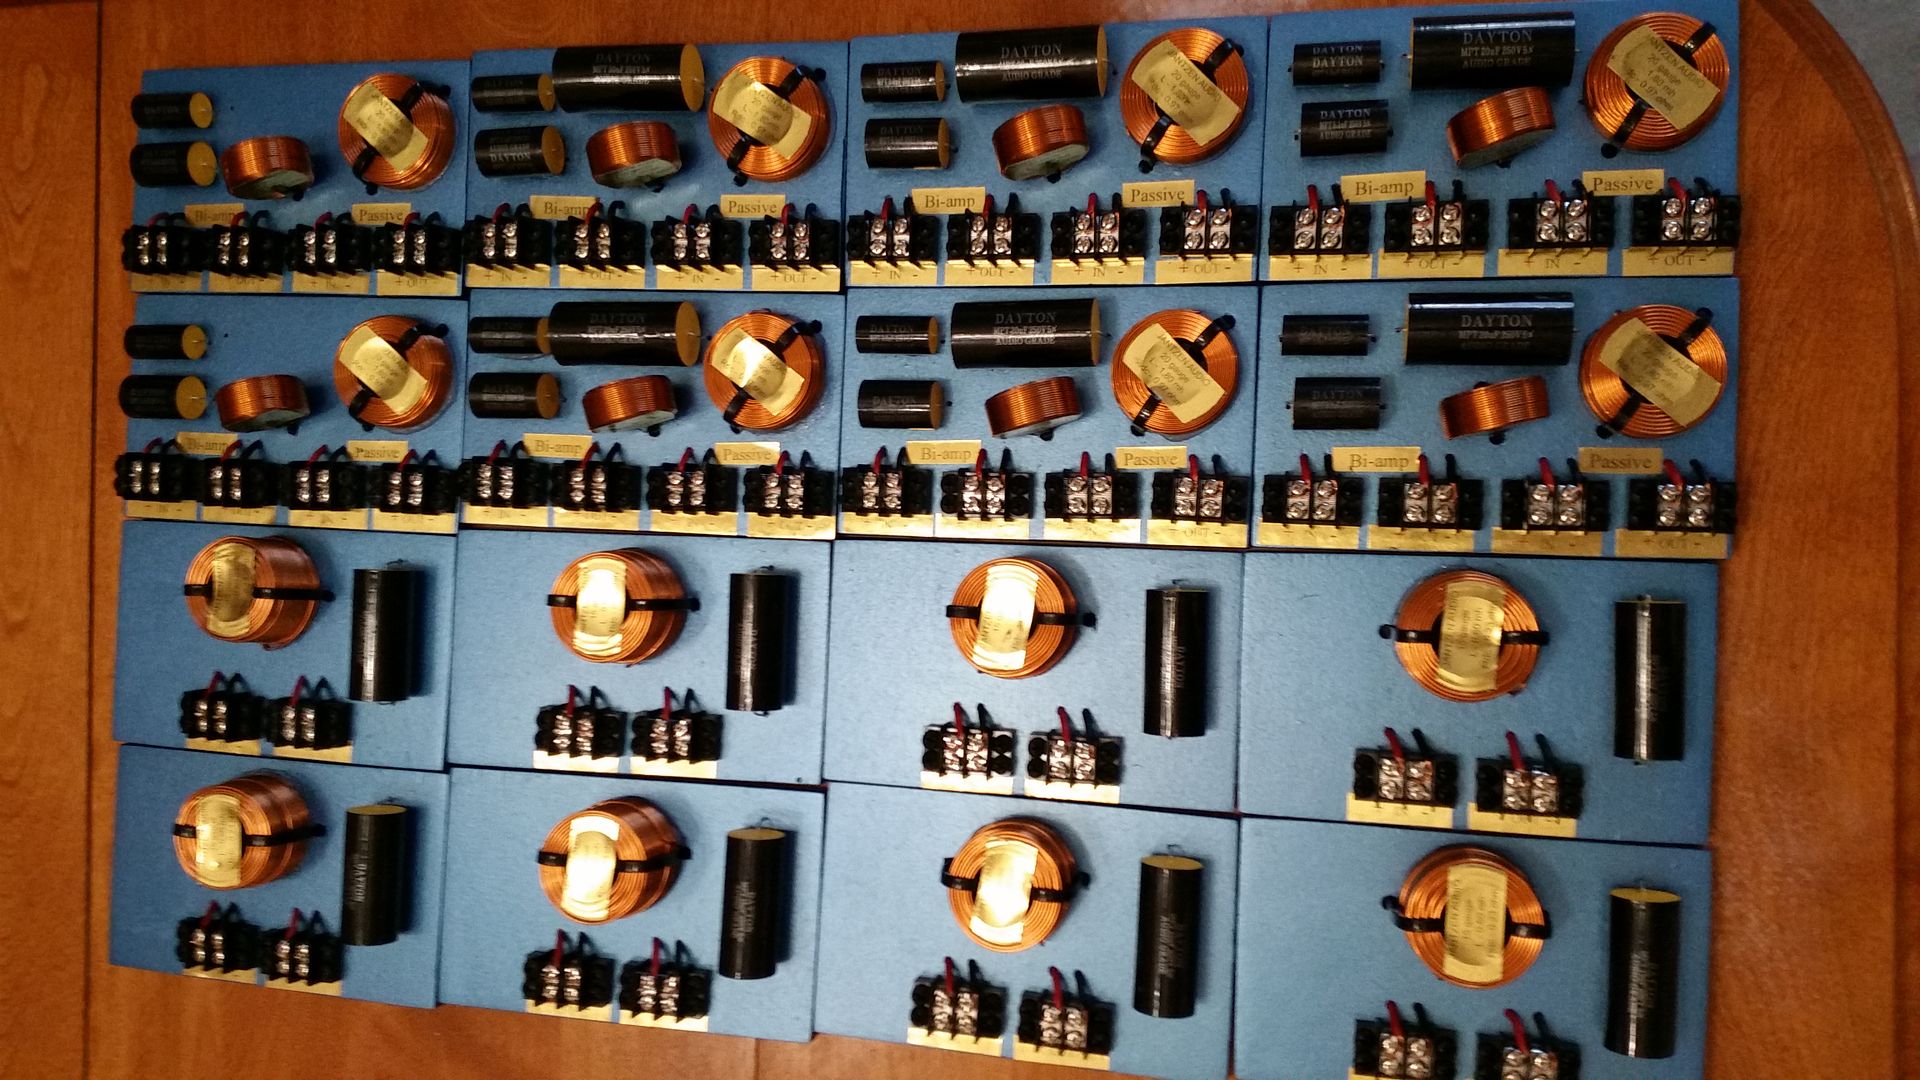
X-over time:
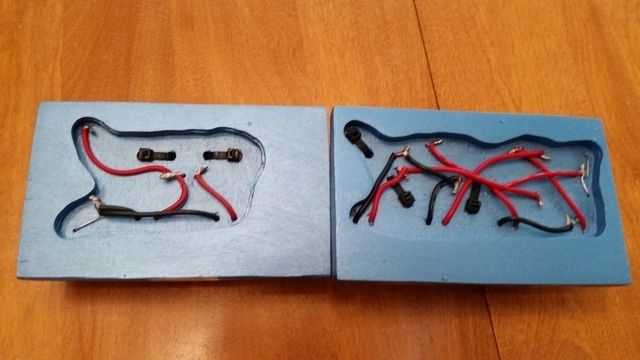
I laid out the components looking for an idea on how to lay them out:


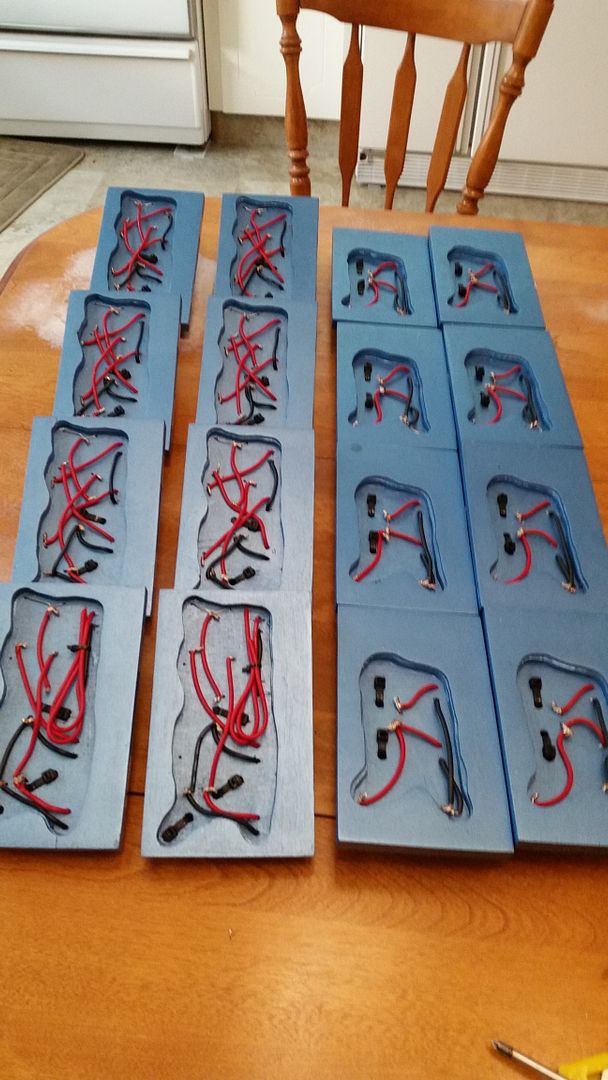
That looked about right to me so then I cut out some blanks and drilled a few holes:
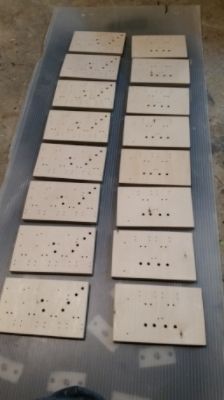
I painted all those up, then I tested all the components on my computer using PartsExpress DATS audio test system. All the capacitors were within 2.5% of the listed spec. The inductors were all wound about 4-5% higher than listed:
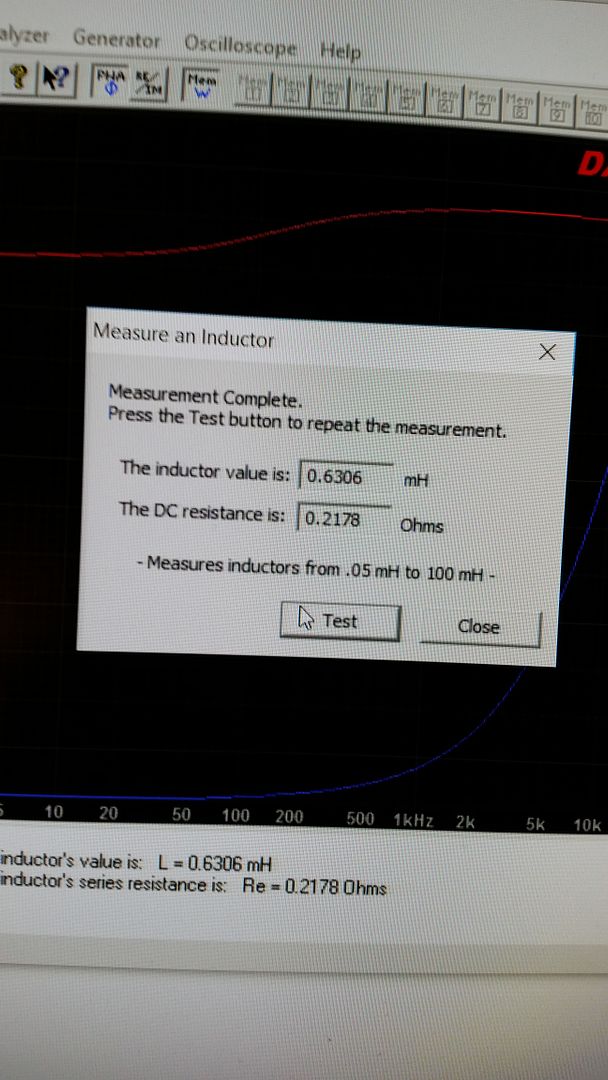
I suspect that is to please all the audiophiles who like to unwind their coils to the right spec while being close enough for everyone else. I unwound all the coils as close as I could to the listed spec. It was fun unwinding a half an inch off the coil and measuring a small difference. Most of them took about 2.5 turns removed to bring it in. Except the coils I bought that were 0.85 mH, they were pretty much 0.9 mH on the dot right out of the box . (I know no audible differences were to be made, but it was fun to do anyways. It helps with the OCD too!)
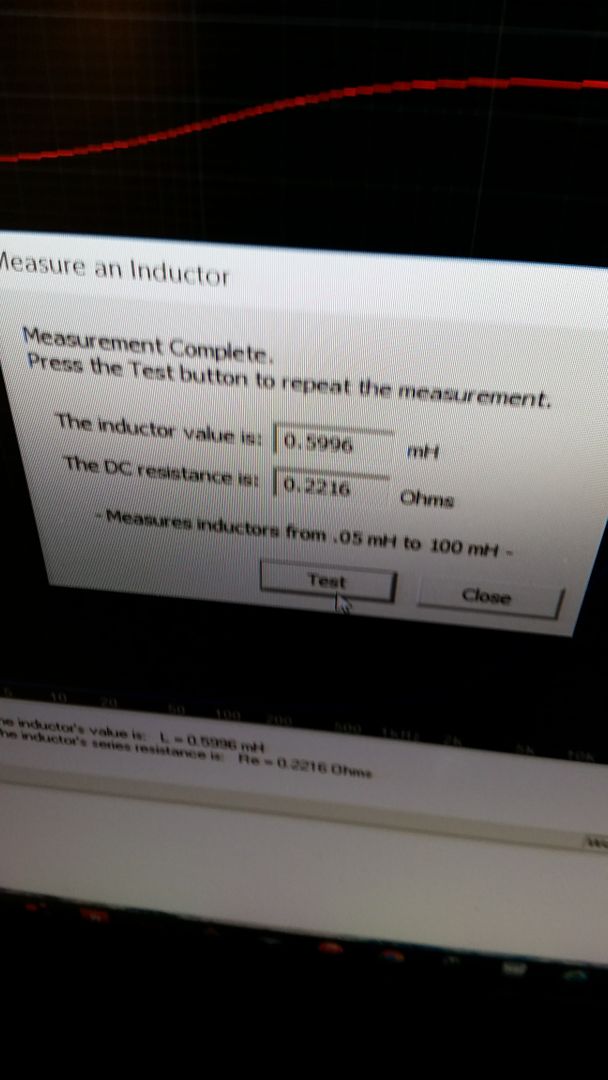
Looks like I went (literally) about a millimeter too far on that one. Oh well, can't win every OCD war!
I laid out the components looking for an idea on how to lay them out:
That looked about right to me so then I cut out some blanks and drilled a few holes:
I painted all those up, then I tested all the components on my computer using PartsExpress DATS audio test system. All the capacitors were within 2.5% of the listed spec. The inductors were all wound about 4-5% higher than listed:
I suspect that is to please all the audiophiles who like to unwind their coils to the right spec while being close enough for everyone else. I unwound all the coils as close as I could to the listed spec. It was fun unwinding a half an inch off the coil and measuring a small difference. Most of them took about 2.5 turns removed to bring it in. Except the coils I bought that were 0.85 mH, they were pretty much 0.9 mH on the dot right out of the box
Looks like I went (literally) about a millimeter too far on that one. Oh well, can't win every OCD war!
Last edited by CoronaOperator on Thu Mar 03, 2016 9:12 pm, edited 1 time in total.
Built:
17" width 10" driver Autotuba
2 x 29" width dual Lab12 Tuba60
6 x DR250 2510/asd1001
In progress:
2 x DR250 2510/asd1001
For best results, point the loud end of the array towards the audience
17" width 10" driver Autotuba
2 x 29" width dual Lab12 Tuba60
6 x DR250 2510/asd1001
In progress:
2 x DR250 2510/asd1001
For best results, point the loud end of the array towards the audience
-
CoronaOperator
- Posts: 1648
- Joined: Wed Mar 25, 2009 7:07 pm
- Location: Medicine Hat, Alberta, Canada
Re: 8 x DR250 build
I used clear 100% silicone to glue the components to the blank. It takes longer to dry than hotmelt (overnight) but it has some give to it and I thought it would be easier on the painted surface.
Then I figured I'd start by tinning some wires:
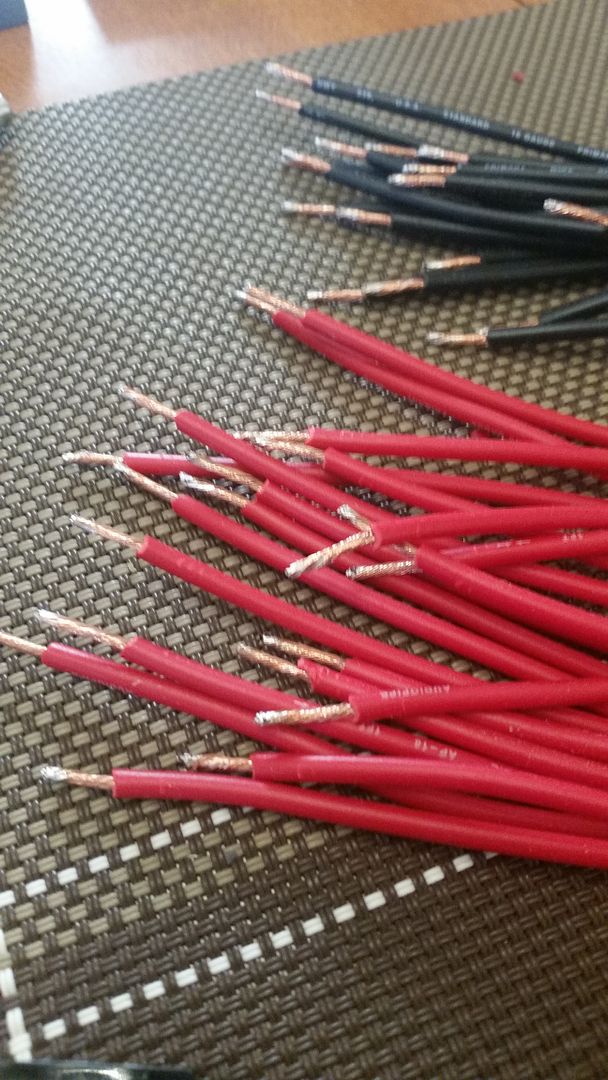
Then soldering some joint:
I mean joints:
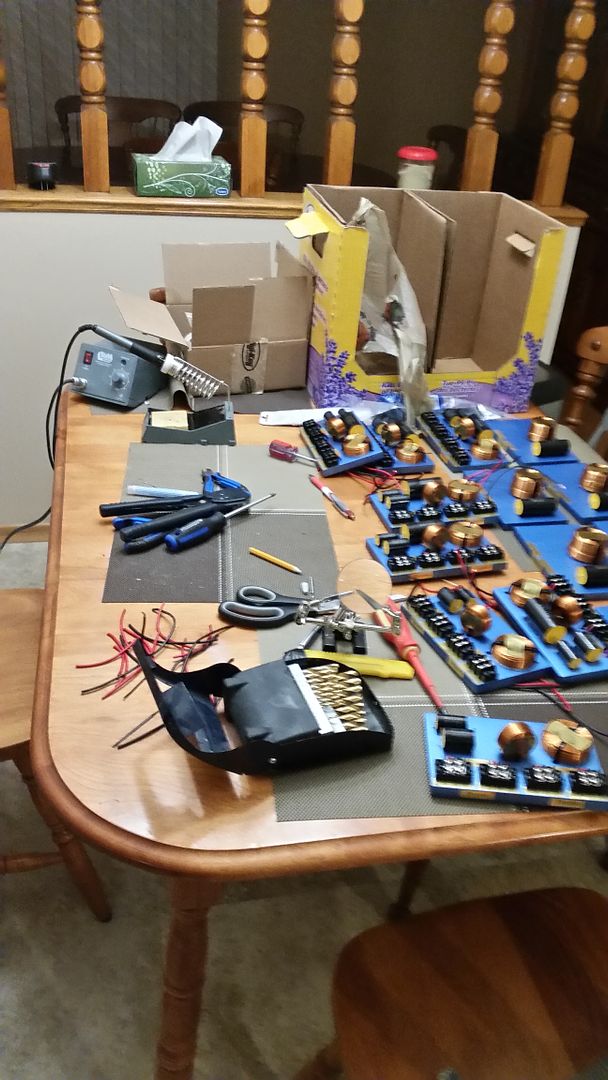
Here is my makeshift workstation:
Oh ya, the other side of them:
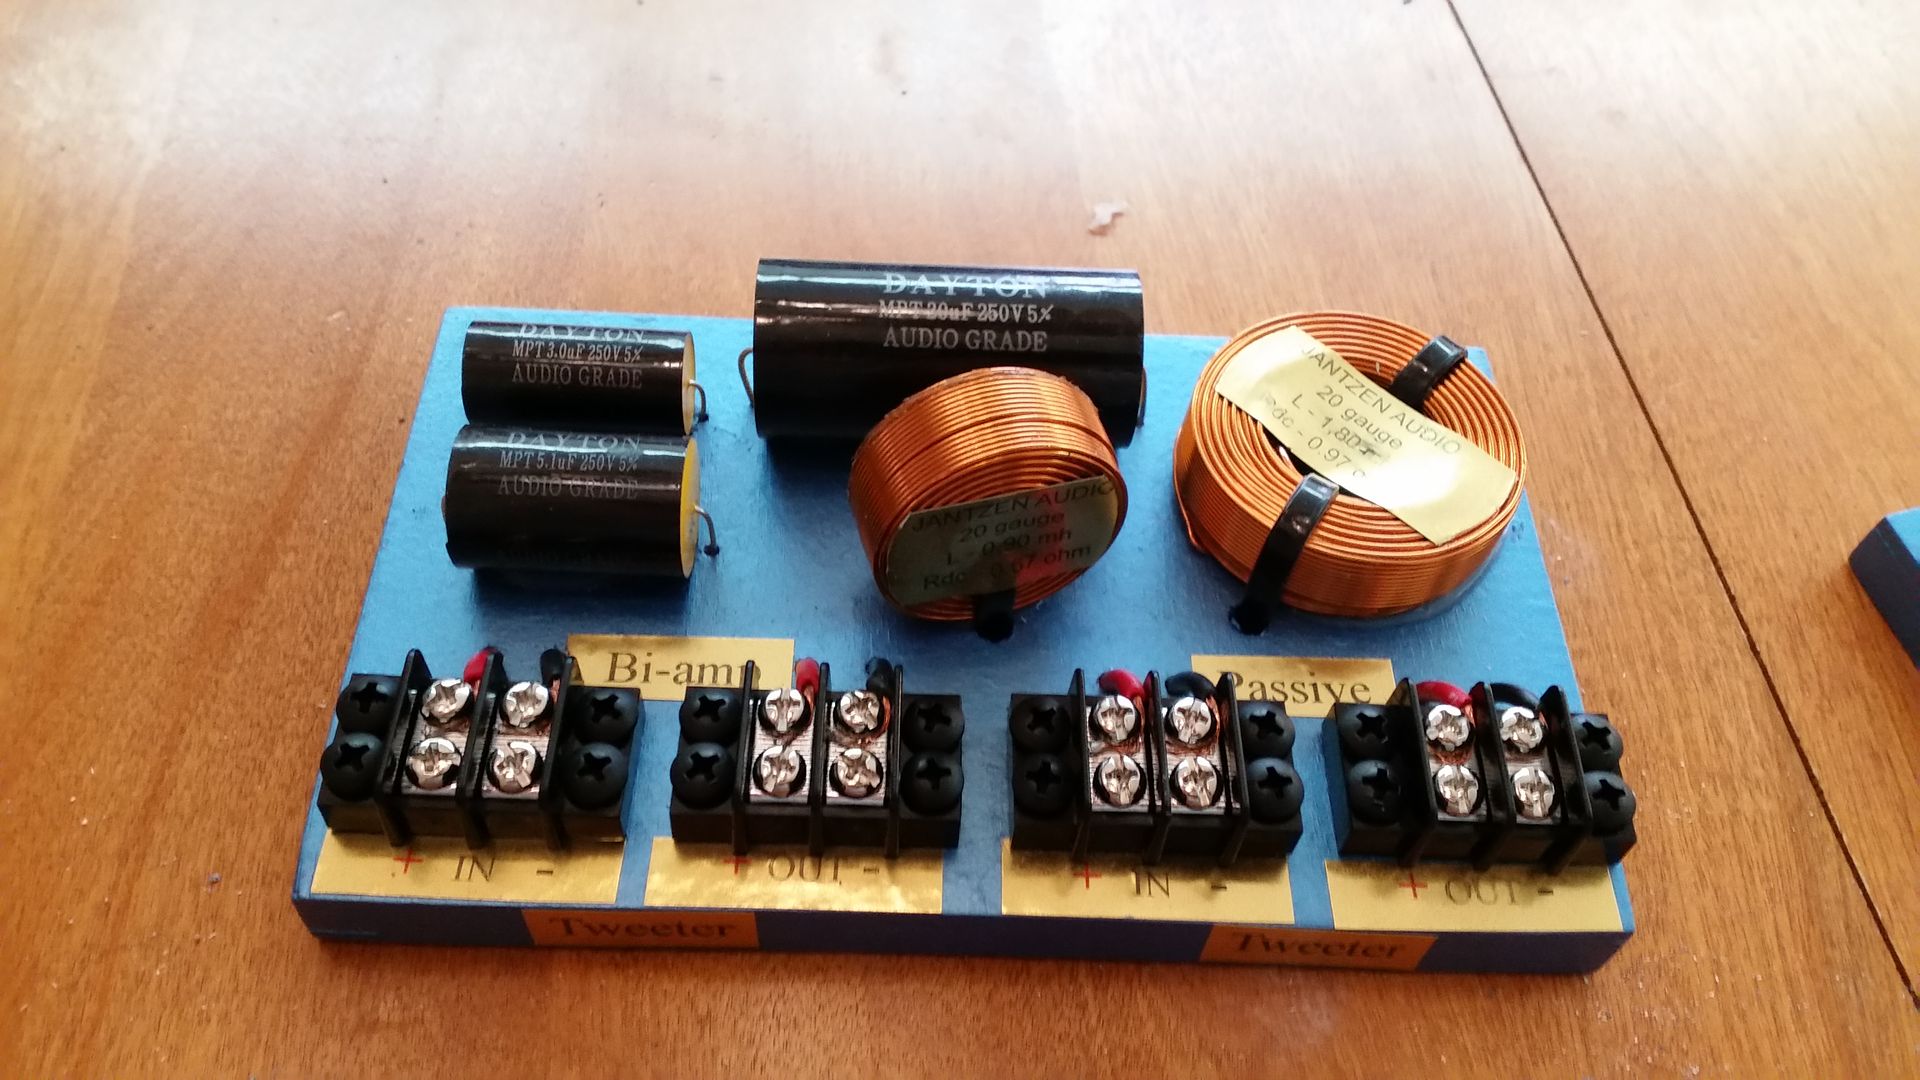
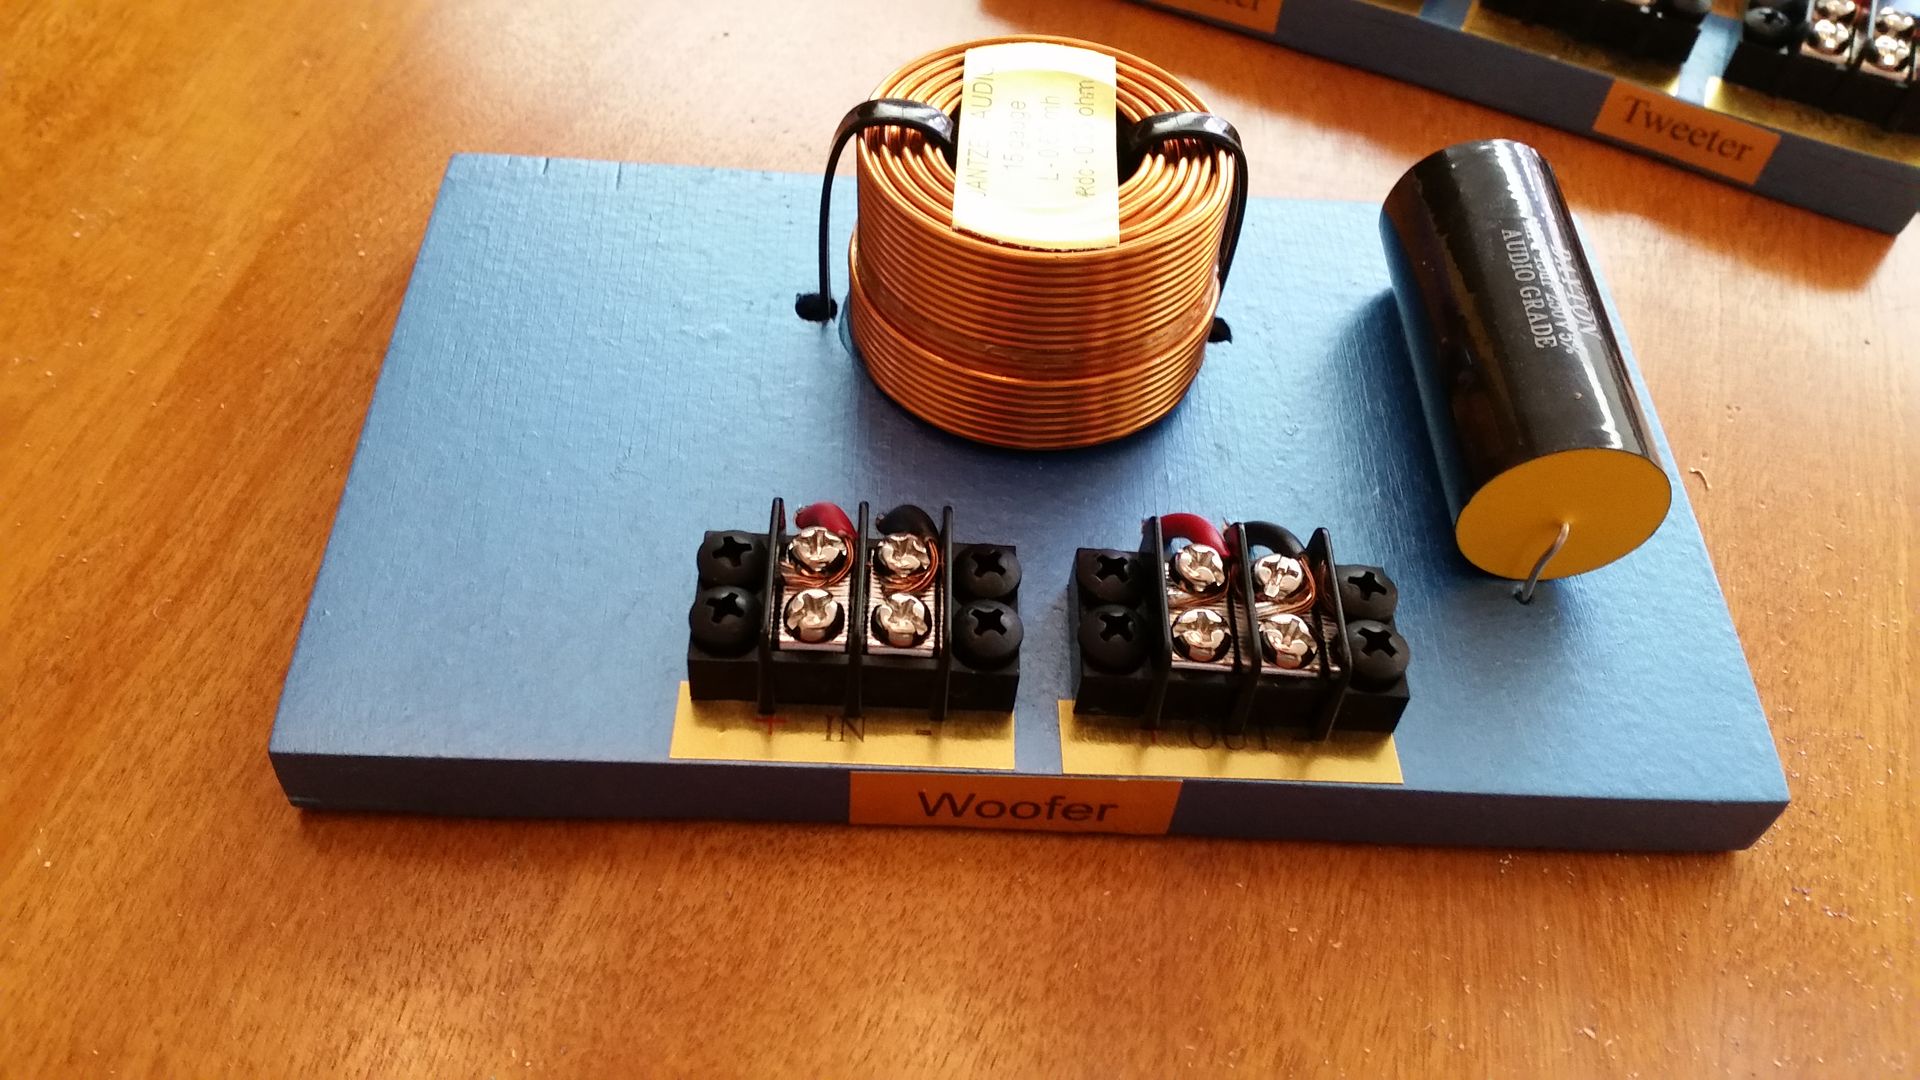
Close ups:
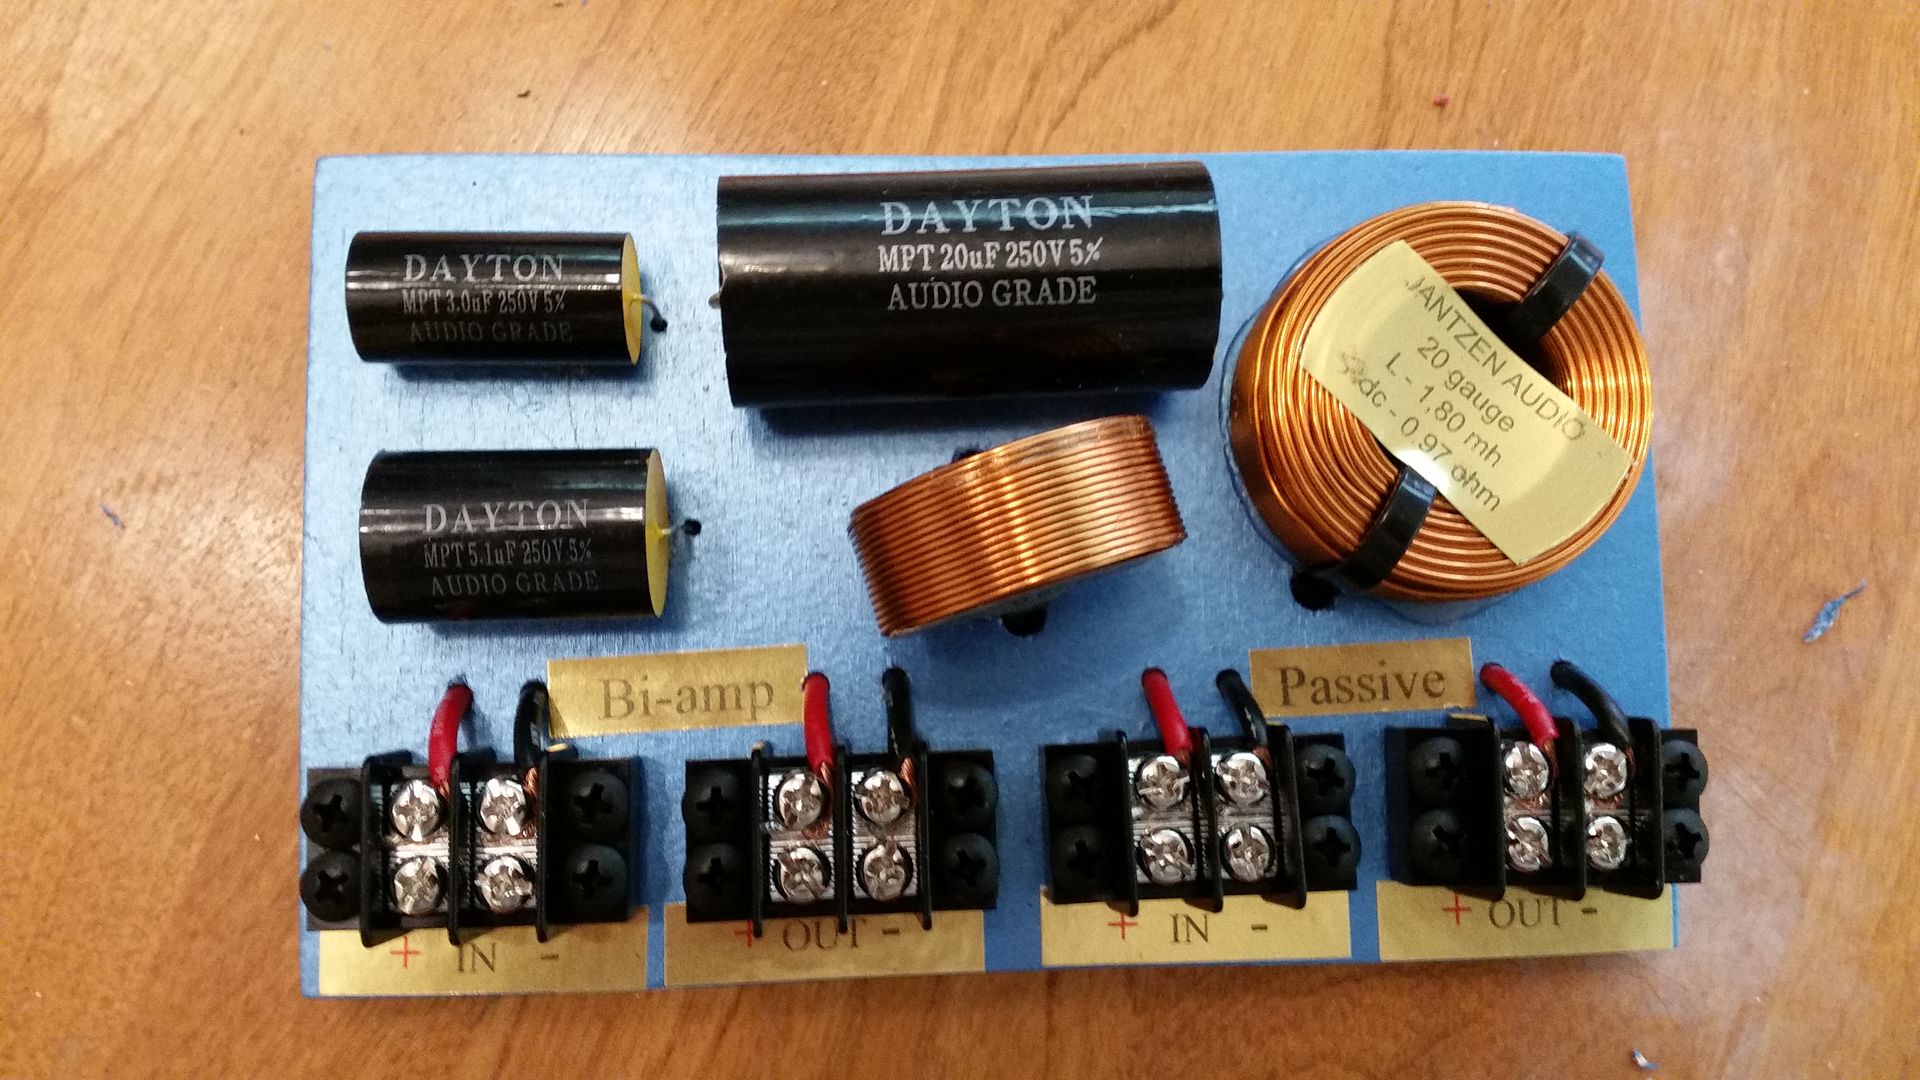
Labels were done on the computer.
That was a bit of work. Lots of holes and lots of screws.
Then I figured I'd start by tinning some wires:
Then soldering some joint:
I mean joints:
Here is my makeshift workstation:
Oh ya, the other side of them:
Close ups:
Labels were done on the computer.
That was a bit of work. Lots of holes and lots of screws.
Built:
17" width 10" driver Autotuba
2 x 29" width dual Lab12 Tuba60
6 x DR250 2510/asd1001
In progress:
2 x DR250 2510/asd1001
For best results, point the loud end of the array towards the audience
17" width 10" driver Autotuba
2 x 29" width dual Lab12 Tuba60
6 x DR250 2510/asd1001
In progress:
2 x DR250 2510/asd1001
For best results, point the loud end of the array towards the audience

Re: 8 x DR250 build
Dude! Nice crossovers!
2 - OTop8
2 - T39
8 - DR200
2 - DR250
9 - T24
6 - T45
1 - Auto Tuba
2 - T39
8 - DR200
2 - DR250
9 - T24
6 - T45
1 - Auto Tuba
-
LelandCrooks

- Posts: 7244
- Joined: Thu May 04, 2006 9:36 am
- Location: Midwest/Kansas/Speaker Nirvana
- Contact:
Re: 8 x DR250 build
Meticulous and well thought out. Nice.
If it's too loud, you're even older than me! Like me.
http://www.speakerhardware.com
http://www.speakerhardware.com
Re: 8 x DR250 build
Dude, you are my hero. I am not worthy. 
-todd
5 and 8 string bass | SansAmp | Crown | 2 x J110
2 x W8 panel-mount
2 x T39 24" 3012LF
4 x OT12 2512 melded (finally done!)
5 and 8 string bass | SansAmp | Crown | 2 x J110
2 x W8 panel-mount
2 x T39 24" 3012LF
4 x OT12 2512 melded (finally done!)