CoronaOperator wrote:
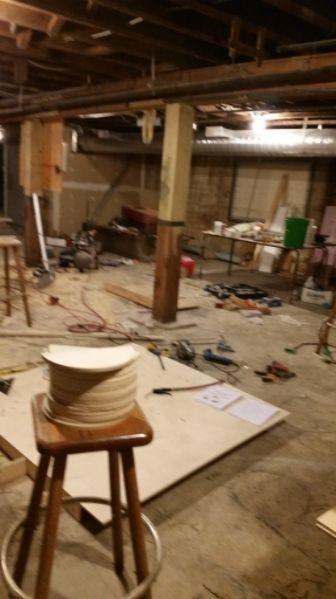
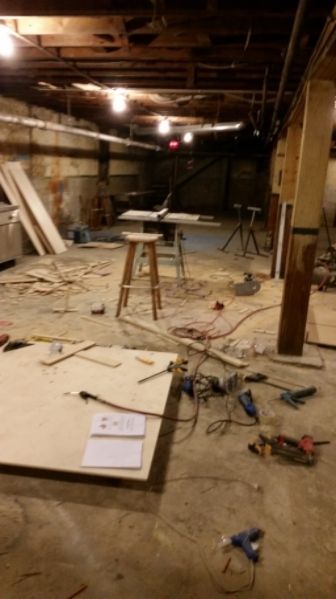
Since Harley made an appearance it was time to show everyone what a North American shop looks like. In NZ it is easy to keep a clean shop because all the sawdust and chips just fall upwards because they are on the bottom of the Earth. Over here everything falls down to the ground.
8 x DR250 build
Re: 8 x DR250 build
TomS
-
CoronaOperator
- Posts: 1648
- Joined: Wed Mar 25, 2009 7:07 pm
- Location: Medicine Hat, Alberta, Canada
Re: 8 x DR250 build
I posted that a few posts back on the first page. Forgive me if everyone knows this and I'm wasting time here but I owned a brad nailer for 15 years and just learned it by accident and I now have new superpowers in the shopCoronaOperator wrote: I just toe-nailed them from the feet. I learned that for toe-nailing brads if you hold the gun one way the brad will angle itself and curve upwards. If you hold the gun the other way, the brad will curve down and you will miss the top piece all together. The angle on the lead edge of the brad will guide it either one way or the other.
Here is a few pictures to show what I mean:
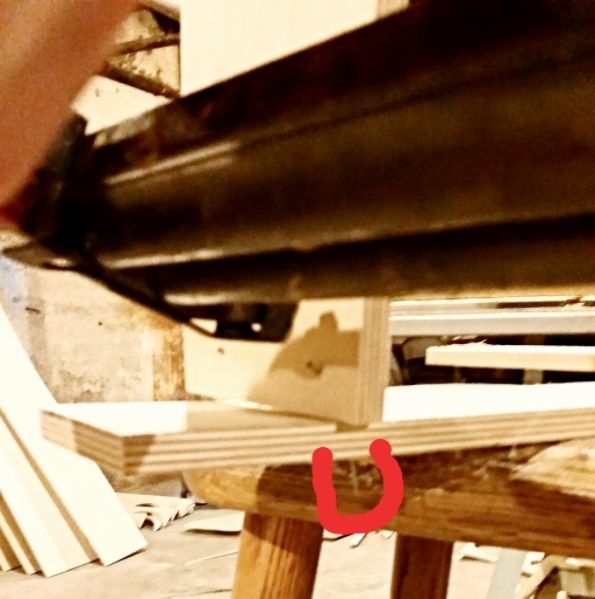
Here I'm holding the gun with the hose to the right and only using a slight 30 degree toe nail angle. BAM! the brad curves down every time and I never pop out the backside, ever!!!
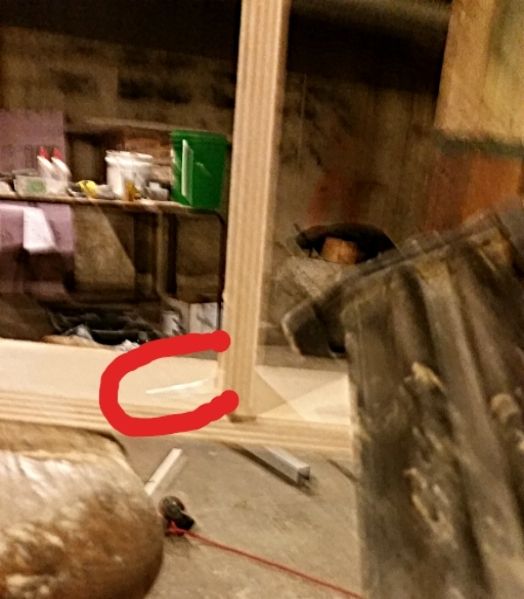
Here I'm holding the gun with the hose to the left, same angle. Every single brad I shoot will miss the joint and pop out the backside!
If you want the right/left reversed, pop out your brads from your gun and flip them around so the angle on the bottom edge of the brad faces the opposite direction.
Built:
17" width 10" driver Autotuba
2 x 29" width dual Lab12 Tuba60
6 x DR250 2510/asd1001
In progress:
2 x DR250 2510/asd1001
For best results, point the loud end of the array towards the audience
17" width 10" driver Autotuba
2 x 29" width dual Lab12 Tuba60
6 x DR250 2510/asd1001
In progress:
2 x DR250 2510/asd1001
For best results, point the loud end of the array towards the audience
-
CoronaOperator
- Posts: 1648
- Joined: Wed Mar 25, 2009 7:07 pm
- Location: Medicine Hat, Alberta, Canada
Re: 8 x DR250 build
First thing I did today was to clean up the driver spacers. When I installed the driver there were a couple spots where the screw tore out the top layer of plywood and could possibly compromise the driver seal. I used autobody putty, waited 20 minutes, then sanded them smooth. I won't have room for the sander after the next step so thought now was a good time to do that. Then I used a hot glue gun and went over anywhere on the driver spacer where PL squeeze out was missing to ensure an airtight seal.
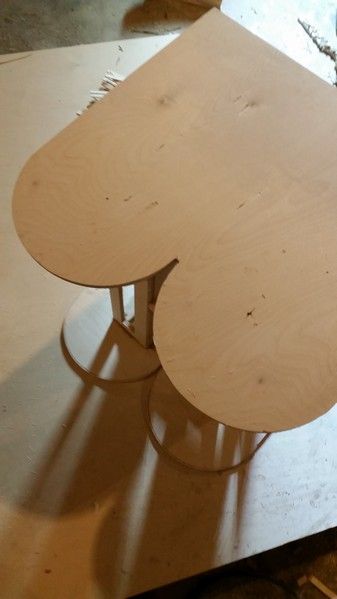
Then I cut out and installed all the horn sheath braces. They were way more work than I thought. Each one has to be individually fitted for length with angles on 3 sides. Then you have to cut out the half rounds for the driver to clear. Well, the plans gives the radius of the cutout and my Jasper jig is labelled for diameter. Apparently the 2 terms are not interchangeable . I know this, however it took me driving half way across town back to my house to view the sketchup model before I realized this. You should have seen me trying to tetris the driver through those small holes
  .
.
I made another little jig with scraps to do all the radius cuts, the hole in the center of the round scrap piece is where I first started my cutouts, lol:
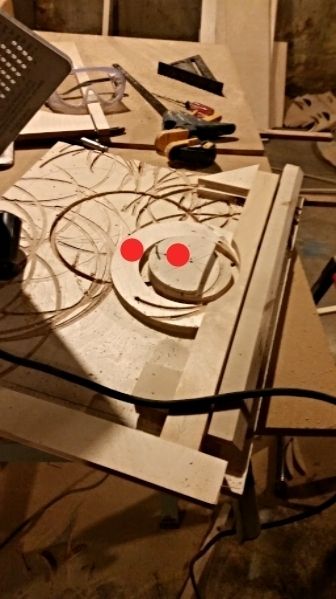
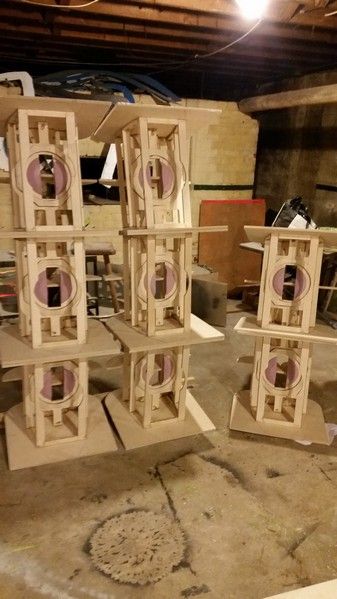
Here are all the boxes with the horn sheath braces installed:
That was a full day, slow going for now.
Then I cut out and installed all the horn sheath braces. They were way more work than I thought. Each one has to be individually fitted for length with angles on 3 sides. Then you have to cut out the half rounds for the driver to clear. Well, the plans gives the radius of the cutout and my Jasper jig is labelled for diameter. Apparently the 2 terms are not interchangeable
I made another little jig with scraps to do all the radius cuts, the hole in the center of the round scrap piece is where I first started my cutouts, lol:
Here are all the boxes with the horn sheath braces installed:
That was a full day, slow going for now.
Built:
17" width 10" driver Autotuba
2 x 29" width dual Lab12 Tuba60
6 x DR250 2510/asd1001
In progress:
2 x DR250 2510/asd1001
For best results, point the loud end of the array towards the audience
17" width 10" driver Autotuba
2 x 29" width dual Lab12 Tuba60
6 x DR250 2510/asd1001
In progress:
2 x DR250 2510/asd1001
For best results, point the loud end of the array towards the audience
-
heavybdrums

- Posts: 366
- Joined: Fri May 22, 2015 3:46 pm
- Contact:
Re: 8 x DR250 build
Such a nice large shop, mine is fine for my purposes, but I would be hard pressed to do 8 dr's at a time in mine. I will try 4 at a time.
4x WH8 delta pro
2x WH10 Deltalite 2510
4x Dr250 Deltalite II 2510
8X Titan 39 3012lf, 28"
4X Tuba 60 W/ lab 15
FB: https://www.facebook.com/sunsoundservices/ likes appreciated
2x WH10 Deltalite 2510
4x Dr250 Deltalite II 2510
8X Titan 39 3012lf, 28"
4X Tuba 60 W/ lab 15
FB: https://www.facebook.com/sunsoundservices/ likes appreciated
-
CoronaOperator
- Posts: 1648
- Joined: Wed Mar 25, 2009 7:07 pm
- Location: Medicine Hat, Alberta, Canada
Re: 8 x DR250 build
I have the entire basement of a hotel that opened in 1912. That is one of 3 "wings" in the basement. There is lots of room but the lighting isn't the greatest. There is an old stone coal fired bread oven and even 3 horse stables still down there among other cool relics. The entire building was still heated by a couple original boilers down there that I used to operate until we had to decommission 4 years back. It does have a few drawbacks: I only have one 15 amp circuit to work with and when I built my 2 dual T60's I had to carry them up the stairs, even unloaded that just about killed me and I had another guy helping me.heavybdrums wrote:Such a nice large shop, mine is fine for my purposes, but I would be hard pressed to do 8 dr's at a time in mine. I will try 4 at a time.
Built:
17" width 10" driver Autotuba
2 x 29" width dual Lab12 Tuba60
6 x DR250 2510/asd1001
In progress:
2 x DR250 2510/asd1001
For best results, point the loud end of the array towards the audience
17" width 10" driver Autotuba
2 x 29" width dual Lab12 Tuba60
6 x DR250 2510/asd1001
In progress:
2 x DR250 2510/asd1001
For best results, point the loud end of the array towards the audience
-
CoronaOperator
- Posts: 1648
- Joined: Wed Mar 25, 2009 7:07 pm
- Location: Medicine Hat, Alberta, Canada
Re: 8 x DR250 build
Next up was the sheath cleats. I used the same compass as used for laying out the markings to mark some scrap plywood. It took 3 of these sheets marked to make 33 strips:
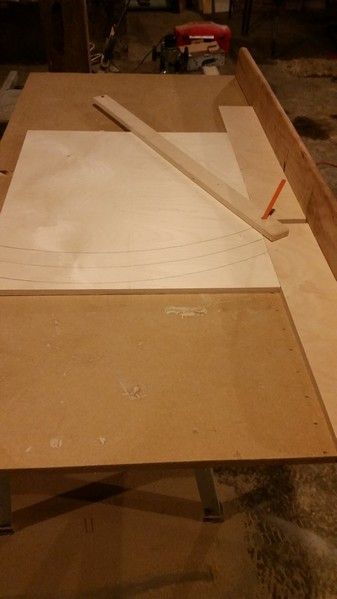
Then I used a jigsaw to cut out the rounds and a random orbit sander to smooth out the edges:
Then a speed square to individually mark the segments:
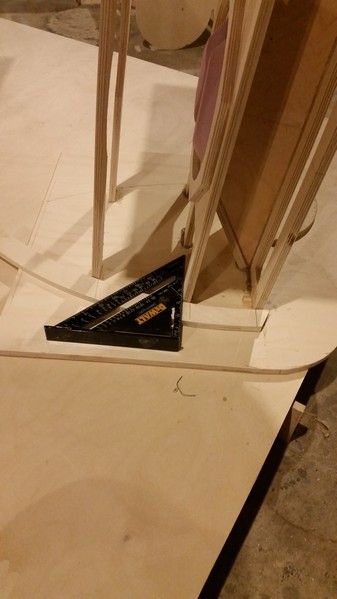
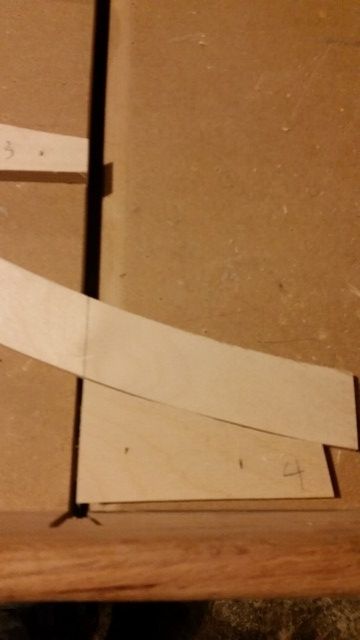
Then I nailed scrap pieces of the curves to my miter sled with the angles lined up to match the angles on the segments. I labeled the pieces cut 1, cut 2, cut 3, and cut 4. After they were nailed I ran the sled through the saw to cut off the ends of the scrap leaving the cut lines zero clearance with the blade:
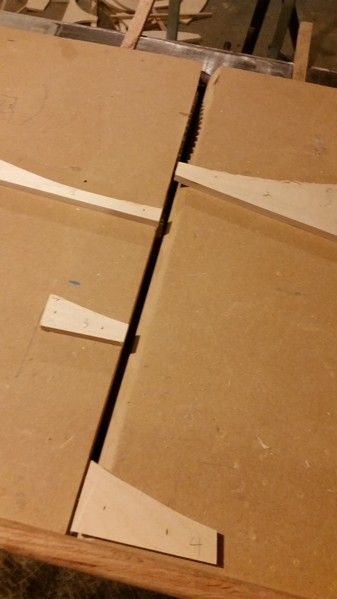
This way after I mark the segments I can quickly and safely cut them to size in one operation.
Cut 1:
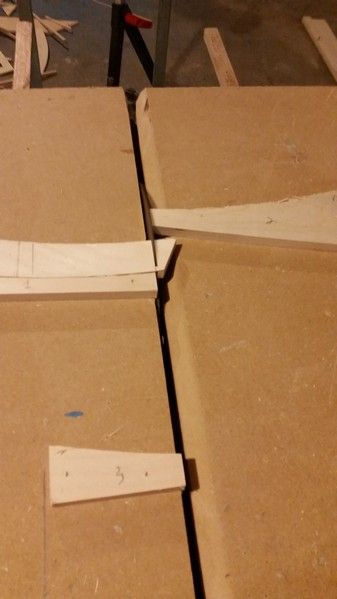
Cut 2:
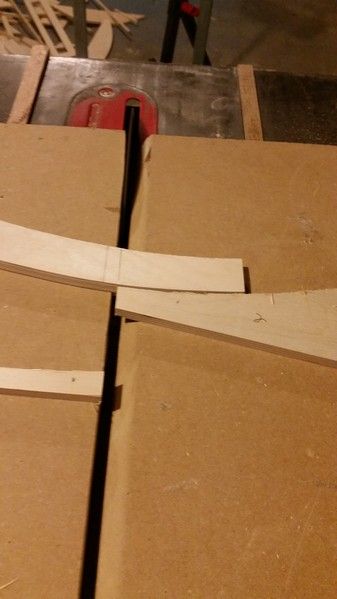
Cut 3:
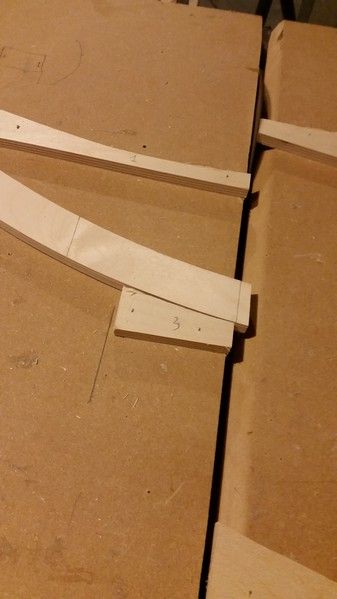
Cut 4:
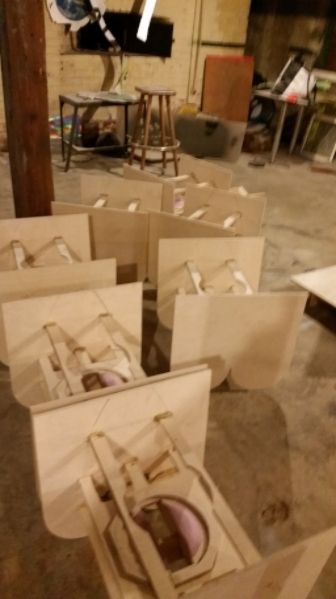
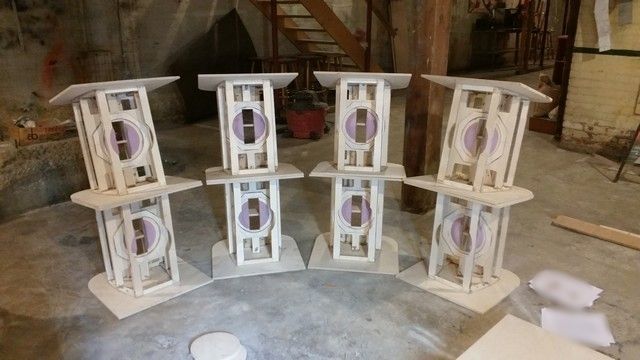
This worked for half of the cleats, to do the other mirror image side I had to re-do the scrap curves on the miter sled. That was 32 sets of cuts and gluing for the 8 cabs. Then I attached the front flanges and went over everything on the inside with PL. I used about 2 1/2 tubes on the 8 cabs to double make sure every joint was sealed.
Here is the cabs posing for a picture after that operation was completed:
Then I used a jigsaw to cut out the rounds and a random orbit sander to smooth out the edges:
Then a speed square to individually mark the segments:
Then I nailed scrap pieces of the curves to my miter sled with the angles lined up to match the angles on the segments. I labeled the pieces cut 1, cut 2, cut 3, and cut 4. After they were nailed I ran the sled through the saw to cut off the ends of the scrap leaving the cut lines zero clearance with the blade:
This way after I mark the segments I can quickly and safely cut them to size in one operation.
Cut 1:
Cut 2:
Cut 3:
Cut 4:
This worked for half of the cleats, to do the other mirror image side I had to re-do the scrap curves on the miter sled. That was 32 sets of cuts and gluing for the 8 cabs. Then I attached the front flanges and went over everything on the inside with PL. I used about 2 1/2 tubes on the 8 cabs to double make sure every joint was sealed.
Here is the cabs posing for a picture after that operation was completed:
Built:
17" width 10" driver Autotuba
2 x 29" width dual Lab12 Tuba60
6 x DR250 2510/asd1001
In progress:
2 x DR250 2510/asd1001
For best results, point the loud end of the array towards the audience
17" width 10" driver Autotuba
2 x 29" width dual Lab12 Tuba60
6 x DR250 2510/asd1001
In progress:
2 x DR250 2510/asd1001
For best results, point the loud end of the array towards the audience
-
CoronaOperator
- Posts: 1648
- Joined: Wed Mar 25, 2009 7:07 pm
- Location: Medicine Hat, Alberta, Canada
Re: 8 x DR250 build
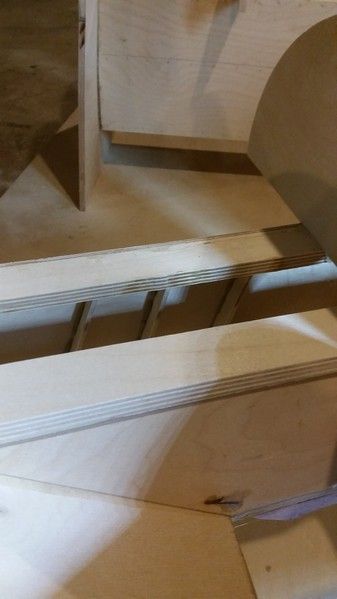
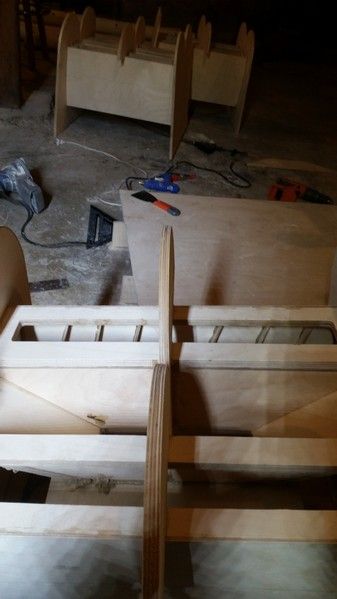
Next up was the back braces. I used a speed square to keep them square:
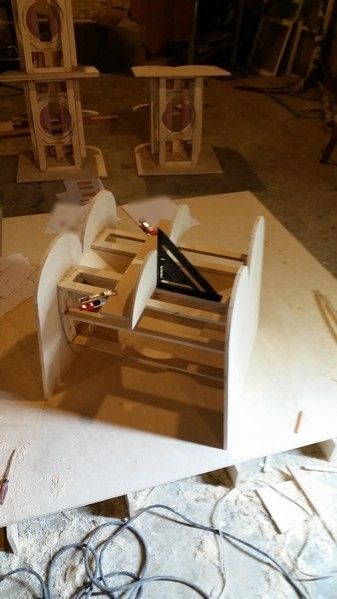
Then I ran into a problem. The back braces were bigger than the half rounds on my top and bottom pieces ! After some measuring I found out I cut ALL the top and bottom half rounds 1/8" too small!
I quickly came up with a plan to glue some wood back on the half rounds then re-route them. I cut 1/2" strips of 1/8" bendy ply. Boy is that fun to work with in 5' x 5' sheets on the table saw ! 

Then using hot melt I glued the strips onto all the half rounds. I used hot melt instead of PL as that would have taken me a week or more with PL.
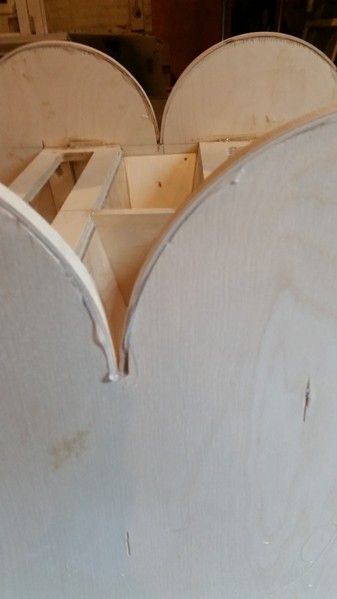
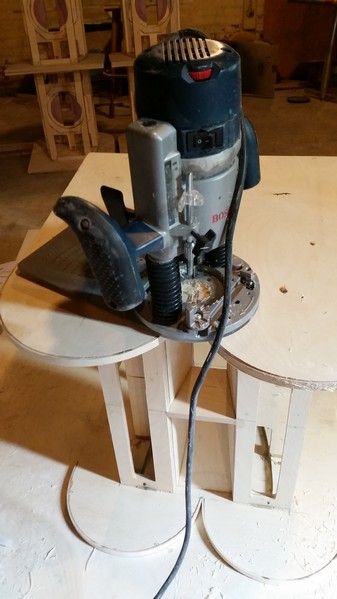
Then using the same holes as before for the guide (but the correct setting on the Jasper Jig) I re-routed all the half rounds:
That was pretty much a whole day just to fix that error, if I had to wait for PL to set up it would've been a week to get through all those boxes but we're back on track! Here are the cabs awaiting for me to attach the horn sheaths:
Until next week ...
Then I ran into a problem. The back braces were bigger than the half rounds on my top and bottom pieces
I quickly came up with a plan to glue some wood back on the half rounds then re-route them. I cut 1/2" strips of 1/8" bendy ply. Boy is that fun to work with in 5' x 5' sheets on the table saw
Then using hot melt I glued the strips onto all the half rounds. I used hot melt instead of PL as that would have taken me a week or more with PL.
Then using the same holes as before for the guide (but the correct setting on the Jasper Jig) I re-routed all the half rounds:
That was pretty much a whole day just to fix that error, if I had to wait for PL to set up it would've been a week to get through all those boxes but we're back on track! Here are the cabs awaiting for me to attach the horn sheaths:
Until next week ...
Built:
17" width 10" driver Autotuba
2 x 29" width dual Lab12 Tuba60
6 x DR250 2510/asd1001
In progress:
2 x DR250 2510/asd1001
For best results, point the loud end of the array towards the audience
17" width 10" driver Autotuba
2 x 29" width dual Lab12 Tuba60
6 x DR250 2510/asd1001
In progress:
2 x DR250 2510/asd1001
For best results, point the loud end of the array towards the audience

Re: 8 x DR250 build
Oh man this is looking awesome!!
2 - OTop8
2 - T39
8 - DR200
2 - DR250
9 - T24
6 - T45
1 - Auto Tuba
2 - T39
8 - DR200
2 - DR250
9 - T24
6 - T45
1 - Auto Tuba
-
heavybdrums
- Posts: 366
- Joined: Fri May 22, 2015 3:46 pm
- Contact:
Re: 8 x DR250 build
yes, very awesome build, and a nice save, though it probably didn't feel like it when it took a day to correct. May I assume the mistake was choosing the wrong hole on the circle jig?
4x WH8 delta pro
2x WH10 Deltalite 2510
4x Dr250 Deltalite II 2510
8X Titan 39 3012lf, 28"
4X Tuba 60 W/ lab 15
FB: https://www.facebook.com/sunsoundservices/ likes appreciated
2x WH10 Deltalite 2510
4x Dr250 Deltalite II 2510
8X Titan 39 3012lf, 28"
4X Tuba 60 W/ lab 15
FB: https://www.facebook.com/sunsoundservices/ likes appreciated
-
CoronaOperator
- Posts: 1648
- Joined: Wed Mar 25, 2009 7:07 pm
- Location: Medicine Hat, Alberta, Canada
Re: 8 x DR250 build
It wasn't too bad because it was rather brainless to do and didn't require any figuring out. I rather enjoyed the lazy day in the shop after a bunch of head scratching days, lol.heavybdrums wrote:yes, very awesome build, and a nice save, though it probably didn't feel like it when it took a day to correct.
Yes, but I choose the wrong hole on purposeheavybdrums wrote: May I assume the mistake was choosing the wrong hole on the circle jig?
Built:
17" width 10" driver Autotuba
2 x 29" width dual Lab12 Tuba60
6 x DR250 2510/asd1001
In progress:
2 x DR250 2510/asd1001
For best results, point the loud end of the array towards the audience
17" width 10" driver Autotuba
2 x 29" width dual Lab12 Tuba60
6 x DR250 2510/asd1001
In progress:
2 x DR250 2510/asd1001
For best results, point the loud end of the array towards the audience
Re: 8 x DR250 build
Actually, you didn't have to redo the jigs to make the second set, as they are mirror images. Just cut them like the first set, and flip them over! And you've turned left into right.CoronaOperator wrote:Next up was the sheath cleats. I used the same compass as used for laying out the markings to mark some scrap plywood. It took 3 of these sheets marked to make 33 strips:
This worked for half of the cleats, to do the other mirror image side I had to re-do the scrap curves on the miter sled. That was 32 sets of cuts and gluing for the 8 cabs. Then I attached the front flanges and went over everything on the inside with PL. I used about 2 1/2 tubes on the 8 cabs to double make sure every joint was sealed.
Built:
1 Omni-15 Tall Boy
2 DR250s
2 Titan 39s
1 Omni-15 Tall Boy
2 DR250s
2 Titan 39s
-
CoronaOperator
- Posts: 1648
- Joined: Wed Mar 25, 2009 7:07 pm
- Location: Medicine Hat, Alberta, Canada
Re: 8 x DR250 build
I marked each piece separately according to the cab it was fitted to. If I flipped the piece over to cut it on my first jig, my marking lines would have been on the bottom. It took less time to redo the jigs than to transfer the lines from the bottom to the top on 16 sets (48 pieces total, 64 cut lines) of cuts.billkatz wrote:
Actually, you didn't have to redo the jigs to make the second set, as they are mirror images. Just cut them like the first set, and flip them over! And you've turned left into right.
Built:
17" width 10" driver Autotuba
2 x 29" width dual Lab12 Tuba60
6 x DR250 2510/asd1001
In progress:
2 x DR250 2510/asd1001
For best results, point the loud end of the array towards the audience
17" width 10" driver Autotuba
2 x 29" width dual Lab12 Tuba60
6 x DR250 2510/asd1001
In progress:
2 x DR250 2510/asd1001
For best results, point the loud end of the array towards the audience
-
CoronaOperator
- Posts: 1648
- Joined: Wed Mar 25, 2009 7:07 pm
- Location: Medicine Hat, Alberta, Canada
Re: 8 x DR250 build
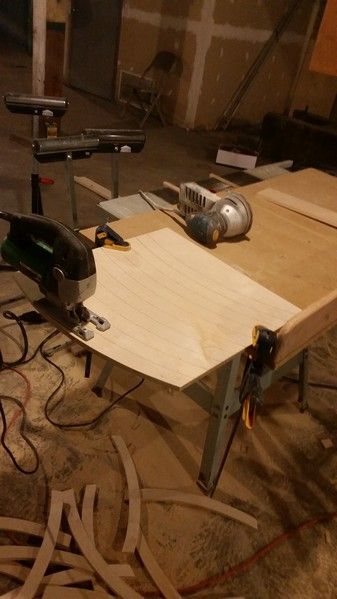
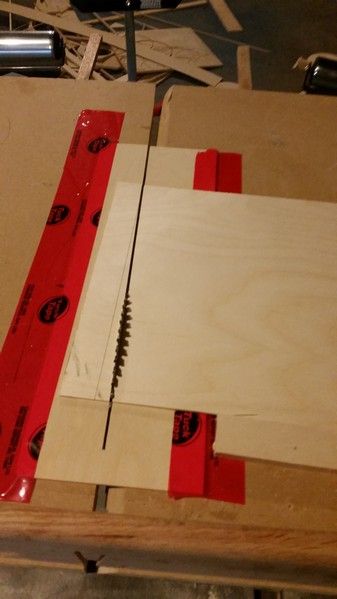
Next up was to tackle the horn sheaths. That 1/8" ply is pretty thin so I used a scrap piece taped to the miter sled to make a zero clearance under layer to prevent chipping:
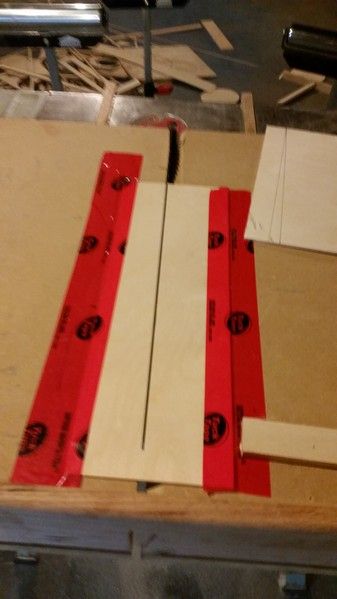
I nailed down some scrap pieces to make another jig for the cut:
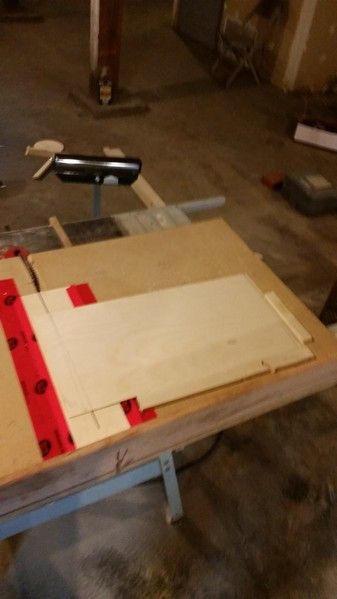
Then cut them out:
I used lots of PL and lots of staples to attach the sheaths:
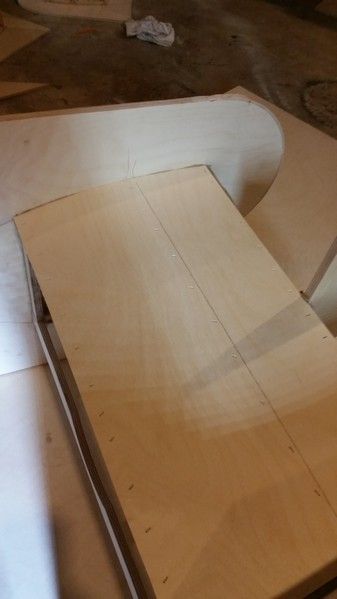
Then used an oscillating saw to trim the sheaths. This tool worked really good for that job. I'm not sure how I would have tackled it without it. I'm new to using it and really like it .
.
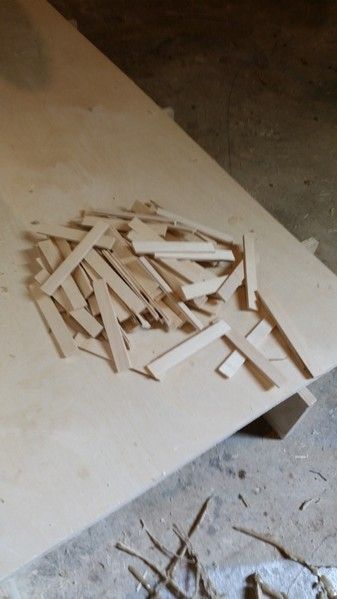
The horn sheaths seemed really flimsy to me with only a gentle radius on that curve and being 1/8". I'll try and post a video in the next few days of the flex. I checked some old plans before the modules and they used to be 1/4" thick. I decided to stiffen them up, at least the back parts for now because I won't be able to reach them later. I cut out about 100 strips of 1/2" x 1/8" ply:
Then I PL'd 6 strips inside the cavity pretty much evenly spaced with a space in the middle because the middle brace will support that:
After that set up overnight I filled a syringe with PL and went back in that space with the syringe and touched up any spots where the PL was missing, the ends usually needed the most touching up to attach them to the baffles. That made a HUGE difference in the panel. Before I could push it in quite a bit with my thumb and now I can't and get a really solid thump when I knock on it. I plan on doing the larger side of the sheath the same way.
I nailed down some scrap pieces to make another jig for the cut:
Then cut them out:
I used lots of PL and lots of staples to attach the sheaths:
Then used an oscillating saw to trim the sheaths. This tool worked really good for that job. I'm not sure how I would have tackled it without it. I'm new to using it and really like it
The horn sheaths seemed really flimsy to me with only a gentle radius on that curve and being 1/8". I'll try and post a video in the next few days of the flex. I checked some old plans before the modules and they used to be 1/4" thick. I decided to stiffen them up, at least the back parts for now because I won't be able to reach them later. I cut out about 100 strips of 1/2" x 1/8" ply:
Then I PL'd 6 strips inside the cavity pretty much evenly spaced with a space in the middle because the middle brace will support that:
After that set up overnight I filled a syringe with PL and went back in that space with the syringe and touched up any spots where the PL was missing, the ends usually needed the most touching up to attach them to the baffles. That made a HUGE difference in the panel. Before I could push it in quite a bit with my thumb and now I can't and get a really solid thump when I knock on it. I plan on doing the larger side of the sheath the same way.
Built:
17" width 10" driver Autotuba
2 x 29" width dual Lab12 Tuba60
6 x DR250 2510/asd1001
In progress:
2 x DR250 2510/asd1001
For best results, point the loud end of the array towards the audience
17" width 10" driver Autotuba
2 x 29" width dual Lab12 Tuba60
6 x DR250 2510/asd1001
In progress:
2 x DR250 2510/asd1001
For best results, point the loud end of the array towards the audience
-
CoronaOperator
- Posts: 1648
- Joined: Wed Mar 25, 2009 7:07 pm
- Location: Medicine Hat, Alberta, Canada
Re: 8 x DR250 build
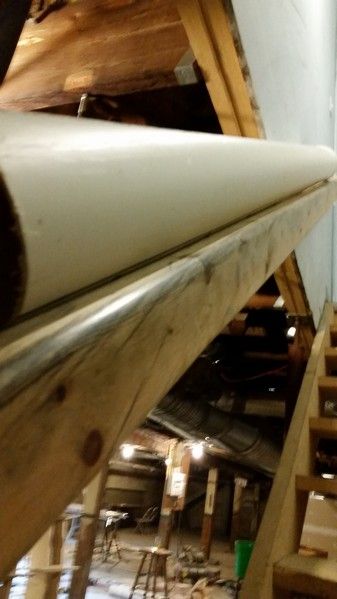
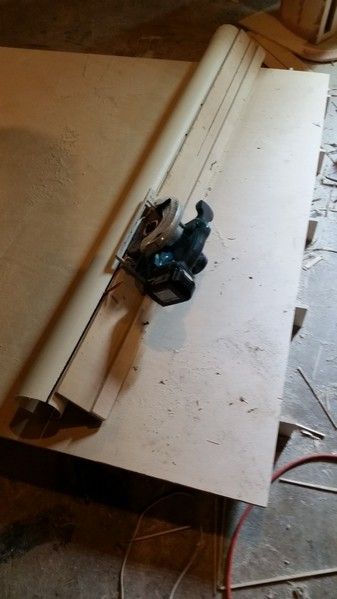
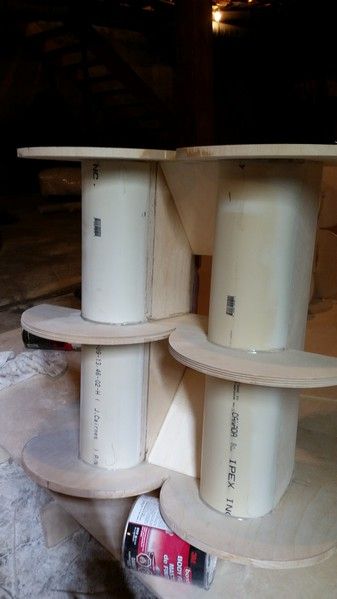
Next up was to cut out the pvc pipe. I put it against a handrail so I could draw a straight line with a marker the length of it:
Then I brad nailed my cutoff sled to the pipe and made the first cut:
My pipe wasn't exactly the right diameter, it was about 3/8 inch too small. Here was my solution for that:
I calculated the circumference of the correct diameter pipe and divided that in 2 to get the half round length. Then I cut a piece of paper that length and used that to mark my pipe from the first cut to where it should be cut. Then I brad nailed my sled on that line and made the second cut. Now my half pipe was cut a little bit more than half round but just enough that if I straighten it out to half round, everything should line up.
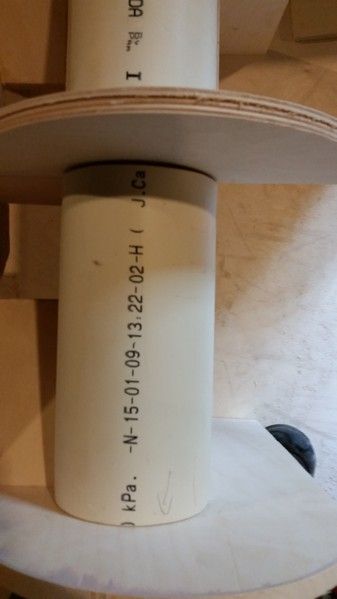
Here it is in place; cut but not straightened yet. You can see that it is too small:
So a little bit of heat to help it bend:
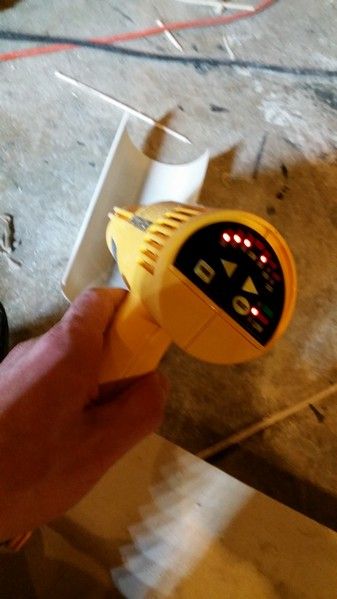
I didn't know this but it didn't just get easier to bend on me. While applying heat it went from stiff to limp as a wet paper towel as soon as the temp got hot enough. I figured I needed a mold of the correct diameter to lay it on for it to cool. I searched the entire club looking for just the right size (and heat resistant too) mold. I checked all the liquor bottles, peanut tins, coffee cans, anything that was round, no luck. Then I came across some old quart size paint cans and they were perfect.
My mold:
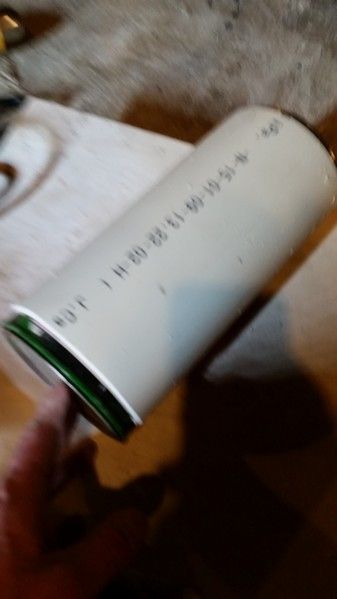
Test fitting:
Pretty much dead on .
.
I was running out of time and molding the pipe is time consuming so I only did one cabinet today:
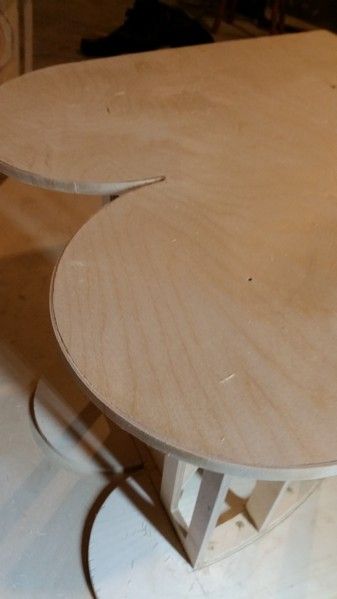
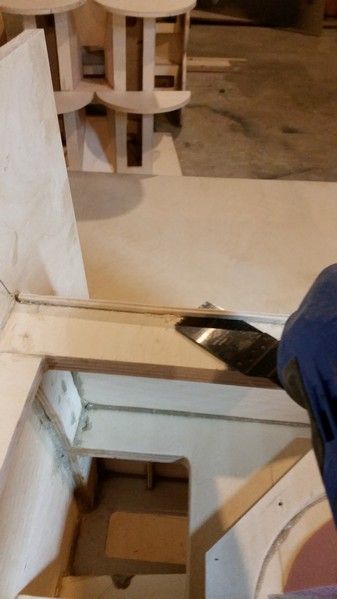
Then cut out all the port holes:
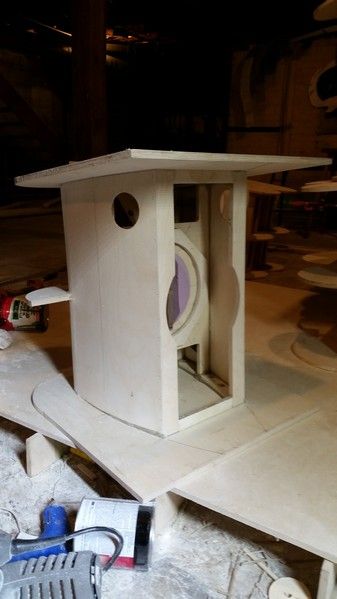
I have a question, how smooth does this transition need to be?
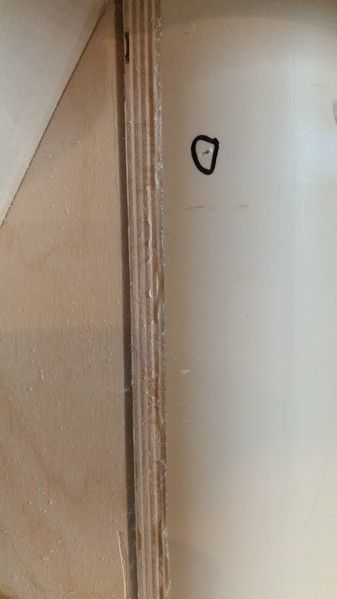

Is this acceptable? Or do I need to really smooth that part?
Then I brad nailed my cutoff sled to the pipe and made the first cut:
My pipe wasn't exactly the right diameter, it was about 3/8 inch too small. Here was my solution for that:
I calculated the circumference of the correct diameter pipe and divided that in 2 to get the half round length. Then I cut a piece of paper that length and used that to mark my pipe from the first cut to where it should be cut. Then I brad nailed my sled on that line and made the second cut. Now my half pipe was cut a little bit more than half round but just enough that if I straighten it out to half round, everything should line up.
Here it is in place; cut but not straightened yet. You can see that it is too small:
So a little bit of heat to help it bend:
I didn't know this but it didn't just get easier to bend on me. While applying heat it went from stiff to limp as a wet paper towel as soon as the temp got hot enough. I figured I needed a mold of the correct diameter to lay it on for it to cool. I searched the entire club looking for just the right size (and heat resistant too) mold. I checked all the liquor bottles, peanut tins, coffee cans, anything that was round, no luck. Then I came across some old quart size paint cans and they were perfect.
My mold:
Test fitting:
Pretty much dead on
I was running out of time and molding the pipe is time consuming so I only did one cabinet today:
Then cut out all the port holes:
I have a question, how smooth does this transition need to be?
Is this acceptable? Or do I need to really smooth that part?
Built:
17" width 10" driver Autotuba
2 x 29" width dual Lab12 Tuba60
6 x DR250 2510/asd1001
In progress:
2 x DR250 2510/asd1001
For best results, point the loud end of the array towards the audience
17" width 10" driver Autotuba
2 x 29" width dual Lab12 Tuba60
6 x DR250 2510/asd1001
In progress:
2 x DR250 2510/asd1001
For best results, point the loud end of the array towards the audience
-
LelandCrooks

- Posts: 7244
- Joined: Thu May 04, 2006 9:36 am
- Location: Midwest/Kansas/Speaker Nirvana
- Contact:
Re: 8 x DR250 build
Scrape the excess glue, sand it a bit, and you're good to go. I make them pretty just because I'm doing for somebody else who's paying me.
If it's too loud, you're even older than me! Like me.
http://www.speakerhardware.com
http://www.speakerhardware.com