OTop12 Build Thread

Post your build odyssey here.
Post Reply
Message
Author
miked
Posts: 1209
Joined: Fri Oct 23, 2009 4:18 am
Location: San Antonio, TX

OTop12 Build Thread

#1 Post by miked »

I've finally begun my OTop12 build. This will be a pretty slow build as I'm in no rush to get them done; mostly b/c my spare time is very limited. Being that I bought the plans more than a year ago, I've almost got them memorized at this point. The only potential landmine that I see is tophat placement (I started another thread about that in the Omni forum). But I'll work around that if it becomes an issue.

I'm going with Delta Pro's b/c I got a pretty good deal on them. The extra 9 pounds per driver will add up when I'm stacking them two-high, but it is what it is; they're present and paid for. I'm building four; two with the melded array and two with the 6-element array. 1/2", 9-ply BB will be purchased this weekend. I plan to at least rough-cut the panels (no angles) this weekend too. I hope to at least get them all rough cut out and labeled as to where they go. We'll see if we get any assembly done.

As of this moment I have all the little parts, everything except the wood, crossovers and Duratex and grills; Leland will be hearing from me soon. It's amazing how many "parts" go into a speaker. Screws for this, jacks for that, corner protectors, feet....it really adds up! :broke:

For now, some pics.

It's The Tweeter Army! I need 36, so I bought 40 to allow for (hopefully none) dead tweets and (hopefully none) screwups on my part when it comes time to cut and glue. I'll be building the jigs as to try to eliminate problem areas.
Image

Here are the four Delta Pro's undergoing break-in. Per the plans they are getting 8-10v each, running at 30Hz off a tone gen proggy. I'm running two per side on a Crown XLS1500.
Image

Oooooh, speakers! The bluriness is them vibrating, not camera shake.
Image

DVM showing voltage.
Image

Amp. This is one of my electric bass rigs. The Studio Channel pre above makes a pretty decent bass pre (FYI, IMO).
Image

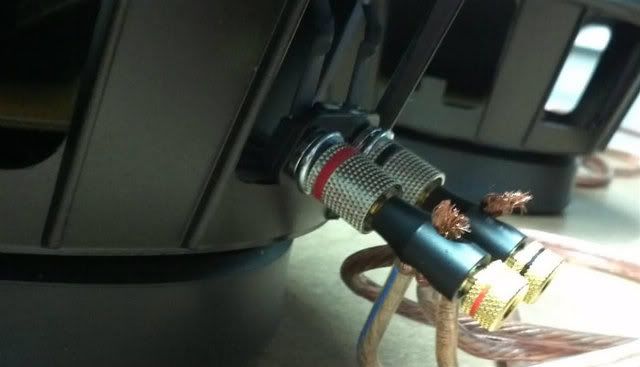
How the speakers are wired in parallel. Amp channel to speaker 1, leads running from speaker 1 to speaker 2.
Image

And finally, a screenshot of NCH Tone Generator. Works very well, extremely small footprint (300KB or so).
Image

More pics to follow this weekend. I've been looking foward to this build for a very long time. :hyper:
Last edited by miked on Wed Jan 16, 2013 8:48 am, edited 1 time in total.

User avatar
Charles Jenkinson
Posts: 1125
Joined: Sat Aug 06, 2011 3:25 pm
Location: Manchester, UK

Re: OTop12 Build Thread

#2 Post by Charles Jenkinson »

Anticipation, contemplation, and detail - all the makings of a great build. I will enjoy this. :-)
2xJ12L (3012HO) switchable/melded
2xT30

Words&graphics - Audio&Acoustics - Hardware&DSP; 3 different paradigms.

miked
Posts: 1209
Joined: Fri Oct 23, 2009 4:18 am
Location: San Antonio, TX

Re: OTop12 Build Thread

#3 Post by miked »

Charles Jenkinson wrote:Anticipation, contemplation, and detail - all the makings of a great build. I will enjoy this. :-)
I also really enjoy detailed build threads. I learn more from seeing how people actually build these things than from reading the plans. As a side note, if my baffles look half as good as the one in your avatar picture, I'll be set! Did you cut those w/a jigsaw? I've seen pics of people using a router with a straight bit, but I dont' see how you could freehand that with a router.

Being that it's taken me more than a year to get started, there's been plenty of "anticipation and contemplation" that's for sure. :horse:

User avatar
Charles Jenkinson
Posts: 1125
Joined: Sat Aug 06, 2011 3:25 pm
Location: Manchester, UK

Re: OTop12 Build Thread

#4 Post by Charles Jenkinson »

miked wrote:Did you cut those w/a jigsaw? I've seen pics of people using a router with a straight bit, but I dont' see how you could freehand that with a router.
Yes, I did. There are more revealing pics in my build thread: http://billfitzmaurice.info/forum/viewt ... 3&start=15

I was happy with the free-handed curves and the straights, but the corner drilling was poor. People don't freehand with router - they set straight edge jig-boards up and use radius jigs, and stop and start cutting at (exactly) the right place. I wasn't up for that. The best way I've seen is to get a laser cut acrylic sheet piece made and then trace round it with a router tracing bit. Genius.

Keep it going. Bravo!

P.S. My build has been 'ongoing' for a year too. I was just doing other stuff. Now it's winter, that other stuff goes on hold. I'm aiming for my 40th in October. The driving motivation is to have a jaw dropping good P.A. for my birthday do. I've got tired of mediocre boxes on sticks, and thought it's time to do this right, ...and I haven't even heard a BF PA live.
2xJ12L (3012HO) switchable/melded
2xT30

Words&graphics - Audio&Acoustics - Hardware&DSP; 3 different paradigms.

miked
Posts: 1209
Joined: Fri Oct 23, 2009 4:18 am
Location: San Antonio, TX

Re: OTop12 Build Thread

#5 Post by miked »

Thank you for the details, Charles. I'm mulling over making a template and then using a bearing/pattern bit in the router. But I'm only making four OTops; not sure if a template is worth the hassle. In all probability I'll use the jigsaw and do them one at a time. If I had a scroll saw I might stack the boards two at a time, but I won't chance it with the jigsaw. Wood is too expensive. I have a small drill press, so I can be fairly accurate with corner drilling. I'm going to be very careful with this build and the jigsaw. I'm really no pro with a router anyway. I can roundover corners with the best of them and I can...uh...that's really all I can do with a router without ruining the workpiece. :( Oh, and cut circles with my Jasper jig. Big whoop-de-do there. LOL!

And it is indeed very nice to have your own PA at home. I have my little PA from my band days (I play bass) and it sure beats the crap out of a boombox for backyard parties. I usually wind up with some guy at my door that looks like this. :arrow: :cop: But there is nothing like crystal-clear, well-defined music at 90+ decibels.

88h88
Posts: 1603
Joined: Mon Jul 04, 2011 10:20 am
Location: Coventry, UK

Re: OTop12 Build Thread

#6 Post by 88h88 »

Charles Jenkinson wrote:Yes, I did. There are more revealing pics in my build thread: http://billfitzmaurice.info/forum/viewt ... 3&start=15

I was happy with the free-handed curves and the straights, but the corner drilling was poor. People don't freehand with router - they set straight edge jig-boards up and use radius jigs, and stop and start cutting at (exactly) the right place. I wasn't up for that. The best way I've seen is to get a laser cut acrylic sheet piece made and then trace round it with a router tracing bit. Genius.

Keep it going. Bravo!

P.S. My build has been 'ongoing' for a year too. I was just doing other stuff. Now it's winter, that other stuff goes on hold. I'm aiming for my 40th in October. The driving motivation is to have a jaw dropping good P.A. for my birthday do. I've got tired of mediocre boxes on sticks, and thought it's time to do this right, ...and I haven't even heard a BF PA live.
October? Hmm, I should have a raft of BFM kit built by then if you really want to go overboard on the speaker setup. :chainsaw:
4xOT12s, 2xT39s@22", TTLS@18", 2xT60@18"

User avatar
shawn_g
Posts: 385
Joined: Sat Jan 14, 2012 9:00 pm
Location: Logan, OH

Re: OTop12 Build Thread

#7 Post by shawn_g »

miked wrote:Thank you for the details, Charles. I'm mulling over making a template and then using a bearing/pattern bit in the router. But I'm only making four OTops; not sure if a template is worth the hassle. In all probability I'll use the jigsaw and do them one at a time. If I had a scroll saw I might stack the boards two at a time, but I won't chance it with the jigsaw. Wood is too expensive. I have a small drill press, so I can be fairly accurate with corner drilling. I'm going to be very careful with this build and the jigsaw. I'm really no pro with a router anyway. I can roundover corners with the best of them and I can...uh...that's really all I can do with a router without ruining the workpiece. :( Oh, and cut circles with my Jasper jig. Big whoop-de-do there. LOL!
...
The first baffle takes forever. I did rough cuts on mine with a jig saw, then used a router table with a makeshift fence and straight bit to make the edges clean and straight.

Once you get that first one done, you can bust out the other three with a flush trim bit like you mentioned. A router table (mine is home-made using a tabletop with a hole cut in it and the router mounted on the underside) helped me tremendously on my OmniTop builds. You really just have to make one of each part perfect, then duplicate each one with the flush trim bit.

Image

miked
Posts: 1209
Joined: Fri Oct 23, 2009 4:18 am
Location: San Antonio, TX

Re: Some progress

#8 Post by miked »

I've got the major parts cut to size. I still need to cut: driver spacer, phase plugs, horn braces and the thin slats for mouting the tweet arrays and the back panel. I have a circle jig for my router, so the rings and plugs should go quickly enough.

The good news is that b/c I'm lucky enough to have a table saw, all the parts I've cut so far are perfectly-sized to within about 1/32" or so of each other.. The bad news is that I spent about 4 hours just on the baffles and I'm not real happy with them. IMO they look like crap. I honestly didn't think they'd come out this lousy. Cutting them out with a jigsaw is an exercise in frustration. I didn't realize that the top layer of the BB would delaminate/chip out as I cut across the grain with the jigsaw. It's difficult to cut along the line when the line disappears. :wall: I have guide boards but didn't use them on the baffles. After drilling holes in the corners to start the cut with the jigsaw, the 1/4" holes I drilled didn't necessarily line up with the line I'd have to clamp along, so I didn't use the guide board. Hope that made sense.

I have an oscillating spindle sander and that helped to clean them up, but they are FAR from looking like Shawn's do. /shakes fist at Shawn

Since time is not of the essence here, I may redo the baffles IF the community thinks that their crappyness will negatively affect the sound/tuning that much. They're all pretty much uniform in their crappiness. I'm thinking (maybe rationalizing?) that once the phase plugs are installed they'll be OK. The 4 "windows" in each baffle might not be bone-straight, but they are all approximately the same size, area-wise. LMK what you think on that.

Anyway, some pics.

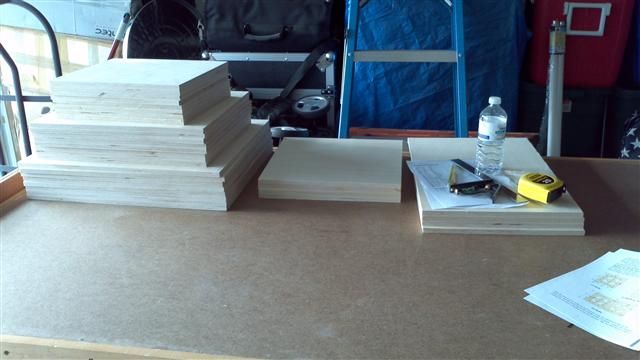
Pile of cut wood.
Image

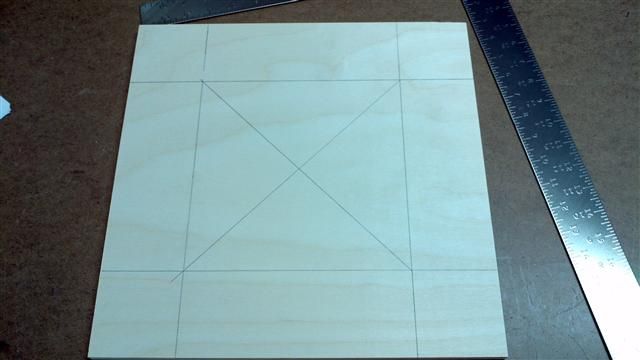
Marking the baffles. Got my 8-inch square and center point marked. (I laid these out great...failed at the cutting out part.)
Image

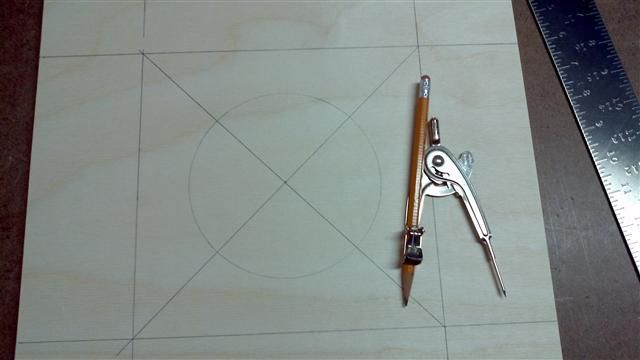
Circle drawn.
Image

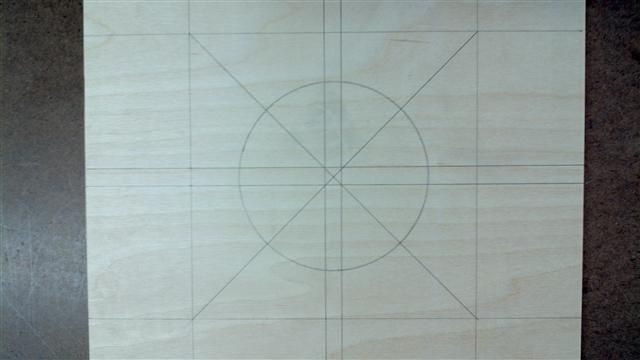
All lines marked.
Image

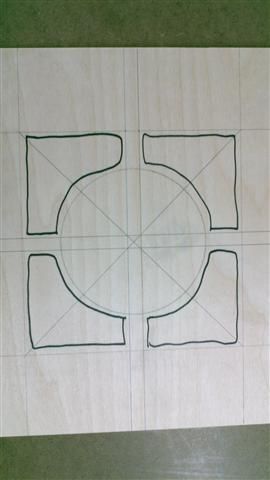
Colored in with marker to help me understand where to cut and where not to...didn't really help the end product. :(
Image

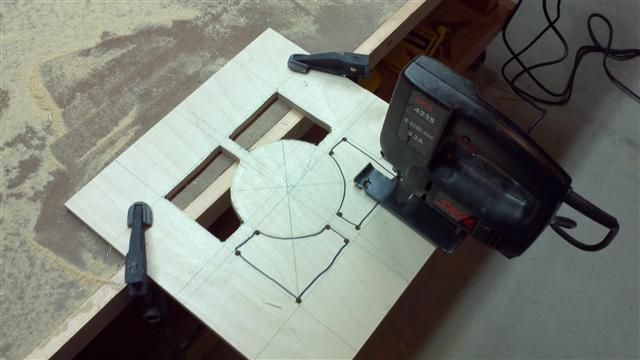
Cutting it out. I cut to within 1/16" - 1/8" of the line then finished the rest on the spindle sander.
Image

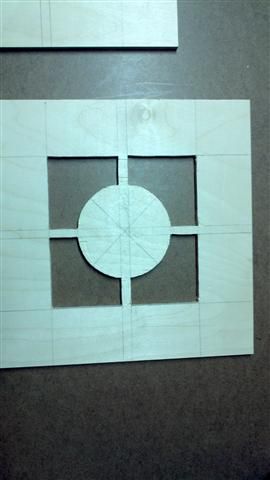
A baffle.
Image

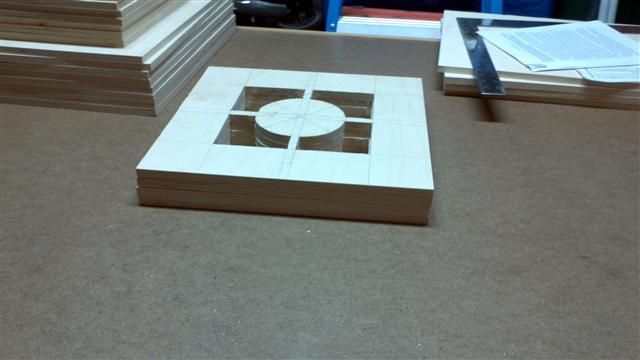
Pile of baffles...4 hours of work with not a happy ending. Please note that the stack isn't "all squared up on itself", but the cutouts on all 4 baffles are not identical. I wanted perfection; did I at least get "good enough?" I'll cut them over again if I have to.
Image

I hope to get the rest of pieces cut tomorrow and may or may not start assembly, depending on if I can/SHOULD use my baffles or not. Thanks for looking.

ncgrove
Posts: 457
Joined: Wed Jul 06, 2011 7:38 pm
Location: Colorado Springs, CO

Re: OTop12 Build Thread

#9 Post by ncgrove »

The baffles look good enough to me.

User avatar
LelandCrooks
Posts: 7244
Joined: Thu May 04, 2006 9:36 am
Location: Midwest/Kansas/Speaker Nirvana
Contact:

Re: OTop12 Build Thread

#10 Post by LelandCrooks »

ncgrove wrote:The baffles look good enough to me.
+1
The only way to get them perfect by hand repeatably is with a router and template. And you'll spend a day making the template perfect.
If it's too loud, you're even older than me! Like me.
http://www.speakerhardware.com

User avatar
DJPhatman
Posts: 5412
Joined: Mon Aug 14, 2006 5:08 am
Location: Warren, MI
Contact:

Re: OTop12 Build Thread

#11 Post by DJPhatman »

LelandCrooks wrote:
ncgrove wrote:The baffles look good enough to me.
+1
The only way to get them perfect by hand repeatably is with a router and template. And you'll spend a day making the template perfect.
Or, buy one of Leland's, and use it as a template! :noob: :loler: :slap:
I know money often seals the deal, but seriously, quality is an investment, not an expense... Grant Bunter
Accept the fact that airtight and well-braced are more important than pretty on the inside. Bill Fitzmaurice

User avatar
Tom Smit
Posts: 7463
Joined: Sat Jan 05, 2008 1:24 pm
Location: Sarnia, Ont. Canada

Re: OTop12 Build Thread

#12 Post by Tom Smit »

Nope. Do it again! :chainsaw:

Just kidding. They look fine. :D
TomS

miked
Posts: 1209
Joined: Fri Oct 23, 2009 4:18 am
Location: San Antonio, TX

Re: OTop12 Build Thread

#13 Post by miked »

THANK YOU, everyone! :clap: I am so glad I don't have to redo them. I'd say "You have no idea how glad I am" but I know you do b/c you've been through this already. I am a bit of a perfectionist, but truth be told, I took my time on them, used all of my meager skills and they still turned out this way. :bash:

Seeing how much time I spent yesterday on the baffles, there is no doubt in my mind that it would take a full day to get one perfect one for use as a template. I don't own a router table and trying to freehand with a template/pattern bit on top of my workbench would just result in disaster. By the time you clamp the pieces together/down to the table you've got no room to sit your router on top. I'll do a bit of hand sanding on them today...try and even out the spokes that hold the center disk. My spokes are sort of wiggly in some places.

Now, onto the smaller parts. Cutting the horn braces will be interesting. Not real sure how best to do that.

iamlowsound
Posts: 158
Joined: Mon Feb 04, 2013 10:46 pm
Location: Listowel Ontario

Re: OTop12 Build Thread

#14 Post by iamlowsound »

If you score (ie cut) the line before you try cutting with the jig saw, or any saw for that matter, you will greatly reduce the chip out. You don't have to cut deep either.

lowsound

Bruce Weldy
Posts: 8317
Joined: Fri Nov 27, 2009 11:37 am
Location: New Braunfels, TX

Re: OTop12 Build Thread

#15 Post by Bruce Weldy »

iamlowsound wrote:If you score (ie cut) the line before you try cutting with the jig saw, or any saw for that matter, you will greatly reduce the chip out. You don't have to cut deep either.

lowsound
That works as does just putting down masking tape first then drawing the design. Cut right through the tape. Also, there really is a difference in jigsaws - cheap ones don't cut worth a crap. I finally got a Bosch and it cuts like butter. The other thing you can do it use a fine tooth blade and go slow.

6 - T39 3012LF
4 - OT12 2512
1 - T24
1 - SLA Pro
2 - XF210


"A system with a few knobs set up by someone who knows what they are doing is always better than one with a lot of knobs set up by someone who doesn't."

Post Reply